Windows Azure and Cloud Computing Posts for 8/22/2011+
| A compendium of Windows Azure, SQL Azure Database, AppFabric, Windows Azure Platform Appliance and other cloud-computing articles. |

Note: This post is updated daily or more frequently, depending on the availability of new articles in the following sections:
- Azure Blob, Drive, Table and Queue Services
- SQL Azure Database and Reporting
- Marketplace DataMarket and OData
- Windows Azure AppFabric: Apps, Access Control, WIF and Service Bus
- Windows Azure VM Role, Virtual Network, Connect, RDP and CDN
- Live Windows Azure Apps, APIs, Tools and Test Harnesses
- Visual Studio LightSwitch and Entity Framework v4+
- Windows Azure Infrastructure and DevOps
- Windows Azure Platform Appliance (WAPA), Hyper-V and Private/Hybrid Clouds
- Cloud Security and Governance
- Cloud Computing Events
- Other Cloud Computing Platforms and Services
Azure Blob, Drive, Table and Queue Services
Jim O’Neil (@jimoneil) continued his Photo Mosaics series with Photo Mosaics Part 5: Queues on 8/22/2011:
Our look at the internals of my Azure Photo Mosaics program continues with this coverage of the use of Windows Azure Queues in the application. Windows Azure Queues are designed to facilitate inter-role communication within your Windows Azure applications, allowing you to decouple processing and thereby scale portions of the application independently. The Photo Mosaics program makes use the four Windows Azure queues highlighted in the architecture diagram below:

As you can see, each of the queues is positioned between two of the web or worker roles that handle the processing within the application.
- The imagerequest queue is where the ClientInterface Web Role (specifically the Job Broker service) places a message to initiate a new request on behalf of the client.
- The slicerequest queue is where the JobController Worker Role dispatches potentially multiple messages after ‘slicing’ up the original image into n-pieces, where n is the number of slices specified by the end user.
- The sliceresponse queue is where the ImageProcessor Worker Role dispatches messages for each completed slice of the mosaic as it’s generated.
- The imageresponse queue is where the JobController Worker Role dispatches a single message corresponding to the completion of an end user’s request.
As you can see the queues are paired: imagerequest and imageresponse each contain one message corresponding, respectively, to the initiation and completion of a client request. slicerequest and sliceresponse contain possibly multiple messages for each client request (depending on the value of ‘number of slices’ input by the user), but there is a one-to-one correspondence between messages in slicerequest and sliceresponse.
Windows Azure Queue Primer
Windows Azure Queues are one of the three main types of storage available within a Windows Azure Storage account (and in previous blog posts we looked at the use of tables and blobs in the context of the Photo Mosaics application). You can create an unlimited number of queues per storage account, and each queue can store an unlimited number of messages (up to the 100TB limit of a storage account, of course). Additionally queues have the following restrictions/attributes:
- Messages are a maximum of 8KB in size. Note that this is the size of the message after Base-64 encoding, not the size of raw bytes comprising the message. For larger message requirements, the common design pattern is to store the larger data in Windows Azure blobs (or tables or even SQL Azure) and include a lookup key to that storage in the queue message itself.
- Like blobs, queues can have metadata associated with them – in the form of name/value pairs - up to 8KB per queue.
- Messages are NOT always processed in first-in/first-out (FIFO) order. This may be counterintuitive for graduates of Data Structures 101, but it makes sense when you look at how guaranteed message delivery is ensured.
When a message is read from the queue, it is no longer visible to other roles that might be monitoring that queue, but it may reappear if it is not successfully processed by the role that has read it from the queue. For instance, suppose the ImageProcessor (cf. the architecture diagram above) grabs a message from the slicerequest queue, and the role VM crashes because of a hardware failure or just gets rebooted as part of a regular OS patching cycle in the Windows Azure Data Center. The message is no longer on the queue, but it was also not successfully processed by the VM that dequeued it – now what, is it lost forever?
Nope! To accommodate this contingency, the consumer of a message from a queue must explicitly delete the message from the queue after it has finished processing it. If the deletion does not occur within an allotted time – the invisibility timeout – the message reappears on the queue. The default timeout is 30 seconds, but it can be as much as 2 hours, and is specified at the point the message is retrieved (via GetMessage when using the Storage Client API).That then leads to the question of what happens if the message was processed correctly, but the role processing it crashed in the instant immediately before it was to explicitly delete the message. Won’t the message reappear to potentially be processed again? Yes, indeed, and that’s something you have to plan for. Essentially, you need to make sure that the operations you perform are idempotent, meaning that regardless of whether the message is processed once or multiple times, the outcome is identical.
But what if there’s a bug, and the message is never processed successfully? Won’t it continually reappear on the queue only to be part of a vicious cycle of failure – a poison message if you will? That’s where two additional message attributes come in:
- The DequeueCount property specifies how many times a specific message has been fetched from the queue. To guard against poison messages, you can set a threshold value for how many times you want to retry a message before treating it as a poison message. When the DequeueCount exceeds this value, explicitly delete the message, log the occurrence, and take whatever other corrective action you deem appropriate in the application.
Keep in mind that if the invisibility timeout value is too small in comparison to the time it takes to process the message, it’s possible this same scenario will result even though the message itself isn’t ‘poisoned’ per se.- All messages also have a time-to-live (TTL) value (cf. ExpirationTime) that is specified when they are first put on the queue (via the AddMessage method if you’re using the Storage Client API). By default, the TTL is seven days, and that’s also the maximum value. If the message isn’t explicitly deleted before the TTL expires, the Windows Azure storage system will delete and garbage collect it.
- queues can handle approximately
- 500 requests per second per queue
- 5000 requests per second across all queues within a single Windows Azure storage account
For the level of activity in the Photo Mosaics application, these limits well exceed the expected load; however, 500 messages for a large application or even a small one that responds to real-time stimuli (like sensors) is well within the realms of possibility. In scenarios like this where you need to scale your queue storage, you’ll want to consider load balancing over multiple queues or even multiple queues in multiple storage accounts to get the throughput you need.
Photo Mosaics Queue Abstraction
For the Photo Mosaics application, I’ve built a few abstractions over Windows Azure queues and messages that may initially seem overly complex, but actually help simplify and standardize their usage within the Web and Worker roles.
In a previous post on the storage architecture, I’ve already introduce the QueueAccessor class as part of a data access layer (CloudDAL). QueueAccessor is a static class that maintains a reference to the four queues used in the application, namely, imagerequest, imageresponse, slicerequest, and sliceresponse. The references are of a new type, ImageProcessingQueue, which I’ve defined in the Queue.cs file within the CloudDAL:

ImageProcessingQueue has the following members:
- Name – the queue name,
- PoisonThreshold – the number of times a message can be dequeued before it’s treated as a poisoned message and immediately deleted,
- Timeout – the default invisibility timeout for messages retrieved from the queue,
- RawQueue – a reference to the CloudQueue object abstracted by this given instance of ImageProcessingQueue.
- AcceptMessage<T> – a generic method used to retrieve messages of type T from the given queue,
- SubmitMessage<T> – a generic method used to submit messages of type T to the given queue.
Similar to my use of metadata for blobs, each ImageProcessingQueue instance is created with two pieces of metadata that are used to set the PoisonThreshold and Timeout:
1: internal ImageProcessingQueue(CloudQueueClient queueClient, String queueName)2: {3: this.Name = queueName;4: this.RawQueue = queueClient.GetQueueReference(queueName);5:6: // fetch the queue's attributes (metadata)7: this.RawQueue.FetchAttributes();8: String timeout = this.RawQueue.Metadata["defaulttimeout"];9: String threshold = this.RawQueue.Metadata["poisonthreshold"];10:11: // pull out queue-specific timeout/poison message retry value (or set to defaults)12: Int32 i;13: this.Timeout = (Int32.TryParse(timeout, out i)) ?
new TimeSpan(0, 0, i) : new TimeSpan(0, 0, 30);14: this.PoisonThreshold = (Int32.TryParse(threshold, out i)) ? i : Int32.MaxValue;15: }AcceptMessage and SubmitMessage are essentially inverse operations that wrap the GetMessage and AddMessage APIs by providing some exception handling and deferring message-specific handling to two generic methods defined on QueueMessage, a class which we���ll discuss in the next section.
Photo Mosaics Queue Message Abstraction
Similar to ImageProcessingQueue’s encapsulation of the CloudQueue reference, a new class, QueueMessage (in Messages.cs of the CloudDAL), wraps a reference to CloudQueueMessage and augments it with application-specific functionality. That class serves as the abstract ancestor of the four distinct message types uses in the Photo Mosaics application – ImageRequestMessage, ImageResponseMessage, SliceRequestMessage, SliceResponseMessage - each of which is handled by exactly one of the similarly-name queues.

Each of the four messages shares a common set of three fields that ultimately appear in every message’s payload:
- _clientId: a string ID uniquely identifying the client that made the request. In the Windows Forms application, the user’s SID is used, but this field could be extended to be an e-mail address or an application-specific user name. The field is also exposed as the ClientId property.
- _requestId: a GUID assigned to each request to convert an image into a mosaic. The GUID is used to re-name the original image as well as slices of the image as they are stored as blobs during the processing. This field is also exposed as the RequestId property.
- _queueUri: the full URI identifying the queue to which this message was associated. Though this may seem redundant – after all we must know the queue in order to retrieve the message – it becomes necessary for processing messages generically. In particular, given a reference to a QueueMessage alone you cannot delete that message, since DeleteMessage is a method of a CloudQueue not of a CloudQueueMessage. The _queueUri field is used along with the FindQueue message of QueueAccessor to get a reference to the containing queue and store that as the Queue property of the QueueMessage instance.
The four concrete implementations of QueueMessage add additional properties that are specific to the task represented by the message. Those fields are summarized below:


Each of these classes implements a Parse method which handles the conversion of the message payload (which is just a string) into the fields and properties for the specific message type. If a message payload fails to parse, a custom exception of type QueueMessageFormatException (also defined in Messages.cs) is thrown. They Payload property is the inverse of the Parse method and formats the actual string payload for the message based on the property values of the specific instance of QueueMessage.
With this infrastructure, all of the message processing within the application can be handled with two generic methods (AcceptMessage and SubmitMessage), versus having to spread message-specific processing across each implementation of the various Windows Azure roles. Maintenance and enhancements are also simplified since modifying the structure of a message requires changes only to the appropriate descendant of the QueueMessage class.
Pulling it all together…
ImageProcessingQueue.AcceptMessage<T> and QueueMessage.CreateFromMessage<T> work in tandem to pull a message (of type T) off of the queue and parse the payload into the appropriate descendant of the QueueMessage class.
In the AcceptMessage case below, a message is retrieved from the queue (GetMessage in Line 6) and the payload parsed, via CreateFromMessage, to return a strongly-typed message of the appropriate type.
1: public T AcceptMessage<T>() where T : QueueMessage, new()2: {3: T parsedMsg = default(T);4: if (this.RawQueue.Exists())5: {6: CloudQueueMessage rawMsg = this.RawQueue.GetMessage(this.Timeout);7: if (rawMsg != null)8: {9: try10: {11: parsedMsg = QueueMessage.CreateFromMessage<T>(rawMsg);12: }13: catch (QueueMessageFormatException qfme)14: {15: // exception handling elided for brevity16: }17: }18: }19: return parsedMsg;20: }Note that CreateFromMessage assumes the three fields shared by every message appear in a specific order at the beginning of the payload (Lines 17-19), followed by the message-specific properties (in _components in Line 22)
   1: internal static T CreateFromMessage<T>(CloudQueueMessage rawMsg)
                  where T : QueueMessage, new()
2: {3: // check if message parameter is valid4: if ((rawMsg == null) || String.IsNullOrEmpty(rawMsg.AsString))5: throw new ArgumentNullException("rawMsg", "No message data to parse");6:7: // create a new message instance8: T newQueueMessage = new T();9: newQueueMessage.RawMessage = rawMsg;10:11: // split message payload into array12: String[] s = newQueueMessage.RawMessage.AsString.Split(MSG_SEPARATOR);13:14: // first element is queue URI15: if (s.Length >= 3)16: {17: newQueueMessage._queueUri = s[0];18: newQueueMessage._clientId = s[1];19: newQueueMessage._requestId = s[2];20:21: // split payload array into components22: newQueueMessage._components = s.Skip(3).ToList();23:24: // parse into strongly typed message fields25: newQueueMessage.Parse();26: }27: else28: {29: throw new QueueMessageFormatException(
"Message is missing one or more required elements (queueUri, userId, requestId)");30: }31:32: // return the new message instance33: return newQueueMessage;34: }When a message is placed on a queue, an inverse operation occurs via ImageProcessingQueue.SubmitMessage<T> and QueueMessage.CreateFromArguments<T>. In Line 8 below, you can see that CreateFromArguments accepts the clientId and requestId as parameters as well as the specific queue’s URI – these, again, are the three properties that are part of all messages in the Photo Mosaics application. The message-specific properties are passed in the params argument.
   1: public void SubmitMessage<T>(String clientId, Guid requestId, params object[] parms)
                                                                 where T : QueueMessage, new()
2: {3: T parsedMsg = default(T);4:5: this.RawQueue.CreateIfNotExist();6: try7: {8: parsedMsg = QueueMessage.CreateFromArguments<T>(
this.RawQueue.Uri, clientId, requestId, parms);9: this.RawQueue.AddMessage(new CloudQueueMessage(parsedMsg.Payload));10: }11: catch (QueueMessageFormatException qfme)12: {13: // exception handling code elided for brevity14: }15: }1: internal static T CreateFromArguments<T>(Uri queueUri, String clientId,
Guid requestId, params object[] parms) where T : QueueMessage, new()2: {3: T newQueueMessage = new T();4:5: // pull arguments into payload arrays6: newQueueMessage._queueUri = queueUri.ToString();7: newQueueMessage._clientId = clientId;8: newQueueMessage._requestId = requestId.ToString();9: newQueueMessage._components = (from p in parms select p.ToString()).ToList<String>();10:11: // parse into strongly typed message fields12: newQueueMessage.Parse();13:14: // return the new message instance15: return newQueueMessage;16: }What we’ll see in the next post is how code in the web and worker roles of the application leverage AcceptMessage, SubmitMessage, and the QueueMessage instances to carry out the workflow of the Photo Mosaics application.
Key Takeaways
I realize that was quite of lot of technical content to absorb, and if you’re really interested in understanding it, you’re likely poring over the code now. If I lost you as soon as you scrolled past the first screen – no worries. I feel the biggest takeaway from this post is that creating a flexible and fault-tolerant infrastructure for handling your messaging between the various roles in your application is paramount. The time you spend doing that will reap rewards later as you’re building out the processing for the application and as new requirements and unforeseen challenges surface. I don’t suggest that the framework I’ve set up here is ideal; however, some sort of framework is recommended, and hopefully this post has provided some food-for-thought.
Lastly, we haven’t talked much yet about diagnostics or monitoring, but it should be apparent that queues are one of the more significant barometers of how well the application is running in Windows Azure. If the queue length gets too high, it may mean that you need additional web or worker roles to handle the additional requests. On the other hand, if there’s never any wait time, perhaps the load is so light that you could dial down some of the roles you have spun up (and save some money). We’ll look at Windows Azure diagnostics and tracing in a later blog post, and it’s through that mechanism that you can keep tabs on the application’s health and even respond automatically to bursts or lulls in activity made manifest by changes in queue length.
Dhananjay Kumar (@Debug_Mode) explained Fetching Web Roles details using Windows Azure Management API in an 8/21/2011 post:
If you are writing some tool to manage Windows Azure portal then fetching information about Roles may be frequent requirement for you.
In this post, we will discuss the way to Fetch below information about a Web Role or Worker Role using Windows Azure Management API.
- RoleName
- InstanceName
- InstanceStatus
Any client making call to Azure portal using Management API has to authenticate itself before making call. Authenticating being done between Azure portal and client calling REST based Azure Management API through the certificates.
Very first let us create class representing Roles:
public class RoleInstance
    {
        public string RollName { get; set; }
        public string InstanceName { get; set; }
        public string InstanceStatus { get; set; }
    }

Essentially you need to perform four steps,
1. You need to create a web request to your subscription id.

2. While making request you need to make sure you are calling the correct version and adding the cross ponding certificate of your subscription.

3. Get the stream and convert response stream in string

You will get the XML response in below format,

In returned XML all the Roles and their information’s are returned as below,

4. Last step is to parse using LINQ to XML to fetch details of Role

For your reference full source code is as below,
using Microsoft.WindowsAzure;
using Microsoft.WindowsAzure.StorageClient;
using System.Collections.Generic;
using System.IO;
using System.Linq;
using System.Net;
using System.Security.Cryptography.X509Certificates;
using System.Xml.Linq;
namespace ConsoleApplication1
{
 class Program
    {
        static void Main(string[] args)
var request = (HttpWebRequest)WebRequest.Create("https://management.core.windows.net/ursubscriptionid
/services/hostedservices/yourhostedservicename?embed-detail=true");
            request.Headers.Add("x-ms-version:2009-10-01");
            CloudStorageAccount cloudStorageAccount = CloudStorageAccount.Parse("DefaultEndpointsProtocol=https;
                                                                            AccountName=debugmodetest9;AccountKey=dfkj");
            CloudBlobClient cloudBlobClient = cloudStorageAccount.CreateCloudBlobClient();
            CloudBlobContainer cloudBlobContainer = cloudBlobClient.GetContainerReference("debugmodestreaming");
            CloudBlob cloudBlob = cloudBlobContainer.GetBlobReference("debugmode.cer");

            byte[] byteData = cloudBlob.DownloadByteArray();
            X509Certificate2 certificate = new X509Certificate2(byteData);
            request.ClientCertificates.Add(certificate);
            var response = request.GetResponse().GetResponseStream();
            var xmlofResponse = new StreamReader(response).ReadToEnd();
            //XDocument doc = XDocument.Parse(xmlofResponse);
            XElement el = XElement.Parse(xmlofResponse);
            XNamespace ns = "http://schemas.microsoft.com/windowsazure";
            var servicesName = from r in el.Descendants(ns + "RoleInstance")
                               select new RoleInstance
                               {
                                   RollName  = r.Element(ns + "RoleName").Value,
                                   InstanceName = r.Element(ns + "InstanceName").Value,
                                   InstanceStatus = r.Element(ns + "InstanceStatus").Value,

                               };

 foreach (var r in servicesName )
            {
                Console.WriteLine(r.InstanceName + r.InstanceStatus);
            }
 Console.ReadKey(true);
    }
}


Dhananjay Kumar (@Debug_Mode) described Creating [an] X.509 certificate from [a] Windows Azure BLOB in an 8/15/2011 post (missed when published):
Sometime you may have to create X.509 certificate on the fly. Imagine you are writing a WCF Service to be hosted in App Fabric or creating a WCF Service Web Role to be hosted in Microsoft Data center. In these scenarios you don’t have access to local file system and in the service you are performing Azure subscription level operation using Windows Azure Management API. So to authenticate WCF Service against Windows Service subscription you need to provide the certificate.

- Read X.509 Certificate file (.cer) from AZURE BLOB.
- Create X.509 certificate from the downloaded file from Azure BLOB.
- Pass the created certificate as part of request to authenticate.
Read Certificate file from Windows AZURE BLOB storage as byte array

In above code snippet, we are reading certificate file from BLOB as an array of byte data. You need to add reference of Microsoft.WindowsAzure and Microsoft.WindowsAzure.StorageClient . Container Name is name of your public container.
Create X.509 certificate
Once you have byte array form Azure BLOB, you can create X.509 certificate to be authenticated using the byte array as below,

Pass the Certificate to authenticate


Here while making call you can add certificate created from AZURE BLOB file.
For your reference full source code is as below,
using System;
using System.IO;
using System.Linq;
using System.Net;
using System.Security.Cryptography.X509Certificates;
using System.Xml.Linq;
using Microsoft.WindowsAzure;
using Microsoft.WindowsAzure.StorageClient;

namespace ConsoleApplication26
{
    class Program
    {
        static void Main(string[] args)
        {

                      CloudStorageAccount cloudStorageAccount = CloudStorageAccount.Parse("DataConnectionString");
            CloudBlobClient cloudBlobClient = cloudStorageAccount.CreateCloudBlobClient();
            CloudBlobContainer cloudBlobContainer = cloudBlobClient.GetContainerReference("ContainerName");
            CloudBlob cloudBlob = cloudBlobContainer.GetBlobReference("debugmode.cer");
            Console.WriteLine(cloudBlob.DownloadText());
            Console.ReadKey(true);
            byte[] byteData = cloudBlob.DownloadByteArray();
            X509Certificate2 certificate = new X509Certificate2(byteData);

           var request = (HttpWebRequest)WebRequest.Create("https://management.core.windows.net/697714da-b267-4761-bced-b75fcde0d7e1/services/hostedservices");
           request.Headers.Add("x-ms-version:2009-10-01");
           request.ClientCertificates.Add(certificate);

            var response = request.GetResponse().GetResponseStream();
            var xmlofResponse = new StreamReader(response).ReadToEnd();

            XDocument doc = XDocument.Parse(xmlofResponse);
            XNamespace ns = "http://schemas.microsoft.com/windowsazure";
            var servicesName = from r in doc.Descendants(ns + "HostedService")
                               select new HostedServices
                               {
                                   serviceName = r.Element(ns + "ServiceName").Value
                               };

            foreach (var a in servicesName)
            {
                Console.WriteLine(a.serviceName);
            }

            Console.ReadKey(true);

        }

        static public  byte[] ReadToEnd(System.IO.Stream stream)
        {
            long originalPosition = stream.Position;
            stream.Position = 0;
            try
            {
                byte[] readBuffer = new byte[4096];
                int totalBytesRead = 0;
                int bytesRead;
                while ((bytesRead = stream.Read(readBuffer, totalBytesRead, readBuffer.Length - totalBytesRead)) > 0)
                {
                    totalBytesRead += bytesRead;
                    if (totalBytesRead == readBuffer.Length)
                    {
                        int nextByte = stream.ReadByte();
                        if (nextByte != -1)
                        {
                            byte[] temp = new byte[readBuffer.Length * 2];
                            Buffer.BlockCopy(readBuffer, 0, temp, 0, readBuffer.Length);
                            Buffer.SetByte(temp, totalBytesRead, (byte)nextByte);
                            readBuffer = temp;
                            totalBytesRead++;
                        }
                    }
                }
                byte[] buffer = readBuffer;
                if (readBuffer.Length != totalBytesRead)
                {
                    buffer = new byte[totalBytesRead];
                    Buffer.BlockCopy(readBuffer, 0, buffer, 0, totalBytesRead);
                }
                return buffer;
            }
            finally
            {
                stream.Position = originalPosition;
            }
        }

     public    class HostedServices
        {
            public string serviceName { get; set; }
        }
    }
}


<Return to section navigation list>
SQL Azure Database and Reporting
No significant articles today.
<Return to section navigation list>
MarketPlace DataMarket and OData
The Anonymous Author of the CodeNodes blog posted Return complex type from OData WCF Data Service on 8/22/2011:
I’ve recently started working with the OData format and specifically Microsoft’s implementation of OData which is WCF Data Services, formerly known as ADO.NET Data Services and formerly formerly known as Astoria. From a high level point of view, to return or expose data in OData format we need to create objects that implement the IQueryable interface. The idea is to have the WCF service expose these objects to the calling consumer.
For this example I’m using VS Web Developer Express 2010 where I have a very simple WCF Data Service hosted in a console app (thanks to www.bizcoder.com). It’s returning an IQuerable collection of a simple ‘Study’ class from a repository (located in a separated dll project), which will eventually retrieve ‘Study’ classes from a db project in a third dll – for this demo the repository is dummying up the data.
The Study class has some normal properties such as Id, Name, etc and also a child class called ‘Page’ implemented as a virtual IQueryable collection. To get the code below up and running:
- Create a standard dll project in Visual Studio called MyStudyService, and set the output type to Console app in the project properties.
- Add a second project of type class library to the solution and call it MyStudyRepository
- Add a third and final project of type class library to the solution and call it MyStudyDB
Set the console app containing the service project as the startup project. This will expose the ‘Study’ data and associated ‘Page’ items. To retrieve data from the service (or from any public OData service for that matter) we can use a great piece of software called LinqPad written by Joseph Albahari. Not only will this piece of kit query OData sources, it will also query standard databases and run free-form C# expressions and statements into the bargain..all for free. You can also query the data by typing the url specified in the service in a browser:
- http://localhost:123/Studies
- To get the first Study object in the collection: http://localhost:998/Studies(1)
- To get the Page object of the first Study object: http://localhost:998/Studies(1)/Pages
So now for the code – here’s the simple service that’s hosted in a console app:
using MyStudyRepository;
using MyStudyDB;

namespace MyStudyService
{
public class Program
{
public static void Main(string[] args)
{
string serviceAddress = "http://localhost:123";
Uri[] uriArray = { new Uri(serviceAddress) };
Type serviceType = typeof(StudyDataService);

using (var host = new DataServiceHost(serviceType,uriArray))
{
host.Open();
Console.WriteLine("Press any key to stop service");
Console.ReadKey();
}
}
}

public class StudyDataService : DataService<StudyRepository>
{
public static void InitializeService(IDataServiceConfiguration config)
{
config.SetEntitySetAccessRule("*", EntitySetRights.AllRead);
}
}
}

Here’s the repository:
using MyStudyDB;
using MyStudyDB.Entities;

namespace MyStudyRepository
{
public class StudyRepository : IRepository<Study>
{
List<Study> _listStudies = new List<Study>();
List<Page> _listPages = new List<Page>();

//Add data to populate myStudies list on creation of class
public StudyRepository()
{
CreateStudies();
}

public IQueryable<Page> Pages
{
get
{
return _listPages.AsQueryable<Page>();
}
}

public IQueryable<Study> Studies
{
get
{
return _listStudies.AsQueryable<Study>();
}
}

public Study GetById(int itemId)
{
return _listStudies.SingleOrDefault(s => s.ID == itemId);
}

public Study GetByName(string itemName)
{
return _listStudies.FirstOrDefault(s => s.StudyName == itemName);
}

public void Add(Study item)
{
throw new NotImplementedException();
}

public void Update(Study item)
{
throw new NotImplementedException();
}

public void Delete(int itemId)
{
throw new NotImplementedException();
}

public IList<Study> List()
{
throw new NotImplementedException();
}

private void CreateStudies()
{
for (int i = 1; i < 5; i++)
{
Study myStudy = new Study()
{
ID = i,
StudyOwnerId = i,
StudyName = "Study" + i.ToString(),
Pages = new List<Page>() {
new Page()
{
ID = i,
Name = "Page " + i.ToString(),
StudyId = i
}
}.AsQueryable()
};

myStudy.Pages.First().Study = myStudy;
_listStudies.Add(myStudy);
}
}
}
}
And finally here’s the model:
namespace MyStudyDB.Entities
 {
 public class Study : IStudy
 {
 public int ID { get; set;}
 public int StudyOwnerId { get; set; }
 public string StudyName { get; set; }
 public virtual IQueryable<Page> Pages { get; set; }
 }

public class Page : IPage
 {
 public int ID { get; set; }
 public string Name { get; set; }
 public int StudyId { get; set; }
 public virtual Study Study { get; set; }
 }
 }
If you know the name of the Irish blogger in the photo above, please leave a comment.
<Return to section navigation list>
Windows Azure AppFabric: Apps, Access Control, WIF and Service Bus
Avkash Chauhan explained a Windows Azure Web Role and ACSv2 Application Exception- "A potentially dangerous Request.Form value was detected from the client (wresult="<t:RequestSecurityTo...")" in an 8/21/2011 post:
Recently I was working on my MVC3 ASP.NET Web Role application (Using Windows Azure Tools August 2011 Update based MVC3 template) which is interacting with App Fabric ACSv2 and I hit the following error:
Server Error in '/' Application.
A potentially dangerous Request.Form value was detected from the client (wresult="<t:RequestSecurityTo...").
Description: Request Validation has detected a potentially dangerous client input value, and processing of the request has been aborted. This value may indicate an attempt to compromise the security of your application, such as a cross-site scripting attack. To allow pages to override application request validation settings, set the requestValidationMode attribute in the httpRuntime configuration section to requestValidationMode="2.0". Example: <httpRuntime requestValidationMode="2.0" />. After setting this value, you can then disable request validation by setting validateRequest="false" in the Page directive or in the <pages> configuration section. However, it is strongly recommended that your application explicitly check all inputs in this case. For more information, see http://go.microsoft.com/fwlink/?LinkId=153133.
Exception Details: System.Web.HttpRequestValidationException: A potentially dangerous Request.Form value was detected from the client (wresult="<t:RequestSecurityTo...").
Source Error:An unhandled exception was generated during the execution of the current web request. Information regarding the origin and location of the exception can be identified using the exception stack trace below.
Stack Trace:
[HttpRequestValidationException (0x80004005): A potentially dangerous Request.Form value was detected from the client (wresult="<t:RequestSecurityTo...").]
…
So if you get this error, don’t freak out…
The main reason for this problem can be found in your configuration. The web service was invoked where a parameter included an XML tag as below:
(wresult="<t:RequestSecurityTo...").
You can solve this problem two ways:
Solution #1: Turn off request validation
Configure your web.config to add the following:
<pages validateRequest="false" />
You also need to use the following setting in your ASP.NET 4 application’s web.config to solved this problem:
<httpRuntime requestValidationMode="2.0" />
Solution #2: Create a custom class to handle validation
Please create a customer validator clad and add the following line in the web.config:
<httpRuntime requestValidationType="CustomRequestValidator" />
To learn how to write a custom request validation handler, please follow the link below:
Above link is the best information to follow up on this regard.
Vittorio Bertocci (@vibronet) posted Guess what? on 8/21/2011:

…and that’s as much as I can say for now


Vittorio is the second person to admit to presenting a session at BUILD whom I’ve discovered to date. (Nathan Totten, below, is the first.)
Glad to see them both as BUILD speakers, but I’d be happier if session details were available.
<Return to section navigation list>
Windows Azure VM Role, Virtual Network, Connect, RDP and CDN
No significant articles today.
<Return to section navigation list>
Live Windows Azure Apps, APIs, Tools and Test Harnesses
My (@rogerjenn) OakLeaf Systems Windows Azure Table Services Sample Project Updated with Tools v1.4 and Storage Analytics post of 8/22/2011 describes a storage analytics upgrade to my early OakLeaf Systems Azure Table Services Sample Project:
The Windows Azure Team updated Windows Azure Tools for Visual Studio 2010 v1.4 and released a new Windows Azure Storage Analytics feature on 8/3/2011. The Windows Azure Storage Team added Windows Azure Storage Metrics: Using Metrics to Track Storage Usage and Windows Azure Storage Logging: Using Logs to Track Storage Requests posts on the same date.
Here’s the start of the Storage Team’s Analytics feature description:
Windows Azure Storage Analytics offers you the ability to track, analyze, and debug your usage of storage (Blobs, Tables and Queues). You can use this data to analyze storage usage to improve the design of your applications and their access patterns to Windows Azure Storage. Analytics data consists of:
- Logs, which trace executed requests for your storage accounts
- Metrics, which provide summary of key capacity and request statistics for Blobs, Tables and Queues
I hadn’t worked on the OakLeaf Systems Azure Table Services Sample Project since May 2011, so I updated the project with v1.4 of the Azure SDK and Tools, added code to implement Storage Analytics, and changed from a brown/yellow (Colorful theme) to a more Web 2.0-like custom blue theme:

Note: Use of the “Powered by Windows Azure” logo is authorized by an earlier (v1.3) version having passed the Microsoft Platform Ready Test last November. For more details, see my Old OakLeaf Systems’ Azure Table Services Sample Project Passes New Microsoft Platform Ready Test post of 11/5/2011.
Prior OakLeaf posts have covered load tests and instrumentation for the sample project:
- My Load-Testing the OakLeaf Systems Azure Table Services Sample Project with up to 25 LoadStorm Users post of 11/18/2011 described some simple LoadStorm tests on the site.
- My Adding Trace, Event, Counter and Error Logging to the OakLeaf Systems Azure Table Services Sample Project of 12/5/2010 describes instrumentation added after the LoadStorm tests.
Azure Table Services Logging, Metrics and Analytics
Following is the source code in the Global.asax.cs file that determines the logging and analytic settings for table storage; the sample project doesn’t use blob or queue storage. AnalyticsSettings, AnalyticsSettingsExtensions and SettingsSerializerHelper classes perform the actual work. You can download the code for these classes here.
protected void Session_Start(object sender, EventArgs e)
{
    // AnalyticsSettings code added on 8/21/2011 from the Azure Storage Team's
    // "Windows Azure Storage Logging: Using Logs to Track Storage Requests" post of 8/3/2011
    // http://blogs.msdn.com/b/windowsazurestorage/archive/2011/08/03/windows-azure-storage-logging-using-logs-to-track-storage-requests.aspx
    // See also AnalyticsSettings.cs and AnalyticsSettingsExtensions.cs

    AnalyticsSettings settings = new AnalyticsSettings()
    {
        LogType = LoggingLevel.Delete | LoggingLevel.Read | LoggingLevel.Write,
        IsLogRetentionPolicyEnabled = true,
        LogRetentionInDays = 1,
        IsMetricsRetentionPolicyEnabled = true,
        MetricsRetentionInDays = 7,
        MetricsType = MetricsType.All
    };

    var account = CloudStorageAccount.FromConfigurationSetting("DataConnectionString");
    // CloudBlobClient blobClient = account.CreateCloudBlobClient();
    // CloudQueueClient queueClient = account.CreateCloudQueueClient();
    CloudTableClient tableClient = account.CreateCloudTableClient();

    // set the settings for each service
    // blobClient.SetServiceSettings(settings);
    // queueClient.SetServiceSettings(account.QueueEndpoint, settings);
    tableClient.SetServiceSettings(settings);

    // get the settings from each service
    // AnalyticsSettings blobSettings = blobClient.GetServiceSettings();
    // AnalyticsSettings queueSettings = queueClient.GetServiceSettings(account.QueueEndpoint);
    AnalyticsSettings tableSettings = tableClient.GetServiceSettings();
}
Here’s a report returned by Cerebrata’s free Windows Azure Storage Analytics Configuration Utility after clicking the Get Current Analytics Configuration button:

You can download it from https://www.cerebrata.com/Downloads/SACU/SACU.application.
Here’s a capture of Steve Marx’s online Windows Azure StorageAnalytics demo application that reads configuration data from Azure cloud storage:

I was surprised to see the following graph of Get Blob usage without having issued settings to the BlobClient:

The constant 118/hour blob requests probably are from diagnostic blobs generated by routine uptime tests from mon.itor.us and pingdom.com that I report monthly. August uptime data will show a few minutes of downtime as a result of replacing the old with the new version today:

Note: I wasn’t able to do a VIP Swap because the Windows Azure Portal didn’t detect that the new version had two endpoints, despite the fact that two Web Role instances were running in Staging.
Here’s a recent version of Cerebrata V2 (2011.03.0811.00) displaying summary data from the $MetricsTransactionsTable for today (8/21/2011):

Note: TotalEgress (bytes), Availability (%), AverageE2E Latency (ms), AverageServerLatency (ms), Percent Success (%) and about 20 more columns to the right of TotalIngress are hidden in the above capture. The Windows Azure Storage Metrics: Using Metrics to Track Storage Usage post provides a detailed description of each column’s contents in a very lengthy table. Cerebrata V2 was in private beta testing as of 8/21/2011. The current v2011.08.11.00 of Cerebrata’s Cloud Storage Studio includes identical storage analytics features.
After I collect more analytic data on the Table Services Sample Project, I’ll update this post.
Full disclosure: I have received no-charge licenses for Cerebrata products.


Avkash Chauhan described how to Create [a] new Windows Azure Service and Get Deployment Info Sample Code using Windows Azure Service Management API in an 8/22/2011 post:
Here is C# sample code to access Windows Azure Services using Windows Azure Management API in C#. I have managed the following two functions:
- To get deployment details for a specific Windows Azure Application on Windows Azure

 GetDeploymentDetails(UserSubscriptionID, MgmtCertThumbprint,
    UserServiceName, "", DeploymentType);
- To create a new service to host Windows Azure Application on Windows Azure
CreateNewDeployment(UserSubscriptionID, MgmtCertThumbprint,
    UserServiceName, UserServiceLabelName);
Please check that you have certificate installed in your machine as below:

Then you can also verify that the certificate is also available in Windows Azure Management Portal as below:

Step 2: Now you can use the following code in your application (Be sure to input Subscription ID, Certificate Thumbprint, Service Name and Service Label in the code):
using System.Text;
 using System.Security.Cryptography.X509Certificates;
 using System.Net;
 using System.IO;
 using System;


 namespace ManagementAPI
 {
 public class RequestState
 {
 const int BufferSize = 1024;
 public StringBuilder RequestData;
 public byte[] BufferRead;
 public WebRequest Request;
 public Stream ResponseStream;

 public RequestState()
 {
 BufferRead = new byte[BufferSize];
 RequestData = new StringBuilder(String.Empty);
 Request = null;
 ResponseStream = null;
 }
 }

 class Program
 {
 static void Main(string[] args)
 {
 string UserSubscriptionID = "PLEASE_PROVIDE_YOUR_SUBSCRIPTION_ID"; // Your subscription id.
 string MgmtCertThumbprint = "CERTIFICATE_THUMB_PRINT";
 string UserServiceName = "AZURE_SERVICE_NAME";
 string UserServiceLabelName = "AZURE_SERVICE_NAME_LABEL";
 string DeploymentType = "production"; // Use "production" or "staging"

 GetDeploymentDetails(UserSubscriptionID, MgmtCertThumbprint, UserServiceName, "", DeploymentType);

 CreateNewDeployment(UserSubscriptionID, MgmtCertThumbprint, UserServiceName, UserServiceLabelName);
 Console.ReadKey();
 }

 private static void GetDeploymentDetails(string subID, string certThumb, string hostedServiceName, string hostedServiceLabel, string deploymentType)
 {
 X509Store certificateStore = new X509Store(StoreName.My, StoreLocation.CurrentUser);
 certificateStore.Open(OpenFlags.ReadOnly);
 X509Certificate2Collection certs = certificateStore.Certificates.Find(X509FindType.FindByThumbprint, certThumb, false);
 if (certs.Count == 0)
 {
 Console.WriteLine("Couldn't find the certificate with thumbprint:" + certThumb);
 return;
 }
 certificateStore.Close();
 HttpWebRequest request = (HttpWebRequest)HttpWebRequest.Create(
 new Uri("https://management.core.windows.net/" + subID + "/services/hostedservices/" + hostedServiceName + "/deploymentslots/" + deploymentType));
 request.Method = "GET";
 request.ClientCertificates.Add(certs[0]);
 request.ContentType = "application/xml";
 request.Headers.Add("x-ms-version", "2010-10-28");
 using (HttpWebResponse response = (HttpWebResponse)request.GetResponse())
 {
 // Parse the web response.
 Stream responseStream = response.GetResponseStream();
 StreamReader reader = new StreamReader(responseStream);

 // Display the raw response.
 Console.WriteLine("Deployment Details:");
 Console.WriteLine(reader.ReadToEnd());
 Console.ReadKey();

 // Close the resources no longer needed.
 responseStream.Close();
 reader.Close();
 }
 Console.ReadKey();
 }

 private static void CreateNewDeployment(string subID, string certThumb, string hostedServiceName, string hostedServiceLabel)
 {
 X509Store certificateStore = new X509Store(StoreName.My, StoreLocation.CurrentUser);
 certificateStore.Open(OpenFlags.ReadOnly);
 X509Certificate2Collection certs = certificateStore.Certificates.Find(X509FindType.FindByThumbprint, certThumb, false);
 if (certs.Count == 0)
 {
 Console.WriteLine("Couldn't find the certificate with thumbprint:" + certThumb);
 return;
 }
 certificateStore.Close();
 HttpWebRequest request = (HttpWebRequest)HttpWebRequest.Create(
 new Uri("https://management.core.windows.net/" + subID + "/services/hostedservices"));
 request.Method = "POST";
 request.ClientCertificates.Add(certs[0]);
 request.ContentType = "application/xml";
 request.Headers.Add("x-ms-version", "2010-10-28");

 StringBuilder sbRequestXML = new StringBuilder("<?xml version=\"1.0\" encoding=\"utf-8\"?>");
 sbRequestXML.Append("<CreateHostedService xmlns=\"http://schemas.microsoft.com/windowsazure\">");
 sbRequestXML.AppendFormat("<ServiceName>{0}</ServiceName>", hostedServiceName);
 sbRequestXML.AppendFormat("<Label>{0}</Label>", EncodeToBase64String(hostedServiceLabel));
 sbRequestXML.Append("<Location>Anywhere US</Location>");
 sbRequestXML.Append("</CreateHostedService>");

 byte[] formData =
 UTF8Encoding.UTF8.GetBytes(sbRequestXML.ToString());
 request.ContentLength = formData.Length;

 using (Stream post = request.GetRequestStream())
 {
 post.Write(formData, 0, formData.Length);
 }
 Console.WriteLine("Message: Hosted Service " + hostedServiceName + "creation successfull!");
 try
 {
 RequestState state = new RequestState();
 state.Request = request;
 IAsyncResult result = request.BeginGetResponse(new AsyncCallback(RespCallback), state);
 }
 catch (Exception ex)
 {
 Console.WriteLine("Error: " + ex.Message);
 }
 Console.ReadKey();
 }
 public static string EncodeToBase64String(string original)
 {
 return Convert.ToBase64String(Encoding.UTF8.GetBytes(original));
 }
 private static void RespCallback(IAsyncResult result)
 {
 RequestState state = (RequestState)result.AsyncState; // Grab the custom state object
 WebRequest request = (WebRequest)state.Request;
 HttpWebResponse response =
 (HttpWebResponse)request.EndGetResponse(result); // Get the Response
 string statusCode = response.StatusCode.ToString();
 string reqId = response.GetResponseHeader("x-ms-request-id");
 Console.WriteLine("Creation Return Value: " + statusCode);
 Console.WriteLine("RequestId: " + reqId);
 }

 }
 }
That's it!!


Maarten Balliauw (@maartenballiauw) posted a Book review: Microsoft Windows Azure Development Cookbook on 8/22/2011:
Over the past few months, I’ve been doing technical reviewing for a great Windows Azure book: the Windows Azure Development Cookbook published by Packt. During this review I had no idea who the author of the book was but after publishing it seems the author is no one less than my fellow Windows Azure MVP Neil Mackenzie! If you read his blog you should know you should immediately buy this book.
Why? Well, Neil usually goes both broad and deep: all required context for understanding a recipe is given and the recipe itself goes deep enough to know most of the ins and outs of a specific feature of Windows Azure. Well written, to the point and clear to every reader both novice and expert.
The book is one of a series of cookbooks published by Packt. They are intended to provide “recipes” showing how to implement specific techniques in a particular technology. They don’t cover getting started scenarios, but do cover some basic techniques, some more advanced techniques and usually one or two expert techniques. From the cookbooks I’ve read, this approach works and should get you up to speed real quick. And that’s no different with this one.
Here’s a chapter overview:
- Controlling Access in the Windows Azure Platform
- Handling Blobs in Windows Azure
- Going NoSQL with Windows Azure Tables
- Disconnecting with Windows Azure Queues
- Developing Hosted Services for Windows Azure
- Digging into Windows Azure Diagnostics
- Managing Hosted Services with the Service Management API
- Using SQL Azure
- Looking at the Windows Azure AppFabric
An interesting sample chapter on the Service Management API can be found here.
Oh and before I forget: Neil, congratulations on your book! It was a pleasure doing the reviewing!

On order from Amazon.
The Windows Azure Team (@WindowsAzure) reported New Videos Showcase Windows Azure Customers in an 8/22/2011 post:
Check out these new videos to hear how customers Sogeti, Quosal and Paladin Systems have each tapped into the power of Windows Azure to cost-effectively grow their business and serve their customers.
Sogeti Creates the Windows Azure Privilege Club
Sogeti is a leading provider of professional technology services, specializing in application and infrastructure management and testing. Sogeti created the Windows Azure Privilege Club to bring together some of their enterprise clients and introduce them to Windows Azure. Sogeti employs more than 20,000 professionals in 15 countries.
Quosal Offers Cloud-Based Database, Sales Jump 50 Percent
Quosal wanted to offer a hosted version of its quote and proposal software to customers around the world, but this would require building three new data centers. Quosal turned to SQL Azure as an alternative to building its own global hosting infrastructure. Almost overnight this 10-person company gained access to a worldwide market of customers who benefit from having their Quosal databases hosted in the cloud, rather than managing their own on-premises servers. In 10 months, Quosal increased its customer base by 15 percent and global sales by 50 percent—while avoiding a planned U.S.$300,000 in infrastructure costs and ongoing monthly maintenance costs of $6,000.
Paladin Data Systems Reduces Operating Costs with SQL Azure
In 2009, Paladin Data Systems moved its planning and permits solution from the Oracle platform to SQL Server 2008 to attract small, municipal government customers. To make it easy for these jurisdictions to acquire and use the solution, called SMARTGov Community, Paladin wanted to offer a hosted version. Paladin turned to SQL Azure as a less expensive alternative to building its own hosting infrastructure. Almost immediately, attracted by the easy deployment, low maintenance, and reliability of a Microsoft-hosted solution, Paladin gained its first customer. Looking ahead, it expects increased market share and profit margins because it can provision customers in the cloud at a tenth of what it would have cost to host solutions in-house.
Learn how other customers are using Windows Azure.
<Return to section navigation list>
Visual Studio LightSwitch and Entity Framework 4.1+
Gill Cleeren described Cleaning a LightSwitch solution in an 8/22/2011 post to Snowball - The Blog:
When developing LightSwitch applications with Visual Studio, a newly created (and built) solution is quite heavy on disk space. We are talking of about 100 – 130MB per solution.

While creating the course material for Ordina’s upcoming LightSwitch course, I typically create many demo solutions, totaling several gigs of DLLs. Luckily, I found a *.cmd file in the downloads of Wrox’s excellent LightSwitch book: Beginning Microsoft Visual Studio LightSwitch Development by István Novák.
Running this file cleans all unnecessary files (which are recreated by Visual Studio) from the solution folder, making it easier to store many solutions on your local disk.
This is the contents of the *.CMD file:
@echo off
del /Q /S /A:H <solutionName>.suo
cd .\<solutionName>del /Q /S Client\bin
rd /Q /S Client\bin
del /Q /S Client\obj
rd /Q /S Client\objdel /Q /S ClientGenerated\bin
rd /Q /S ClientGenerated\bin
del /Q /S ClientGenerated\obj
rd /Q /S ClientGenerated\objdel /Q /S Common\bin
rd /Q /S Common\bin
del /Q /S Common\obj
rd /Q /S Common\objdel /Q /S Server\bin
rd /Q /S Server\bin
del /Q /S Server\obj
rd /Q /S Server\objdel /Q /S bin\Debug
rd /Q /S bin\Debug
del /Q /S bin\Release
rd /Q /S bin\Releasedel /Q /S ServerGenerated\bin
rd /Q /S ServerGenerated\bin
del /Q /S ServerGenerated\obj
rd /Q /S ServerGenerated\obj
del /Q /S _Pvt_Extensions
rd /Q /S _Pvt_Extensions
cd ..
echo Cleanup completed.
pauseYou can download the file from this link as well as a ZIP file: Cleanup.zip (.36 KB). If you download the samples of the book, you’ll have the file as well.
Cleaning your solution comes down to pasting this file in the same directory as where the solution (*.sln) (and *.suo if present) file are located:


Gill is is Microsoft Regional Director for Belgium.
Paul Patterson posted Microsoft LightSwitch – Telerik RadRichTextBox Document Database on 8/22/2011:
Okay, I just stumbled upon something that may just open the door to something really cool! Using a Telerik RadRichTextBox control, I was able to create a simple tool that would allow me to create and edit an HTML document, and then save the document to a database. Here is how I did it…
Win a FREE developer license for RadControls for Silverlight (worth $799)…
Telerik is offering a prize to one of you, LightSwitch developers: a FREE developer license for RadControls for Silverlight (worth $799) which you can use in you LightSwitch projects and/or to develop Silverlight applications! To participate in the drawing for this license, simply:
1. Tweet this blog post (title and URL)
2. Use the following hashtag in the tweet: #TelerikLightSwitch
Here is a tweet you use right away: #Telerik RadRichTextBox Document Database http://bit.ly/pgmrD7 #TelerikLightSwitch #LightSwitch
To raise your chances of winning, re-tweet this as many times as you would like in the next five (5) days. Telerik will collect all tweets and will contact the winner personally via a direct Twitter message. The winner’s name will also be publically announced in the @Telerik twitter account.
Good luck!
Using a third party control like the Telerik RadRichTextBox Silverlight control will certainly provide a great deal of new opportunities for some very interesting solutions. I was more than prepared to pound out a full blown document management system, but laziness got the best of me. However, that did not stop my mind from thinking of all the great things I could do with this control.
Having said that, let me take you through the steps I went through to for this project. If you follow along and do the same, I am sure you’ll see the possibilities for your own solutions.
Get the Control.
First off, download and install the latest Silverlight controls from Telrik (http://www.telerik.com/products/silverlight.aspx) . The particular control, and requisite assemblies are all included in the download. Even if just doing the trial version, go for it and try them out.
Create the Project
The first thing I did was create a brand new LightSwitch project. I named my new project MyLSRTFDatabase. In my case, I selected to create a Visual Basic LightSwitch application.

Yeah, yeah, yeah. Okay already. For those who are development language challenged, I WILL include C# versions of any code I provide. Geeez! (kidding of course! please do not spam me now
)
The first thing I did was create a simple table for my application. I named the table Article. The idea is to create an application where I can add and maintain drafts of blog articles, and then store the articles in a database. The article itself will be formatted in HTML and composed and saved via the Telerik RadRichTextBox control.
In my Article table I create just a couple of fields. The first is named Summary, which will be a summary title of the article. The second field is named ArticleContent. The ArticleContent field will be where the actual article will be stored.
For the ArticleContent field, I made emptied the value in the MaximumLength property. This is because the value that will be stored in this field is actually quite large, so I made sure to make this field one that will hold a large amount of data…

Now for some fun stuff. To use the control, I need to do some fancy dancing around File view of the solution. So, I right-click the solution in the Solution Explorer and selected to view the solution in File View…

In the file view of the solution I expanded the Client project and double clicked the My Project item to open the Client project properties dialog. (No need to do this in C#).

I then select the References tab and added the following references to the Client project. (In C# you can simply right-click the References item in the project to add references).
- System.Windows.Browser.dll
Main Telerik Assemblies
- Telerik.Windows.Controls.dll
- Telerik.Windows.Controls.ImageEditor.dll
- Telerik.Windows.Controls.Input.dll
- Telerik.Windows.Controls.Navigation.dll
- Telerik.Windows.Controls.RibbonBar.dll
- Telerik.Windows.Controls.RichTextBoxUI.dll
- Telerik.Windows.Data.dll
- Telerik.Windows.Documents.dll
Format providers for export/import
- Telerik.Windows.Documents.FormatProviders.Html.dll
- Telerik.Windows.Documents.FormatProviders.MsRichTextBoxXaml.dll
- Telerik.Windows.Documents.FormatProviders.OpenXml.dll
- Telerik.Windows.Documents.FormatProviders.Pdf.dll
- Telerik.Windows.Documents.FormatProviders.Rtf.dll
- Telerik.Windows.Documents.FormatProviders.Xaml.dll
Spell Checking
- Telerik.Windows.Documents.Proofing.dll
- Telerik.Windows.Documents.Proofing.Dictionaries.En-US.dll

Yikes! That’s a lot of assemblies, but worth it.
Back in the Solution Explorer I right-click the Client project and select to Add a New Item…

In the Add New Item dialog, I add a new Silverlight User Control with a name of MyArticleRTFEditor.xaml…

For some reason, the designer for the newly added control has a problem loading, and a bunch of errors get presented in the Error List. I click the Reload the designer link in the xaml editor and it appears that everything gets fixed the way it should…

… and the results…

Next, I locate the RadRichTextBox control in the Visual Studio IDE Toolbox panel and then drag and drop the control onto the xaml design surface for the user control…

This action fires up the RadRichTextBox Wizard. In the first screen of the wizard, select the Word Processor option, and then click the Next button. For the remaining wizard pages, accept the defaults and then finish…


When I hit the Finish button here, something didn’t quite work, and the result did not look like the control that was supposed to be added. What I did to get this to work properly is delete the RadRichTextBox control from the designer, and then went through the drag and drop, and wizzard, process again. That seemed to get the result I wanted (below)
In the resulting designer window, I updated some XMAL stuff so that control would fit the whole space. So I removed the Height=”500″ attribute from second grid layout.

If you were following along, but using a C# version of the solution, you don’t have to worry about this next part.
For some reason the VB.Net version of LightSwitch does not automagically apply the LightSwitchApplication namespace to the user control class (and resulting xaml as shown in the above diagram. Note the x:Class declaration at the top of the file). So this will have to be manually updated.
At the top of the MyArticleRTFEditor.xaml file, I updated the x:Class declaration to include the necessary namespace.

…and then I had to add the namespace to the code behind. I navigated to the MyArticleRTFEditor.xaml.vb file and double clicked it to open it in the editor, where I added the necessary namespace, and an import…

Finally, for the control, I needed to add some binding to it so that I could bind the content of the RTFEditor to the ArticleContent field of the Article table. This was achieved by using the Telerik HTMLDataProvider, as in shown below…

In the above image, the necessary namespace is declared so that a Telerik HtmlDataProvider can be added to the xaml. This data provider will be used to mitigate the binding that occurs for the sake of my screen. Here is the top portion of the xaml, so that you can copy and past the namespace declaration…
<UserControl x:Class="LightSwitchApplication.MyArticleRTFEditor"
    xmlns="http://schemas.microsoft.com/winfx/2006/xaml/presentation"
    xmlns:x="http://schemas.microsoft.com/winfx/2006/xaml"
    xmlns:d="http://schemas.microsoft.com/expression/blend/2008"
    xmlns:mc="http://schemas.openxmlformats.org/markup-compatibility/2006"
    xmlns:dHTML="clr-namespace:Telerik.Windows.Documents.FormatProviders.Html;assembly=Telerik.Windows.Documents.FormatProviders.Html"
    mc:Ignorable="d"
    d:DesignHeight="300" d:DesignWidth="400" xmlns:telerik="http://schemas.telerik.com/2008/xaml/presentation">
Note the binding that is occurring in the Html property of the HtmlDataProvider. This is telling the provider to bind to the Screen.ArticleProperty.ArticleContent on the screen that I will be building and using the control on.
Here is the part of the xaml that you may want to reference…
<telerik:RadRichTextBox Grid.Row="1" HorizontalAlignment="Stretch"
                                    IsContextMenuEnabled="True" IsSelectionMiniToolBarEnabled="True"
                                    IsSpellCheckingEnabled="True" LayoutMode="Paged"
                                    Margin="24,24,0,0" Name="RadRichTextBox1"
                                    VerticalAlignment="Stretch" >
                <telerik:RadRichTextBox.Resources>
                    <dHTML:HtmlDataProvider x:Key="HtmlDataProvider"
                                            RichTextBox="{Binding ElementName=RadRichTextBox1}"
                                            Html="{Binding Screen.ArticleProperty.ArticleContent1, Mode=TwoWay}" />
                </telerik:RadRichTextBox.Resources>
            </telerik:RadRichTextBox>
So that solves the first requirement to be able to edit a article. I am now going do the same process as the above, but to create a read only view control.
Again, I select to add a new SilverLight User Control to my Client project. This time I name the control MyRTFReader.xaml.
In the RadRichTextBox Wizard, I select Read Only DocumentViewer.

In the next wizard page, I select Html as the format provider, and deselect the Enable Selection checkbox…

…and in the resulting xaml file, I fine tune the control a bit so the whole thing shows on the grid, as well as add the necessary namespace stuff.
<UserControl x:Class="LightSwitchApplication.MyRTFReader"
    xmlns="http://schemas.microsoft.com/winfx/2006/xaml/presentation"
    xmlns:x="http://schemas.microsoft.com/winfx/2006/xaml"
    xmlns:d="http://schemas.microsoft.com/expression/blend/2008"
    xmlns:mc="http://schemas.openxmlformats.org/markup-compatibility/2006"
    mc:Ignorable="d"
    d:DesignHeight="300" d:DesignWidth="400" xmlns:telerik="http://schemas.telerik.com/2008/xaml/presentation" xmlns:my="clr-namespace:Telerik.Windows.Documents.FormatProviders.Html;assembly=Telerik.Windows.Documents.FormatProviders.Html">
    <Grid x:Name="LayoutRoot" Background="White">
        <telerik:RadRichTextBox HorizontalAlignment="Stretch" IsContextMenuEnabled="False"
                                IsReadOnly="True" IsSelectionEnabled="False" IsSelectionMiniToolBarEnabled="False"
                                IsSpellCheckingEnabled="False"  Name="RadRichTextBox1"
                                Margin="0,0,0,0" VerticalAlignment="Stretch" Background="White" BorderBrush="{x:Null}">
            <telerik:RadRichTextBox.Resources>
                <my:HtmlDataProvider x:Key="provider"
                                     RichTextBox="{Binding ElementName=RadRichTextBox1}"
                                     Html="{Binding Screen.Articles.SelectedItem.ArticleContent1}" />
            </telerik:RadRichTextBox.Resources>

        </telerik:RadRichTextBox>
    </Grid>
</UserControl>
Check out the Html binding in this control. This control is going to be used on a screen that contains a collection of Articles.
…and not to forget the code behind…
Imports System.Windows.Controls

Namespace LightSwitchApplication
    Partial Public Class MyRTFReader
        Inherits UserControl

        Public Sub New()
            InitializeComponent()
        End Sub

    End Class
End Namespace
Back to the solution explorer, I change my view of the solution explorer to Logical View so that I can start adding some screens.
For the first screen, I select to add a List and Details Screen, just like this…

Now for the creative stuff. In the resulting screen designer, I change the Article Content screen item to select to use a Custom Control…

To apply the new control to the screen item, click the Change link for the Article Content item…

This brings up the Add Custom Control dialog.
If you don’t see the controls you created listed in the Add Custom Control dialog, cancel out of the dialog and build the project and then try again.
At the time of this writing there appears to be a small bug in LightSwitch that causes some grief when adding and using custom controls. When adding controls that use other references, such as the imports I added early on in the project, it is necessary to also to add those references here via the Add Custom Control dialog. So, having said all that, I added those same references using this dialog. The below is what the Add Custom Control dialog should contain after the project is built, and the references added…

…and with that, I have my new custom control applied for use by the screen. This control is the read only control.
Next, I select to add another screen. This time it is one that I will use for adding and editing Articles.

With the resulting screen designer, I change Article Content item to use the editor control…

Finally, I have all (almost anyway) that I need to run this bad boy. But wait, there’s more!!
I applied some trickery to make for a much more intuitive user experience. For this CreateNewAndEditArticle screen, I first added a data item that I could use as a parameter for the screen…

..and made sure to configure the property as a parameter…

Next, I added some logic to the page by selecting to write some code for it…
…and here is the thing of beauty (comments should be self explanatory)…
Namespace LightSwitchApplication

    Public Class CreateNewAndEditArticle

        Private Sub CreateNewAndEditArticle_InitializeDataWorkspace(ByVal saveChangesTo As Global.System.Collections.Generic.List(Of Global.Microsoft.LightSwitch.IDataService))
            ' Check if the parameter has a value
            If Not Me.ArticleID.HasValue Then
                ' If not, it is a new article record.
                Me.ArticleProperty = New Article()

            Else
                ' The parameter has an article id, so get the article
                ' from the database.
                Dim article = (From a In DataWorkspace.ApplicationData.Articles
                               Where a.Id = Me.ArticleID Select a).First()
                ' Set the article as the article property for the screen.
                Me.ArticleProperty = article
            End If

        End Sub

        Private Sub CreateNewAndEditArticle_Saved()
            Me.Close(False)
        End Sub

    End Class

End Namespace
(C# Version)
using System;
using System.Linq;
using System.IO;
using System.IO.IsolatedStorage;
using System.Collections.Generic;
using Microsoft.LightSwitch;
using Microsoft.LightSwitch.Framework.Client;
using Microsoft.LightSwitch.Presentation;
using Microsoft.LightSwitch.Presentation.Extensions;

namespace LightSwitchApplication
{
    public partial class CreateNewAndEditArticle
    {
        partial void CreateNewAndEditArticle_InitializeDataWorkspace(List<IDataService> saveChangesTo)
        {
           if (!this.ArticleID.HasValue) {
               this.ArticleProperty = new Article();
           }
           else {

               Article existingArticle = (from a in DataWorkspace.ApplicationData.Articles
                                  where a.Id == (int)this.ArticleID select a).First();
               this.ArticleProperty = existingArticle;
           }
        }

        partial void CreateNewAndEditArticle_Saved()
        {
            // Write your code here.
            this.Close(false);
        }
    }
}
And back in the ArticlesListDetail screen, I selected to add some logic to the Add and Edit buttons on the screen…

And of course, the code…
Namespace LightSwitchApplication

    Public Class ArticlesListDetail

        Private Sub ArticleListAddAndEditNew_Execute()
            ' Open the ShowCreateNewAndEditArticle screen, but don't
            ' pass a parameter to it.
            Application.ShowCreateNewAndEditArticle(Nothing)
        End Sub

        Private Sub ArticleListEditSelected_CanExecute(ByRef result As Boolean)
            ' If the current record is valid, enable it.
            If Not Me.Articles.SelectedItem Is Nothing Then
                result = True
            End If

        End Sub

        Private Sub ArticleListEditSelected_Execute()
            Dim articleID As Integer = Me.Articles.SelectedItem.Id
            Application.ShowCreateNewAndEditArticle(articleID)
        End Sub
    End Class

End Namespace
(C# Version)
namespace LightSwitchApplication
{
    public partial class ArticlesListDetail
    {

       partial void ArticleListAddAndEditNew_Execute()
        {
            Application.ShowCreateNewAndEditArticle(null);
        }

       partial void ArticleListEditSelected_CanExecute(ref bool result)
       {
           if (this.Articles.SelectedItem != null )
           {
               result = true;
           }
       }

       partial void ArticleListEditSelected_Execute()
       {
           int articleID = this.Articles.SelectedItem.Id;
           Application.ShowCreateNewAndEditArticle(articleID);
       }
    }
}
Okay! Now lets run this sucker and see what happens…
Adding a record with an HTML document…

…and viewing it in the ListDetail screen…

…and selecting to edit it…

SCORE ONE FOR THE BIG GUY!
Wow, that was easy :p Actually, it all happened in a span of a couple of hours. So consider that, and the opportunities that would exist with a little bit of time and creativity.


The ADO.NET Team Blog announced EF 4.2 Beta 1 Available on 8/22/2011:
We recently posted about our plans to rationalize how we name, distribute and talk about releases. We heard a resounding ‘Yes’ from you so then we posted about our plans for releasing EF 4.2. Today we are making EF 4.2 Beta 1 available.
EF 4.2 = Bug Fix + Semantic Versioning
When we released ‘EF 4.1 Update 1’ we introduced a bug that affects third party EF providers using a generic class for their provider factory implementation, things such as WrappingProviderFactory<TProvider>. We missed this during our testing and it was reported by some of our provider writers after we had shipped. If you hit this bug you will get a FileLoadException stating “The given assembly name or codebase was invalid”. This bug is blocking some third party providers from working with ‘EF 4.1 Update 1’ and the only workaround for folks using an affected provider is to ask them to remain on EF 4.1. So, we will be shipping this version to fix it, this will be the only change between ‘EF 4.1 Update 1’ and ‘EF 4.2’. Obviously a single bug fix wouldn’t normally warrant bumping the minor version, but we also wanted to take the opportunity to get onto the semantic versioning path rather than calling the release ‘EF 4.1 Update 2’.
Getting EF 4.2 Beta 1
The Beta is available via NuGet as the EntityFramework.Preview package.
If you already have the EntityFramework package installed then installing the Beta will overwrite the existing reference in your project. If you used the standalone installer for ‘EF 4.1’ or ‘EF 4.1 Update 1’ there is no need to uninstall.
Templates for Model First & Database First
The templates for using DbContext with Database First or Model First are now available on Visual Studio Gallery, rather than in a standalone installer.
Note: The templates for C# and VB.NET applications (including ASP.Net Web Applications, MVC, etc.) are available. The templates for ‘Web Sites’ will be available soon.
Right Click on the designer surface and select ‘Add Code Generation Item…’:

Select ‘Online Templates’ from the left menu and search for DbContext:

Support
This is a preview of a future release and is designed to allow you to provide feedback. It is not intended or licensed for use in production. If you need assistance we have an Entity Framework Pre-Release Forum.
What’s Not in This Release?
As covered earlier this release is just a small update to the DbContext & Code First runtime. The features that were included in EF June 2011 CTP are part of the core Entity Framework runtime and will ship at a later date. Our Code First Migrations work is continuing and we are working to get the next alpha in your hands soon.


Michael Washington (@ADefWebserver) posted Using WCF RIA Services With LightSwitch: I Know You're Scared, I Understand to the OpenLightGroup.net blog on 8/20/2011 (missed when posted):
First item of business, you’re not wrong. If your code works, and you are happy with it, march on with my blessing!
This is not about telling anyone that they “are wrong”. It is written only to encourage you to consider using WCF RIA Services in your LightSwitch applications.
The “MVVM WARS”
My point is, I know what it feels like when other programmers tell you that you are wrong. This makes you defensive, because it is as if they are denying you the right to create your “art”. If you rather continue with your current techniques, please continue to do so and remember, I am not saying you are wrong.
Why You Won’t Use WCF RIA Services
Ok now we got that important part out of the way, let us now discuss why *I* would not use WCF RIA Services until recently. Yes, let me try and make my point by first calling myself on the carpet. I have been using LightSwitch for over a year, and the day I made my first LightSwitch WCF RIA Service was… only two months ago!
Now, my reasons for not using WCF RIA Services with LightSwitch may be different than yours:
- I had a really bad experience with WCF back in 2008 when I tried to incorporate it into the DotNetNuke IWeb project. I read books on the subject and created contracts, meta data, ect just to perform functions that were quite easy using normal web services (you will notice that all my Silverlight articles used standard .asmx web services not WCF).
- I did not want to complicate my LightSwitch application with code that I needed to maintain in more than one project.
Here are some of the reasons you may not want to use WCF RIA Services with LightSwitch:
- Programming is scary! Once you get a hang of the LightSwitch UI, you feel that it is something you can handle. A WCF RIA Service is a blank page and no safety net (well there is the compiler, but that’s only a safety net that an experienced programmer can appreciate).
- You can live with the limitations LightSwitch has.
LightSwitch Is A Sportscar – Drive Fast!
Reason number two is what motivated me to write this blog post. Because I believe that when you use WCF RIA Services and Silverlight Custom Controls, there is nothing that LightSwitch cannot do, that you could do with a normal Silverlight application.
LightSwitch is nothing more than a application builder to create Silverlight applications. It contains screens to assist in numerous tasks, but the LightSwitch team knew it was impossible to make a tool that was easy to use AND able to perform any task. From the start they designed it to allow you to use any WCF RIA Service for the input of data, and any Silverlight control to display the UI. LightSwitch is the thing that’s sits in the middle.
If you avoid using WCF RIA Services with LightSwitch, it would be like buying a sports car and never going past 3rd gear. LightSwitch was designed to be used with WCF RIA Services. This is what allows LightSwitch to be used for professional applications.
I have mostly concentrated on creating Silverlight Custom Controls with LightSwitch. I did not try to create any large applications until LightSwitch was finally released a few weeks ago. It was then that I discovered that the only way to get past any limitations was to use WCF RIA Services.
Why You Want To Use WCF RIA Services
Simply put, there are limitations to LightSwitch if you do not use WCF RIA Services. Here are some things that it wont do:
- Perform complex queries and aggregations (see: http://blogs.msdn.com/b/lightswitch/archive/2011/04/08/how-do-i-display-a-chart-built-on-aggregated-data-eric-erhardt.aspx)
- Connect to an OData Source (see: How to create a RIA service wrapper for OData Source)
- Combine two tables into one (see: WCF RIA Service: Combining Two Tables)
- Show multiple tables in one control (see: Using WCF RIA Services In LightSwitch To Simplify Your Application UI)
- Show anything but data from a table (see: Saving Files To File System With LightSwitch (Uploading Files))
The list goes on and on. LightSwitch was designed to handle the majority of situations that a Line-Of-Business (LOB) application requires without needing a WCF RIA Service, not All of them.
The Challenge
Are you up to a challenge? Walk through this tutorial:
WCF RIA Service: Combining Two Tables
And then decide if WCF RIA Services with LightSwitch are for you.
That’s it.
Further Reading
- Display a chart built on aggregated data (Eric Erhardt)
- How to create a RIA service wrapper for OData Source
- Using WCF RIA Services In LightSwitch To Simplify Your Application UI
- WCF RIA Service: Combining Two Tables
- Creating a Simple LightSwitch RIA Service (using POCO)
- Saving Files To File System With LightSwitch (Uploading Files)

Return to section navigation list>
Windows Azure Infrastructure and DevOps
Ryan Bateman (@ryanbateman) posted Cloud Provider Global Performance Ranking – July to Compuware’s CloudSleuth blog on 8/22/2011:
Here we are again with our monthly results gathered via the Global Provider View, ranking the response times seen from various backbone locations around the world.

Fig1: Cloud Provider Response times (seconds) from backbone locations around the world
Looking for previous results?
Per my usual disclaimer, please check out the Global Provider View Methodology for the background on this data and use the app itself for a more accurate representation of your specific geography.
Windows Azure (Microsoft’s North Central US data center) has been #1 in Compuware’s tests for the past few months.
Brian Swan (@brian_swan) wrote a Welcome to Windows Azure’s Silver Lining [Blog] on 8/22/2011:
Hello, and welcome to Windows Azure’s Silver Lining. This is a blog about doing interesting and useful things with the Windows Azure platform. What sort of things in particular? Things like running Open Source software on the Windows Azure Platform and developing cloud services for mobile devices. Those are broad categories, yes, but we have a team of writers (OK, only 2 right now) dedicated to covering them. Our aim is to make this blog a treasure trove of information for OSS and mobile device developers who want to understand how to take advantage of the Windows Azure platform to build world-class, highly available, highly scalable applications and services.
Now, you might be asking why we (Microsoft) are reaching out to Open Source and mobile device developers. Why aren’t we focusing only on .NET and Windows Phone 7 developers? That’s a fair question, and the answer is fairly simple: Microsoft understands how important interoperability is to the success of the Windows Azure platform. Satya Nadella, President of the Server and Tools Division at Microsoft, recently summed this up in his keynote address at Microsoft’s World Wide Partner Conference 2011 (full transcript available here):
“…we're building a very broad tent when it comes to the application platform supported and development tools supported. For sure, we're doing a first-class job when it comes to .NET and Visual Studio. But beyond that, we also want to make sure we have first-class support for Java, PHP, and other frameworks... So, we want to have Windows Azure truly reflect our big-tent approach to developers and development platforms.”
With a little web hunting, you can already find lots of resources (many of them Microsoft-produced) that are aimed at supporting OSS frameworks in Azure. Our goal is to add to those resources and help the Azure team take the steps that are necessary to build “first-class support” for these frameworks.
That is the “What” and “Why” of this blog. Let’s take a look at the “Who”. As mentioned earlier, we are currently 2 authors strong, but we hope to bring on more contributors in the near future. Here’s a bit about each of us…
Larry Franks: I'm a classically trained programmer (meaning everything I learned in college is now obsolete,) occasional artist, and gaming geek. I know it sounds cliché, but I'm contributing to this blog because I think cloud and mobile computing is the future. We have cell phones that let us carry around an entire library of books and large music collections. We have distributed resilient networks that let people communicate ideas at the speed of light and organize global communities. Very exciting stuff, especially compared to my early days with computers: 300bps dial-up to the local BBS scene.
At Microsoft, I currently work on developer focused documentation for SQL Azure. I've recently started learning Ruby, so many of my initial posts will be about using Ruby with the Windows Azure Platform. I also play around with mobile development in my spare time, so you might see the occasional WP7/IOS/Android posting. You can find me on twitter at @larry_franks.
Brian Swan: I’m a math guy by training (I was a high school and junior college math teacher for 14 years before I changed careers 5 years ago) and was a hobbyist programmer from my college days until I changed careers (I had a computer science minor in college and dabbled in teaching introductory computer science in my teaching days).
I’m passionate about PHP. It was learning enough PHP in 2 weeks to impress interviewers that allowed me to change careers, and I’ve been learning PHP ever since. I wrote the original documentation for our PHP Driver for SQL Server and I’ve been blogging about PHP and Microsoft technologies for over a year and a half. I regularly attend (and occasionally present at) the Seattle PHP Meetup, and I’ve presented at the Dutch PHP Conference (2010), the PHP World Kongress (2010), TechEd Europe (2010), and the SQL Server JumpIn! Camp (2011). You can find me on Twitter at @brian_swan.
As you might guess, I’ll be focusing on PHP. I’ll be covering the details of deploying, debugging, tuning, and scaling PHP applications running on Windows Azure platform.
We are looking forward to learning and sharing what we learn about developing OSS and device applications for the Windows Azure platform. If that sounds interesting, please subscribe and send us your comments and questions.

Thanks to Mary Jo Foley (@maryjofoley) for the heads up on this new blog. Following.
Brian posted a lengthy Designing and Building Applications for the Cloud overview post on 8/23/2011.
<Return to section navigation list>
Windows Azure Platform Appliance (WAPA), Hyper-V and Private/Hybrid Clouds
Yung Chou posted the first episode of System Center Virtual Machine Manager (VMM) 2012 as [a] Private Cloud Enabler (1/5): Concepts on 8/23/2011:
This the first of a 5-part series examining the key architectural concepts and relevant operations of private cloud based on VMM 2012 including:
- Part 1. Private Cloud Concepts (this article)
- Part 2. Oh, Fabric
- Part 3. Service Template
- Part 4. Private Cloud Lifecycle
- Part 5. Application Controller
VMM, a member of Microsoft System Center suite, is an enterprise solution for managing policies, processes, and best practices with automations by discovering, capturing and aggregating knowledge of virtualization infrastructure. In addition to the system requirements and the new features and capabilities, there are specific concepts presented in this article, although fundamental, nevertheless important to know before building a private cloud solution with VMM 2012. This blog series also assume a reader has a basics understanding of cloud computing. For those not familiar with cloud computing, I recommend first acquiring the baseline information form: my 6-part series, NIST definition, Chou’s 5-3-2 Principle, and hybrid deployment.
Private Cloud in VMM 2012
Private cloud is a “cloud” which is dedicated to an organization ,hence private. Notice that the classification of private cloud or public cloud is not based on where a service is run or who owns the employed hardware. Instead, the classification is based on whom, i.e. the users, that a cloud is intended to serve. Which is to say that deploying a cloud to a company’s hardware does not automatically make it a private cloud of the company’s. Similarly a cloud hosted in hardware owned by a 3rd party does not make it a public cloud by default either.
Nevertheless, as far as VMM 2012 is concerned, a private cloud is specifically deployed with an organization’s own hardware, provisioned and managed on-premises by the organization. VMM 2012 succeeding VMM 2008 R2
represents a significant leap in enterprise system management and acts as a private cloud enabler to accelerate transitioning enterprise IT from an infrastructure-focused deployment model into a service-oriented user-centric, cloud-ready and cloud-friendly environment, as a reader will learn more of the capabilities of VMM 2012 throughout this series.
And There Is This Thing Called “Fabric’
The key architectural concept of private cloud in VMM 2012 is the so-called fabric. Similar to what is in Windows Azure Platform, fabric in VMM 2012 is an abstraction layer to shield the underlying technical complexities and denote the ability to manage defined resources pools of compute (i.e. servers), networking, and storage in the associated enterprise infrastructure. This concept is explicitly presented in the UI of VMM 2012 admin console as shown here on the right. With VMM 2012, an organization can create a private cloud from Hyper-V, VMware ESX, and Citrix XenServer hosts and realize the essential attributes of cloud computing including self-servicing, resource pooling, and elasticity.
Service in VMM 2012
One noticeable distinction of VMM 2012 compared with previous versions of VMM and other similar system management solutions is, in addition to deploying VMs, the ability to roll out a service. I have taken various opportunities in my previous blogs emphasizing the significance of being keen on what is a service and what is cloud to fully appreciate the business values brought by cloud computing. The term, service, is used often indiscreetly to explain cloud and without a grip on what is precisely a service, cloud can indeed be filled with perplexities.
Essentially, the concept of a service in cloud computing is “capacity on demand.” So delivering a service is to provide a business function which is available on demand, i.e. ideally with an anytime, anywhere, and any device access. In private cloud, this is achieved mainly by a combination of self-servicing model, management of resource pooling, and rapid elasticity which are the 3 of the 5 essential characteristics of cloud computing. Specific to private cloud, the 2 other characteristics, i.e. broad access to and chargeback business models in the service (or simply the application since in the context of cloud computing, an application is delivered as a service) are non-essential since in a private setting an organization may not want to offer broad access to a service and a chargeback model may not always be applicable or necessary as already discussed elsewhere.
Particularly, a service in VMM 2012 is implemented by a set of virtual machines (VMs) working together to collectively deliver a business function. To deploy a service in VMM 2012 is therefore to roll out a set of VMs as a whole, as opposed to individually VMs. Managing all the VMs associated with a service as an entity, i.e. a private cloud, has its advantages and at the same time introduces opportunities and challenges as well for better delivering business values. Service Template is an example.
Service Template
An exciting feature of VMM 2012 is the introduction of a service template, a set of definitions capturing all configuration settings for a single release of a service. As a new release of a service is introduced due to changes of the application, settings, or VM images, a new service template is as well developed. With a service template, a cloud administrator can deploy a service which consists of a set of VMs that are multi-tiered and possibly with multiple VM instances in individual tiers based on the service configuration. For instance, instead of deploying individual VMs, using a service template in VMM 2012 IT can now deploy and manage a typical web-based application with web frontends, business logic in a middle tier, and a database backend as a single service.
Private Cloud It Is
VMM 2012 signifies a milestone for enterprise IT to actually have a solution to operate like a service provider. As VMM 2012 soon to be released, IT as a service is becoming a reality. And while some IT professionals are concerning that cloud may take away their jobs, I am hoping on the contrary as reading through this series one will realize the energy and excitements cloud computing has already brought into our IT industry and broadened careers. I believe private cloud is as yet the greatest thing happens to IT. Every time anticipations and curiosities arise as I start envisioning so many possibilities IT can do with private cloud. It is inspiring to witness cloud computing coming true and be part of it. … [Closing doggerel elided.]

The preceding description doesn’t appear to include all promised WAPA features. I assume that part 5’s “Application Controller” is the former Project “Concero.”
David Linthicum (@DavidLinthicum) asserted “CSC's fake 'private cloud' -- and the willingness of some reporters to call it out -- may bring down cloud washing” as a deck for his More fuel for the brewing 'private cloud' rebellion article of 8/13/2011 for InfoWorld’s Cloud Computing blog:
I love reading the international technical press and its coverage of cloud computing. Those writers seem to be a lot less enamored with the hype than their American counterparts, and they provide sobering analysis.
Such was the case in this Delimiter article that talks about Computer Science Corporation (CSC) offering what the company claims is a new concept in cloud computing: the "on-premise private cloud." The service launched by CSC in Australia is based upon the vCloud offering from VMware, Cisco Systems, and EMC (VMware's parent) -- there's nothing new there. Pretty much every large services organization has a similar grouping of technology that it has knitted together and call a "private cloud."
CSC's item does not look like a cloud to me. The reporters and editors at Delimiter had the same reaction and were unafraid to say it publicly: "'On-premise private cloud,' my ass. CSC might as well just call this a managed service and be done with it. Frankly, describing this as cloud computing infrastructure is really quite a misnomer. Not only is the service hosted on customers' premises, but there would appear to be little real opportunity for dynamic expansion of the services used, as in the classic cloud computing paradigm."
Although the analysis is not very politically correct, the underlying message is spot on. In a previous post, I already said how the term "cloud computing" is becoming meaningless. This CSC offering is just another reason why, but CSC is just joining the party -- everyone is doing it.
However, that party could soon be ending. There seems to be emerging anger around this kind of spin. Corporate IT, bloggers, consultants, and others are beginning to push back on the "cloud washing." (Calling a loose grouping of technology that in no way resembles a private cloud is a prime example of cloud washing.)
Perhaps with enough outrage, companies like CSC will stop trying to fool others -- and themselves. Until then, the expression "fake it till you make it" defines what many vendors are doing in the emerging cloud computing market.

<Return to section navigation list>
Cloud Security and Governance
Lori MacVittie (@lmacvittie) asserted If you take one thing away from the ability to programmatically control infrastructure components take this: it’s imperative to maintaining a positive security posture as an introduction to her The Infrastructure 2.0 - Security Connection post of 8/22/2011 to F5’s DevCentral blog:
You’ve heard it before, I’m sure. The biggest threat to organizational security is your own employees. Most of the time we associate that with end-users who may with purposeful intent to do harm carry corporate information offsite but just as frequently we cite employees who intended no harm – they simply wanted to work from home and then Murphy’s Law took over, resulting in the inadvertent loss of that sensitive (and often highly regulated) data. “The 2009 CSI Computer Crime survey, probably one of the most respected reports covering insider threats, says insiders are responsible for 43 percent of malicious attacks.” (The true extent of insider security threats, May 2010)
And yet one of the few respected reports concerning the “insider threat” indicates that the danger comes not just from end-users but from administrators/operators as well. Consider a very recent case carried out by a disgruntled (former) administrator and its impact on both operations and the costs to the organization, which anecdotally backup the claim “insider breaches are more costly than outsider breaches” (Interesting Insider Threat Statistics, October 2010) made by 67% of respondents to a survey on security incidents.
The Feb. 3 attack effectively froze Shionogi's operations for a number of days, leaving company employees unable to ship product, to cut checks, or even to communicate via e-mail," the U.S. Department of Justice said in court filings. Total cost to Shionogi: $800,000.
Cornish had resigned from the company in July 2010 after getting into a dispute with management, but he had been kept on as a consultant for two more months.
Then, in September 2010, the drug-maker laid off Cornish and other employees, but it did a bad job of revoking passwords to the network.
(Fired techie created virtual chaos at pharma company, August 2011)
Let us pause for a moment and reflect upon that statement: it did a bad job of revoking passwords to the network.
Yeah. The network. See, a lot of folks picked up on the piece of this story that was directly related to virtualization because Mr. Malicious leveraged a virtualization management solution to more efficiently delete, one by one, critical operational systems. But what’s really important here is the abstraction of the root cause – failure to revoke access to the network – because it gets to the heart of a much deeper rooted and insidious security threat: the disconnected way in which we manage access to data center infrastructure.
INFRASTRUCTURE IDENTITY MANAGEMENT
Many years ago I spent an entire summer automating identity management from a security perspective using a variety of tools available at the time. These systems enabled IT to automate the process of both provisioning and revocation of access to just about any system in the data center – with the exception of the network. Now that wasn’t a failing on the part of the systems as much as it was the lack of the means to do so. Infrastructure 2.0 and its implied programmatic interfaces were just starting to pop up here and there throughout the industry so there were very few options for including infrastructure component access in the automated processes. For the most part these comprehensive identity management systems focused on end-user account management so that wasn’t as problematic as it might be today. But let’s consider not only where IT is headed but where we are today with virtualization and cloud computing and how access to resources are provisioned today and how they might be provisioned tomorrow.
Are you getting the sense that we might need something akin to identity management systems to automate the processes to provision and revoke access to infrastructure components? I thought you might.
The sheer volume of “services” that might be self-service provisioned and thus require management as well as eventual revocation are overwhelming*.Couple that with the increasing concentration of “power” in several strategic points of control throughout the network from which an organization’s operational posture may be compromised with relative ease and it becomes fairly clear that this is not a job for an individual but for a systematic process that is consistent and adaptable.
What needs to happen when an employee leaves the organization – regardless of the circumstances – is their access footprint needs to be wiped away. For IT this can be highly problematic because it’s often the case that “shared” passwords are used to manage network components and thus all passwords must be changed at the same time. It’s also important to seek and destroy those accounts that were created “just in case” as backdoors that were not specifically authorized. These “orphan” accounts, as they are often referred to in the broader identity management paradigm, must be eradicated to ensure illegitimate access is not available to rogue or disgruntled operators and administrators.
(And let’s not forget cloud computing and the challenges that introduces. Incorporating management of remote resources will become critical as organizations deploy more important applications and services in “the cloud.” )
None of these processes – revocation, mass password changes, and orphan account discovery – are particularly sought after tasks. They are tedious and fraught with peril, for the potential to miss one account can be disastrous to systems. A systematic, programmatic, automated process is the best option; one that is integrated and thus able to not only manage credentials across the infrastructure but recognize those credentials that were not authorized to be created. The bonus in implementing such a system is that it, in turn, can aid in the evolution of the data center toward a more dynamic, self-service oriented set of systems.
THE INFRASTRUCTURE 2.0 CONNECTION
Thus we arrive at the means of integration with these identity management systems: infrastructure 2.0. APIs, service-enabled SDKs, service-oriented infrastructure. Whatever you prefer to call these components it is the ability to integrate and programmatically control infrastructure components from a more holistic identity management system that enables the automation of processes designed to provision, manage, and ultimately revoke access to critical infrastructure components. Without the ability to integrate these systems, it becomes necessary to rely on more traditional, old-skool methods of management involving secure shell access and remote scripts that may or may not themselves be a source of potential compromise.
The ability to manage identity and access rights to infrastructure components is critical to maintaining a positive security – and operational – posture. It’s not that we don’t have the means by which we can accomplish what is certainly a task of significant proportions given the currently entrenched almost laissez-faire methodology in data centers today toward access management, it’s that we haven’t stepped back and taken a clear picture of the ramifications of not undertaking such a gargantuan task. The existence of programmatic APIs means it is possible to incorporate into a larger automation the provisioning and revocation of credentials across the data center. What’s not perhaps so simple is implementation, which may require infrastructure developers or very development-oriented operators capable of programmatically integrating existing APIs or architecting new, organizational process-specific services that can be incorporated into the data center management framework.
More difficult will be the integration of operational process automation for credential management into HR and corporate-wide systems to enable the triggering of revocation processes. For a while, at least, these may need to be manually initiated. The important piece, however, is that they are initiated in the first place. Infrastructure 2.0 makes it possible to architect and implement the systems necessary to automate infrastructure credential management, but it will take a concerted effort on the part of IT – and perhaps a highly collaborative one at that – to fully integrate those systems into the broader context of IT and, ultimately, the “business.”
* This is one of the reasons I advocate a stateless infrastructure, but given the absence of mechanisms through which such an architecture could be implemented, well, it’s not productive to wish for rainbows and unicorns when what you have is clouds and goats.


<Return to section navigation list>
Cloud Computing Events
Nathan Totten (@ntotten) posted //BUILD on 8/22/2011:

Nathan is the first person to admit to presenting a session at BUILD whom I’ve discovered to date.
Microsoft is one of the sponsors of the TechGate Conference 2012 to be held 9/17/2011 from 8:00 AM to 4 PM at the Microsoft DC office, 12012 Sunset Hills Road, Reston, VA 20190. From the Windows Azure announcement’s Schedule:

<Return to section navigation list>
Other Cloud Computing Platforms and Services
SD Times Newswire reported Engine Yard Joins Forces with Orchestra in an 8/23/2011 press release:
Engine Yard, the leading Platform as a Service (PaaS), has signed a definitive agreement to acquire Orchestra, bringing deep PHP expertise to the Engine Yard platform.
Engine Yard has established itself as the best Platform as a Service for Ruby on Rails applications. The company supports thousands of customers, ranging from fast-growing Web 2.0 start-ups to Fortune 500 enterprises, which are located in 45 countries, and consume 35 million CPU hours quarterly.
“The Engine Yard PaaS is the leading choice for development teams that need to build highly reliable, scalable Ruby on Rails applications because we deliver deep expertise, a curated stack, and expert support services,” said John Dillon, CEO of Engine Yard. “Engine Yard has powered some of the fastest growing businesses in history. With Orchestra and its team of dedicated PHP contributors joining Engine Yard, we're extending our platform into an adjacent market to help PHP developers achieve the same success.”
Engine Yard will accelerate development of the Orchestra PHP platform by increasing investment and leveraging the experience, expertise and leadership, which have fueled the company’s rapid growth over the past five years. PHP and Ruby on Rails developers alike will benefit from access to world-class orchestration, support, service and training.
“As passionate and long-time members of the PHP community, we created Orchestra to offer a better experience to PHP developers by reducing the time, costs and risks of setting up and scaling reliable PHP applications,” said Eamon Leonard, CEO of Orchestra. “By joining Engine Yard, we will accelerate our delivery of this vision and provide developers with exceptional support, services and technology.”
The Orchestra team includes highly active PHP contributors. Some of the key projects that Orchestra has supported include PEAR and PEAR2 (library repository), including the PEAR installer and its successor Pyrus (The PHP component manager), FRAPI (a high-level API framework), CakePHP (a rapid development framework for PHP), Lithium (lightweight, fast, flexible framework for PHP 5.3), SPL (Standard PHP Library) and more. This commitment to the community is consistent with the Engine Yard tradition of leadership and participation in key open source initiatives. Following the acquisition, Engine Yard will continue to make substantial investment in both Ruby on Rails and PHP open source communities and projects.
For additional information, please visit: http://www.engineyard.com/orchestra.

Kenneth van Surksum (@kennethvs) reported Release: Nimbula Director 1.5 in an 8/22/2011 post:
In April this year, Nimbula launched the first version of its product Director, a tool assisting the creation of Private, Public and Hybrid cloud solutions running on top of a Linux distribution (CentOS based) supporting KVM virtualization. Director promises an Amazon EC2-like experience for enterprises and service providers. The company is founded by Chris Pinkham and Willem van Biljon, both formerly Amazon executives, who initiated and developed EC2.

Now Nimbula has announced version 1.5 of Director introducing support for geographically distributed clouds, managing them from a single view.
The new version also adds the following new features:
- Policy based automation
- Storage Management functionality
- Packaging up a choice of OS as a customized basis for cloud deployment


Jesus Rodriguez compared Cloud Wars: Windows Azure vs. Amazon AWS, an IaaS perspective in an 8/22/2011 post:
During our recent Tellago Technology Update about cloud platforms, we received a number of questions related to equivalent capabilities in the Windows Azure and Amazon AWS platforms. That’s right, although Windows Azure is positioned as a Platform as a Service(PaaS), the fact of the matter is that there it includes many Infrastructure as a Service(IaaS) capabilities that are comparable to the Amazon AWS stack.
Given how often I see customers struggle to get an accurate evaluation of the capabilities of the different cloud platforms, I’ve decided to start a series of blog posts that compare and contrast the feature set of different cloud technology stacks.
From all the different cloud platforms in the current market, the comparison between Windows Azure and Amazon AWS seems to be at the top of the list of most Microsoft customers. The reason is pretty obvious, Amazon AWS is the clear dominant force in the IaaS market but Windows Azure brings a unique value proposition that combines IaaS, PaaS together with the deep integration with on-premise Microsoft technologies.
I think the following table might help illustrate the equivalent capabilities in both platforms.
Capability
Windows Azure Technology
Amazon AWS Technology
Data Storage
Binary Data Storage Blob Storage S3 NOSQL Database Table Service SimpleDB Relational Database SQL Azure Relational Database Service Messaging
Queuing Windows Azure Queues Windows Azure AppFabric Queues Simple Queue Service Pub-Sub, Notifications Windows Azure AppFabric Topics Simple Notifications Service Computing
Virtualization Windows Azure Web, Worker and VM Roles Amazon Elastic Computing Cloud (EC2) Content Delivery
Content Delivery Service Content Delivery Network (CDN) CloudFront Networking
Traffic Management Traffic Manager Route 53 Private Networks Windows Azure Connect Direct Connect Identity
Identity Management Windows Azure AppFabric Access Control Service Identity and Access Management Services

In subsequent posts, we will start deep diving into specific comparisons of each one of these capabilities.
Understandably, Jesus didn’t compare Windows Azure Caching with the just-announced Amazon ElastiCache (see below posts.)
Werner Vogels (@Werner) posted Expanding the Cloud - Introducing Amazon ElastiCache to his All Things Distributed blog on 8/22/2011:
Today AWS has launched Amazon ElastiCache, a new service that makes it easy to add distributed in-memory caching to any application. Amazon ElastiCache handles the complexity of creating, scaling and managing an in-memory cache to free up brainpower for more differentiating activities. There are many success stories about the effectiveness of caching in many different scenarios; next to helping applications achieving fast and predictable performance, it often protects databases from requests bursts and brownouts under overload conditions. Systems that make extensive use of caching almost all report a significant reduction in the cost of their database tier. Given the widespread use of caching in many of the applications in the AWS Cloud, a caching service had been high on the request list of our customers.

Caching has become a standard component in many applications to achieve a fast and predictable performance, but maintaining a collection of cache servers in a reliable and scalable manner is not a simple task. These efforts clearly fall into the category of "operational muck", but given the widespread usage of caching, maintenance of cache servers is no longer a differentiator and everyone will have to uptake it as the "costs of doing business". Amazon ElastiCache takes away many of the headaches of deploying, operating and scaling the caching infrastructure. A Cache Cluster, which is a set of collaborating Cache Nodes, can be started in minutes. Scaling the total memory in the Cache Cluster is under complete control of the customers as Caching Nodes can be added and deleted on demand. Amazon Cloudwatch can be used to get detailed metrics about the performance of the Cache Nodes. Amazon ElastiCache automatically detects and replaces failed Cache Nodes to protect the cluster from those failure scenarios. Access to the Cache Cluster is controlled using Cache Security Groups giving customers full control over which application components can access which Cache Cluster.
Amazon ElastiCache is compliant with Memcached, which makes it easy for developers who are already familiar with that system to start using the service immediately. Existing applications, tools and libraries that are using a Memcached environment can simply switch over to using Amazon ElastiCache without much effort.
For more details on Amazon ElastiCache visit the detail page of the service. For more hands-on information and to get started right away, see Jeff Barr's posting on the AWS Developer Blog. Please note that Amazon ElastiCache is currently available in the US East (Virginia) Region. It will be available in other AWS Regions in the coming months.


Jeff Barr (@jeffbarr) described Amazon ElastiCache - Distributed In-Memory Caching in an 8/22/2011 post:
Today we are introducing Amazon ElastiCache so that you can easily add caching logic to your application. You can now create Cache Clusters, each comprised of one or more Cache Nodes, in a matter of minutes. Each Cache Cluster is a distributed, in-memory cache that can be accessed using the popular Memcached protocol.
What's Caching?
You can often make your application run faster by caching critical pieces of data in memory. Information that is often cached includes the results of time-consuming database queries or the results of complex calculations.
Suppose that your application includes a function called Calculate, and that it accepts two parameters, and that it is an actual function in the mathematical sense, where there's precisely one output for each input. The non-cached version of Calculate would look like this:
function Calculate(A, B)
{
C = [some lengthy calculation dependent on A and B];
return C;
}If numerous calls to Calculate are making your application run too slowly, you can cache previous answers like this:
function CachedCalculate(A, B)
{
C = Cache.Get("Calculate", A, B);
if (C == null)
{
C = Calculate(A, B);
Cache.Put("Calculate", A, B, C);
}
return C;
}In this example, the Cache keys are the string "Calculate" and the values of A and B. In practice these three values are generally combined into a single string key. The Cache will store previously computed values. Implicit in this example is the assumption that it takes more time to perform the calculation than it does to check the cache. Also implicit is the fact that the cache can expire or evict values if they become too old or if the cache becomes full.
You can also cache the results of database queries. The tradeoffs here can be a little bit more complicated and will often involve the ratio of reads to writes for a given query or for the tables referenced in the query. If you are implementing your own social network, it would be worthwhile to cache each user's list of friends if this information is required with great regularity (perhaps several times per minute) but changes infrequently (hourly or daily). In this case your cache key would include the name of the query and the user name; something like "getfriends_jeffbarr." In order to make sure that the cache does not contain outdated information, you would invalidate the data stored under this key each time you alter the friend list for a particular user. I don't have room to list all of the considerations; for more information check out the following articles on the High Scalability blog:
- A Bunch of Great Strategies for Using Memcached and MySQL Better Together
- Secrets to Fotolog's Scaling Success
Getting Started
If you are already running Memcached on some Amazon EC2 instances, you can simply create a new cluster and point your existing code at the nodes in the cluster. If you are not using any caching, you'll need to spend some time examining your application architecture in order to figure out how to get started. Memcached client libraries exist for just about every popular programming language.Terminology
You will need to learn a few new terms in order to fully understand and appreciate ElastiCache. Here is a quick reference:
- A Cache Security Group regulates access to the Cache Nodes in a Cache Cluster.
- A Cache Cluster is a collection of Cache Nodes. Each cluster resides in a particular AWS Availability Zone.
- A Cache Node is a processing and storage unit within a Cache Cluster. The size of a cluster can be increased or decreased as needed. Each node runs a particular version of a Cache Engine. Amazon ElastiCache supports nodes with cache sizes ranging from 6 to 67 GB. A DNS name is assigned to each Cache Node when it is created.
- A Cache Engine implements a caching protocol, algorithm, and strategy. The initial release of Amazon ElastiCache supports version 1.4.5 of Memcached.
- A Cache Parameter Group holds a set of configuration values that are specific to a particular type and version of a Cache Engine.
Architecture
Here is how it all fits together:
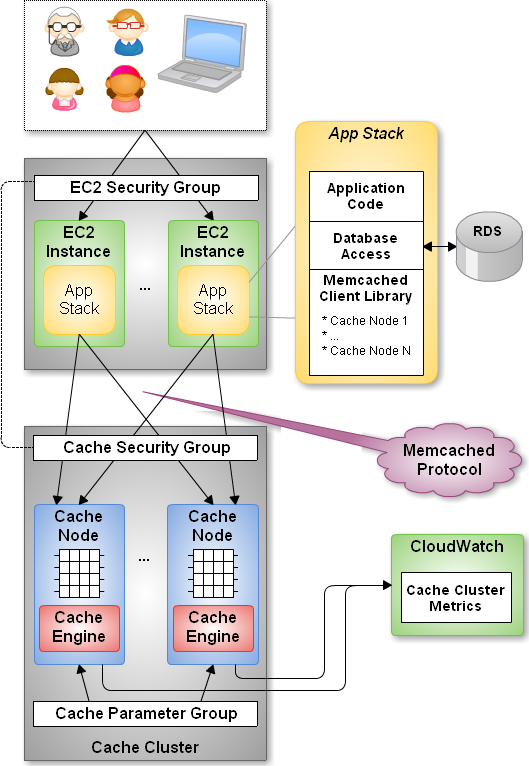
Creating a Cluster Using the Console
The AWS Management Console includes complete support for Amazon ElastiCache. Let's walk through the process of creating a cluster.The first step is to create a Cache Security Group. Each such group allows access to the cluster from the EC2 instances associated with one or more EC2 Security Groups. The EC2 security groups are identified by name and AWS Account Id:
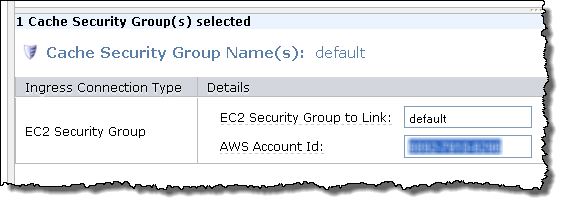
Next, we can create the Cache Cluster. The console makes this quick and easy using a wizard. Push the button to get started:

First, name the cluster, choose the node type, and set the number of nodes. You can also set the port and the Availability Zone, and you can choose to receive notification from Amazon SNS on the topic of your choice. You can also give Amazon ElastiCache permission to automatically perform upgrades to the Cache Engine when a new minor version is available:
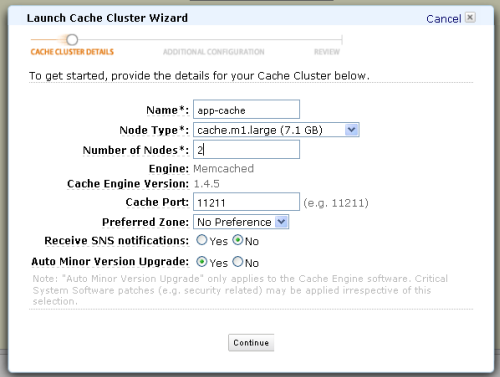
Next, you can select one or more Cache Security Groups, and a Cache Parameter Group. You can also specify a maintenance window during which Amazon ElastiCache will install patches and perform other pending modifications to the cluster.
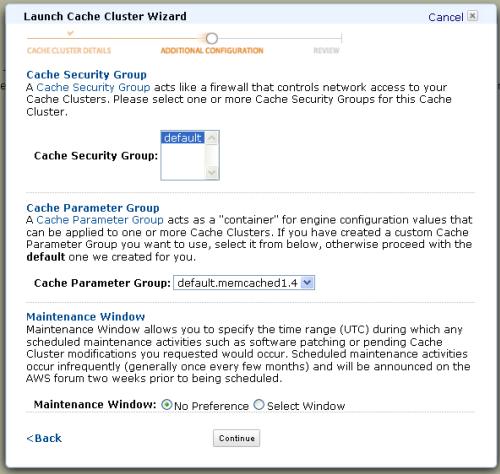
Finally, confirm your selections and launch the cluster:
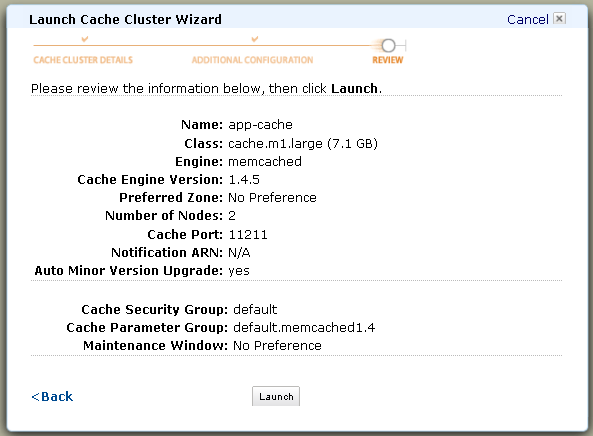
The cluster will be up and running within a few minutes. Once it is ready, you can copy the list of endpoints and use them to configure your application (you can also retrieve this information programmatically using the Amazon ElastiCache APIs):
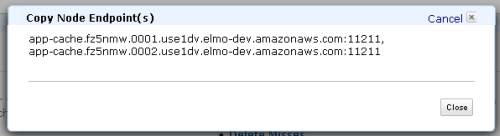
You can click on any of your clusters to see a description of the cluster:
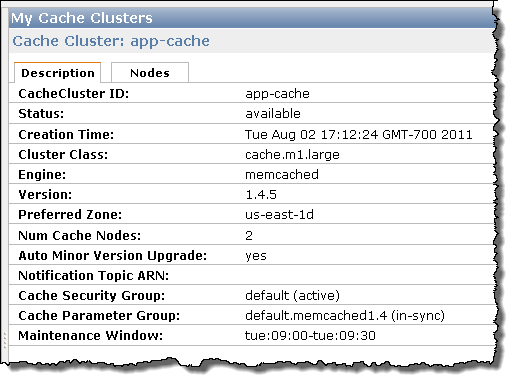
The Nodes tab contains information about each of the Cluster Nodes in the selected cluster:
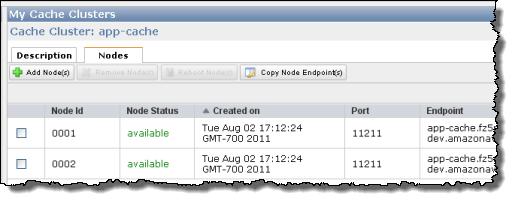
Each Cache Node reports a number of metrics to Amazon CloudWatch. You can watch these metrics to measure the efficacy of your caching strategy. The metrics should also give you the information that you need to make sure that you have enough memory devoted to caching.
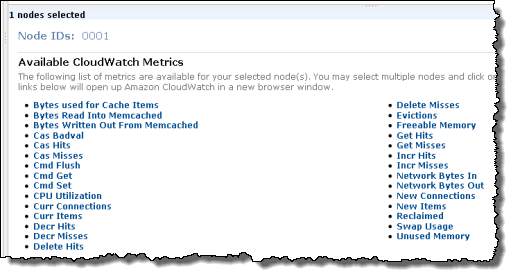
You can also inspect each of your Cache Parameter Groups. The groups can be modified using the Amazon ElastiCache APIs or from the command line.
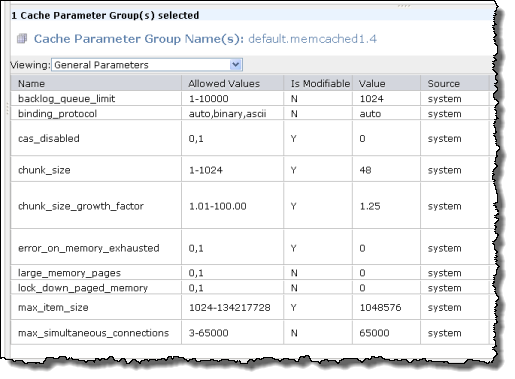
Caching in Action
Once you have launched your cluster, you can configure the DNS names of the nodes into the client library of your choice. At present this is a manual copy and paste process. However, over time, I expect some of the client libraries to add Amazon ElastiCache support and thereby obviate this configuration step.Your application can elect to receive an Amazon SNS (Simple Notification Service) notification when a cluster is created, or when nodes are added to or removed from an existing cluster.
You should definitely watch the CloudWatch metrics for your Nodes, and you should adjust the type and number of nodes as necessary.
Client Libraries and Node Selection
Most of the client libraries treat the cluster as a unit. In other words, you direct your Put and Get requests to the cluster and the library will algorithmically choose a particular node. The libraries do this using a hash function to spread the data out across the nodes.If you plan to dynamically resize your cluster, you need to make sure that you client library uses a consistent hash function. A function of this type produces results that will remain valid even as the size of the cluster changes. Ketama is a popular consistent hashing algorithm for Memcached; you can read all about it here.
Watch the Movie
AWS Evangelist Simone Brunozzi has produced a completed demonstration of Amazon ElastiCache in action:Video: Turbocharge your apps with Amazon ElastiCache
View more videos from Amazon Web Services


AWS is catching up with Windows Azure on the cache front.
<Return to section navigation list>


0 comments:
Post a Comment