Windows Azure and Cloud Computing Posts for 12/17/2012+
| A compendium of Windows Azure, Service Bus, EAI & EDI, Access Control, Connect, SQL Azure Database, and other cloud-computing articles. |
•• Updated 12/22/2012 4:00 PM with new articles marked ••.
• Updated 12/20/2012 1:00 PM with new articles marked •.
Note: This post is updated daily or more frequently, depending on the availability of new articles in the following sections:
- Windows Azure Blob, Drive, Table, Queue, HDInsight and Media Services
- Windows Azure SQL Database, Federations and Reporting, Mobile Services
- Marketplace DataMarket, Cloud Numerics, Big Data and OData
- Windows Azure Service Bus, Caching, Access Control, Active Directory, Identity and Workflow
- Windows Azure Virtual Machines, Virtual Networks, Web Sites, Connect, RDP and CDN
- Live Windows Azure Apps, APIs, Tools and Test Harnesses
- Visual Studio LightSwitch and Entity Framework v4+
- Windows Azure Infrastructure and DevOps
- Windows Azure Platform Appliance (WAPA), Hyper-V and Private/Hybrid Clouds
- Cloud Security, Compliance and Governance
- Cloud Computing Events
- Other Cloud Computing Platforms and Services
Azure Blob, Drive, Table, Queue, HDInsight and Media Services
• Maarten Balliauw (@maartenballiauw) explained Storing user uploads in Windows Azure blob storage in a 12/18/2012 post:
On one of the mailing lists I follow, an interesting question came up: “We want to write a VSTO plugin for Outlook which copies attachments to blob storage. What’s the best way to do this? What about security?”. Shortly thereafter, an answer came around: “That can be done directly from the client. And storage credentials can be encrypted for use in your VSTO plugin.”
While that’s certainly a solution to the problem, it’s not the best. Let’s try and answer…
What’s the best way to uploads data to blob storage directly from the client?
The first solution that comes to mind is implementing the following flow: the client authenticates and uploads data to your service which then stores the upload on blob storage.
While that is in fact a valid solution, think about the following: you are creating an expensive layer in your application that just sits there copying data from one network connection to another. If you have to scale this solution, you will have to scale out the service layer in between. If you want redundancy, you need at least two machines for doing this simple copy operation… A better approach would be one where the client authenticates with your service and then uploads the data directly to blob storage.
This approach allows you to have a “cheap” service layer: it can even run on the free version of Windows Azure Web Sites if you have a low traffic volume. You don’t have to scale out the service layer once your number of clients grows (at least, not for the uploading scenario).But how would you handle uploading to blob storage from a security point of view…
What about security? Shared access signatures!
The first suggested answer on the mailing list was this: “(…) storage credentials can be encrypted for use in your VSTO plugin.” That’s true, but you only have 2 access keys to storage. It’s like giving the master key of your house to someone you don’t know. It’s encrypted, sure, but still, the master key is at the client and that’s a potential risk. The solution? Using a shared access signature!
Shared access signatures (SAS) allow us to separate the code that signs a request from the code that executes it. It basically is a set of query string parameters attached to a blob (or container!) URL that serves as the authentication ticket to blob storage. Of course, these parameters are signed using the real storage access key, so that no-one can change this signature without knowing the master key. And that’s the scenario we want to support…
On the service side, the place where you’ll be authenticating your user, you can create a Web API method (or ASMX or WCF or whatever you feel like) similar to this one:
public class UploadController
    : ApiController
{
    [Authorize]
    public string Put(string fileName)
    {
        var account = CloudStorageAccount.DevelopmentStorageAccount;
        var blobClient = account.CreateCloudBlobClient();
        var blobContainer = blobClient.GetContainerReference("uploads");
        blobContainer.CreateIfNotExists();

        var blob = blobContainer.GetBlockBlobReference("customer1-" + fileName);

        var uriBuilder = new UriBuilder(blob.Uri);
        uriBuilder.Query = blob.GetSharedAccessSignature(new SharedAccessBlobPolicy
            {
                Permissions = SharedAccessBlobPermissions.Write,
                SharedAccessStartTime = DateTime.UtcNow,
                SharedAccessExpiryTime = DateTime.UtcNow.AddMinutes(5)
            }).Substring(1);

        return uriBuilder.ToString();
    }
}
This method does a couple of things:
- Authenticate the client using your authentication mechanism
- Create a blob reference (not the actual blob, just a URL)
- Signs the blob URL with write access, allowed from now until now + 5 minutes. That should give the client 5 minutes to start the upload.
On the client side, in our VSTO plugin, the only thing to do now is call this method with a filename. The web service will create a shared access signature to a non-existing blob and returns that to the client. The VSTO plugin can then use this signed blob URL to perform the upload:
Uri url = new Uri("http://...../uploads/customer1-test.txt?sv=2012-02-12&st=2012-12-18T08%3A11%3A57Z&se=2012-12-18T08%3A16%3A57Z&sr=b&sp=w&sig=Rb5sHlwRAJp7mELGBiog%2F1t0qYcdA9glaJGryFocj88%3D");
var blob = new CloudBlockBlob(url);
blob.Properties.ContentType = "test/plain";

using (var data = new MemoryStream(
    Encoding.UTF8.GetBytes("Hello, world!")))
{
    blob.UploadFromStream(data);
}
Easy, secure and scalable. Enjoy!


Tyler Doerksen (@tyler_gd) described Table Storage 2.0 in a 12/16/2012 post:
This post has been a long time coming. In late October the Windows Azure Storage Team released a new version of the storage services API libraries. At first these libraries were shipped with the Azure SDK, then later provided by NuGet but used the same version number as the Azure SDK. Now even the version numbers are different, where the latest Azure SDK is 1.8 the storage API is on version 2.0.
You can still get the storage SDK on NuGet, or browse/fork the source code on GitHub.
What’s new in 2.0
New Dependencies: The previous version required a reference to the System.Data.Client assembly but now has dependencies on the ODataLib NuGet projects (
Microsoft.Data.OData,Microsoft.Data.Edm,System.Spatial)New Namespace: The namespace has changed from
Microsoft.WindowsAzure.StorageClienttoMicrosoft.WindowsAzure.Storageand the different services are under.Blob .Queue .Tablenamespaces.For more information checkout the overview, and migration guide articles.
Table Storage API in 2.0
Lets get down to it. You can continue to use the API in the standard way with context objects and LINQ but I wanted to show off the new object structure which improves on the clarity of the API.
CloudTable
Rather than instantiating a context class, you can just use the
CloudTableClientsimilar to blobs and queues.
CloudTableClient tableClient = storageAccount.CreateCloudTableClient();


CloudTable customers = tableClient.GetTableReference("customers");
Once you have aCloudTableobject you can start creating objects and performing operations.
public class Customer:TableEntity


{


public string FirstName { get; set; }


public string LastName { get; set; }


}
Customer newCustomer = new Customer();


newCustomer.RowKey = "tylergd";


newCustomer.PartitionKey = "Manitoba";


newCustomer.FirstName = "Tyler";


newCustomer.LastName = "Doerksen";
TableOperation insertOp = TableOperation.Insert(newCustomer);

customers.Execute(insertOp);
TableOperation and TableBatchOperation
There are a number of static methods to create
TableOperationobjects like.Insert .Delete .Merge .Replaceand a few more variations like.InsertOrMergeall the methods take an ITableEntity interface instance, which the TableEntity base class implements.To me this is a crucial addition to the API because it allows the user to specifically define the storage operations, giving much more control than the previous data context abstraction.
If you want to perform batched operations you need only use a
TableBatchOperationobject.
TableBatchOperation batch = new TableBatchOperation();

batch.Add(TableOperation.Insert(newCustomer));


customers.ExecuteBatch(batch);
Or slightly cleaner…
TableBatchOperation batch = new TableBatchOperation();

batch.Insert(newCustomer);


customers.ExecuteBatch(batch);
This operation object structure is also used for read requests, which I will cover in a following post.
This is all the time I have right now. Please look out for the upcoming Table Storage 2.0 posts
- Read Operations
- Dynamic Model Objects
- Building Advanced Queries
As always thanks for reading!
P.S. – Right now I am participating in a blog challenge with a few other western Canada software professionals. We have all entered a pool in which you are eliminated if you do not write a post every two weeks. So far everyone is still in and it has produced a number of excellent blog posts! Check out the links below.
- Aaron Kowall: http://www.geekswithblogs.net/caffeinatedgeek
- Dave White: http://www.agileramblings.com
- David Alpert: http://www.spinthemoose.com
- Dylan Smith: http://geekswithblogs.net/Optikal/
- Steve Rogalsky: http://winnipegagilist.blogspot.ca


Vishwas Lele (@vlele) posted Introducing Media Center App for SharePoint 2013 to the Applied Information Services blog on 12/14/2012 (missed when posted):
Media Center is a SharePoint app that allows you to integrate your Windows Azure Media Services (WAMS) assets within SharePoint.
Before I describe the app functionality, I think it useful to take a step back and briefly talk about why this app is needed and the design choices we had to make in order to build it. This is also a great opportunity for me to thank the team who worked very hard on building this app including Jason McNutt, Harin Sandhoo and Sam Larko. Shannon Gray helped out with the UI design. Building an app using technical preview bits with little documentation is always challenging, so the help provided by Anton Labunets and Vidya Srinivasan from the SharePoint team was so critical. Thank you!
At AIS, we focus on building custom applications on top of the SharePoint platform. Among the various SharePoint applications we have built in the past, the ability to host media assets within SharePoint is a request that has come up a few times. As you know, SharePoint 2010 added streaming functionality, so any media assets stored within the content database could be streamed to the SharePoint users directly. However, the streaming functionality in SharePoint 2010 was never intended to provide a heavy duty-streaming server. For instance, it does not support some of the advanced features like adaptive streaming. Additionally, most organizations don’t want to store large media files within SharePoint in order to avoid bloating the size of the content databases.
Enter Windows Azure Media Services (WAMS).
Windows Azure Media Services is a cloud-based media storage, encoding and streaming service that is part of the Windows Azure Platform. It can provide terabytes of elastic storage (powered by Windows Azure Storage), a host of encoding formats and elastic bandwidth for streaming content down to the consumers. Furthermore, WAMS is offered as a PaaS, so customers only pay for the resources they use, such as the compute cycles used for media encoding, the storage space used for hosting the media assets and the egress bandwidth used by clients consuming the content.
We saw an interesting opportunity to combine the capabilities of WAMS with the new SharePoint 2013 app model. At a high level, the approach seemed straightforward. Download the metadata about the WAMS assets into SharePoint. Once the metadata is available within a SharePoint site, users can play, search and tag media assets — all this without the users having to leave the SharePoint site.
However, the implementation turned out to be a bit more challenging (isn’t that always the case?!). Here’s a glimpse of some of the initial design decisions and the refactoring that that we had to undertake during the course of the implementation.
►Our objective was to build a SharePoint app that is available to both SharePoint Online and on-premises SharePoint customers. This is why we chose the SharePoint hosted app model. You can read up on the different styles of SharePoint apps here. The important thing to note is that the SharePoint-hosted apps are client-side only. In other words, no server-side code is allowed. You can of course use any of the built-in lists, libraries and web parts offered by SharePoint.
Our first challenge was download the WAMS metadata into SharePoint. We knew that BCS has been enhanced in 2013 and can now be configured at the App Web (SPWeb level). So our initial thought was to leverage the BCS OData connector to present assets stored in WAMS as an external list within the app. Note that WAMS exposes an OData feed for assets stored in it. However, SharePoint-hosted apps cannot navigate a secured OData feed. As you can imagine, WAMS OData feed will almost always be secured for corporate portals as the content is likely not public. This limitation meant that we could not use BCS. The alternative, of course, was to use client-side JavaScript code to make a call to WAMS directly.
The data downloaded from WAMS could be inserted into a list using CSOM. This list is part of the Media Center app web. Ultimately this is the approach we ended up with…although not without consequences. By maintaining a separate copy of the metadata (within the list), we were forced to deal with a synchronization issue (i.e. as new assets are added and deleted from WAMS, the list within the Media Center app needs to be updated as well). But recall that SharePoint-hosted apps are not allowed to have any server-side code. So the only recourse was to fall back on the client-side code to keep the list in sync with the WAMS.
One of our objectives was to build an app that is available to both on-premises and cloud-based SharePoint installations.
However, client-side code can only be triggered by a user action, such as someone browsing a Media Center app page. Clearly an auto-hosted or self-hosted app can deal with the synchronization challenge easily by setting up a server-side timer job. But as stated earlier, one of our objectives was to build an app that is available to both on-premises and cloud-based SharePoint installations. It is worth noting that in the current release, auto-hosted apps are limited to SharePoint Online-based apps. On the other hand, the self-hosted apps are limited to on-premises installations. So we decided to stay with the SharePoint hosted app model.
We worked around the client-only code limitation by checking for WAMS updates during the page load. This check is performed asynchronously so as to not block the user from interacting with the app. As a further optimization, this check is only performed after a configurable timeout period has elapsed. We also provided a “sync now” button within the app page allowing users to manually initiate synchronization.
►There is an additional challenge related to connecting to WAMS from the client side. Each SharePoint-hosted app is assigned a unique domain prefix (for security reasons). This meant that the calls to WAMS endpoints (typically media.azure.com) are treated as cross-domain calls by the browser. Now…this is a well-known issue with some well-known solutions including JSONP, CORS etc.
Turns out that SharePoint 2013 provides a web proxy to make it easy to make cross-domain calls. All you need to do is register the external site you want to communicate with inside the app manifest. All the registered sites can be reached via the web proxy, as shown in the example provided at the bottom of this post [1]. However, when you connect to WAMS, it can redirect the clients to a new URI. As a result, the clients are expected to fetch the new URI and use that for subsequent requests. However, the new URI is not the one registered as the external URI with the app. Consequently, the app would not be able to connect to the new URI. (Unfortunately the external site registration does not currently support wild cards.) To get around this issue, we created our own proxy hosted with a Windows Azure website. We can register the URI of the custom proxy with the app manifest and use a SharePoint-provided web proxy to route calls to it. Our custom proxy itself is quite simple: it simply forwards the incoming calls to the appropriate WAMS endpoints.
►The next challenge we ran into involved integrating WAMS with SharePoint features, such as search and managed metadata. It turns out that search cannot crawl external sources (such as WAMS) that an app may depend on.
Fortunately there was a workaround (albeit not an optimal one). The list containing the WAMS metadata could be crawled by search. We were not as lucky when it came to Integrating with the managed metadata store. It turns out that managed metadata is not available to SharePoint-hosted apps. This limitation means that our app will not support tagging, term sets, etc.
►Next, let us discuss the security mechanism used by the app. As you may know, WAMS requires an ACS token for authentication. So in order to access WAMS on behalf of the user, app needs to obtain an ACS token first. It does so by soliciting the WAMS credentials (at time of installation of the app) and using them to obtain an ACS token. Armed with the ACS token, the app makes the needed WAMS REST API calls in order to obtain metadata about the assets, as well as a Shared Access Signature to play the videos. It is important to note that users of the app will have access to all assets that are associated with the WAMS subscription provided to the app. In other words, WAMS assets cannot be granularly mapped to SharePoint users.
►There is one additional detail related to how WAMS credentials are secured. As discussed earlier, the Media Center app needs the WAMS credentials in order to download metadata about the assets. Based on earlier discussion related to synchronization, we know that calls to WAMS are made within the context of the user browsing the Media Center app. This means users of the app (not just the administrator who installed the app) potentially have access to WAMS credentials. To avoid exposing WAMS credentials to the users of the app, we encrypt them. Encryption (and decryption) is performed by our Azure-based web proxy, which we discussed earlier.
►The final architecturally significant decision is related to how the media assets are surfaced within the app. As mentioned earlier, we started out with a list to enumerate the asset metadata downloaded by WAMS. But rather than building the player functionality ourselves, we quickly turned towards leveraging the built-in asset library in SharePoint 2013. Asset library is a type of document library that allows storage of rich media files including image, audio and video files. It provides features such as thumbnail-based views, digital asset content to track the metadata associated with uploaded the media files, and callouts to play and download media files (play and download buttons are enabled as the pointer is moved over a thumbnail). However, the asset library is designed for files that are stored inside the content database. As a result, when we tried to access an external WAMS-based asset programmatically, we ran into the following two issues:
- Adding an item of content type Video to the asset library resulted in an error.
- The query string portion of WAMS access URL is not handled.
Fortunately Anton Labunets and Vidya Srinivasan provided us with workarounds for the two aforementioned issues. We added an item on type VideoSet and set the VideoSetExternalLink property to set the WAMS URL. We overrode the APD_GetFileExtension method to workaround the query string handling issue. See [2] for relevant code snippets.
Now that we understand the architecture of the Media Center app, let’s review the app functionality by walking through a few screenshots:
WAMS video playing inside Media Center App
Settings screen where the administrator can configure their WAMS credentials. Azure Media Services Account Key can be obtained from the WAMS portal as shown in the screenshot.
Define the synchronization interval in days.
Default asset library view showing videos stored in WAMS.
And finally, here is a brief video demonstration of the app’s functionality.
The Media Center App will be available very soon at Office.com. Please follow us on Twitter, Facebook or LinkedIn for the latest information and announcements. More information about the Media Center App can also be found at appliedis.com.
[1] Invoking acs.azure.com via the SharePoint web proxy:
$.ajax (

{


url: _surlweb + “_api/sp.webproxy.invoke”,


type: “post”,


data: json.stringify ( { ‘requestinfo’ :


{


‘__metadata’ : { ‘type’: ‘ SP.WebRequestInfo’},


‘Url’: ‘http://acs.Azure.com’,


‘Method’ : ‘GET’


}),


headers: { },


success: {}


})
[2] Adding a WAMS-based file to an asset library:
var list = web.get_lists().getByTitle('WAMS Library');

var folder = list.get_rootFolder();


var itemCreateInfo = new SP.ListItemCreationInformation();


itemCreateInfo.set_underlyingObjectType(SP.FileSystemObjectType.folder);


itemCreateInfo.set_folderUrl("");


itemCreateInfo.set_leafName("WAMS Test Video");


var listItem = list.addItem(itemCreateInfo);


listItem.set_item('ContentTypeId','0x0120D520A808006752632C7958C34AA3E07CE1D34081E9'); // videoset content type


listItem.set_item('VideoSetExternalLink', < WAMS URL>);


listItem.update();


ctx.load(listItem);


<Return to section navigation list>
Windows Azure SQL Database, Federations and Reporting, Mobile Services
• Robert Green produced Episode 56 of Visual Studio Toolbox: Using Azure Mobile Services in a Windows 8 App on 12/19/2012:
In this episode, learn how to use Azure Mobile Services in a Windows 8 app. Robert shows how to create a new mobile service and an accompanying database as well as how to connect a Windows Store app to the mobile service. He then demonstrates how to query, add, update, and delete items in the database.
You can find the app Robert used here.
Dhananjay Kumar (@debug_mode) described Steps to Enable Windows Azure Mobile Services in a 12/17/2012 post:
In this post we will take a step by step look on enabling Windows Azure Mobile Services in Windows Azure portal. To enable it, login to Windows Azure Management Portal.
After successful login to the portal in the bottom click on the New button.
On clicking of the NEW button under the COMPUTE tab, you need to select MOBILE SERVICES
You will get a screen with description of Mobile Services. Click on Try Now to enable Window Azure Mobile Services
In last step you will be prompted to select subscription and provide quick access token. However quick access token is optional.
In this way we can enable Windows Azure Mobile Services. I hope you find this post useful. Thanks for reading.


• Sasha Goldshtein (@goldshtn) uploaded a Windows Azure Mobile Services unofficial Android SDK to github on 12/16/2012. From the README.md file:
wams-android
This is the Windows Azure Mobile Services unofficial Android SDK. It is provided with no warranty or support, implied or explicit. Use at your own risk. The code is provided under the Creative Commons Attribution License [http://creativecommons.org/licenses/by/3.0/us/].
This SDK covers the following features of Windows Azure Mobile Services:
- Basic CRUD operations on data tables (select, insert, update, delete)
- Simple query operators (gt, lt, equals)
- Simple paging operators (top, skip)
To use the SDK, download the source and add the provided project as a library project to your Eclipse workspace. Next, add a library reference from your app to this project. Note that the project requires an minimum API level of 2.2.
Some examples of what you can do with this SDK, assuming you have a Windows Azure Mobile Service set up at the endpoint http://myservice.azure-mobile.net:
@DataTable("apartments")
public class Apartment {
    //The fields don't have to be public; they are public here for brevity only
    @Key public int id;
    @DataMember public String address;
    @DataMember public int bedrooms;
    @DataMember public boolean published;
}

String apiKey = getResources().getString(R.string.msApiKey);
MobileService ms = new MobileService("http://myservice.azure-mobile.net", apiKey);
MobileTable<Apartment> apartments = ms.getTable(Apartment.class);

Apartment newApartment = new Apartment();
newApartment.address = "One Microsoft Way, Redmond WA";
newApartment.bedrooms = 17;
newApartment.published = true;
apartments.insert(newApartment);

List<Apartment> bigApts = apartments.where().gt("bedrooms", 3).orderByDesc("bedrooms").take(3);
for (Apartment apartment : bigApts) {
    apartment.published = false;
    apartments.update(apartment);
}

//Other operations feature async support as well:
apartments.deleteAsync(newApartment, new MobileServiceCallback() {
    public void completedSuccessfully() {}
    public void errorOccurred(MobileException exception) {}
});
In the future, I plan to add push support (with GCM) and possibly additional features. Pull requests, enhancements, and any other assistance are very welcome.


<Return to section navigation list>
Marketplace DataMarket, Cloud Numerics, Big Data and OData
Mike Stafford announced WCF Data Services 5.2.0 Released in a 12/17/2012 post to the WCF Data Services blog:
We’re pleased to announce that today we are releasing NuGet packages and a tools installer for WCF Data Services 5.2.0. As mentioned in the prerelease blog post, this release brings in the UriParser from ODataLib Contrib and contains a few bug fixes.
Bug Fixes
This release contains the following noteworthy bug fixes:
- Fixes an issue where code gen for exceedingly large models would cause VS to crash (you need to run the installer to get this fix)
- Provides a better error message when the service model exposes enum properties
- Fixes an issue where IgnoreMissingProperties did not work properly with the new JSON format
- Fixes an issue where an Atom response is unable to be read if the client is set to use the new JSON format
URI Parser
In this release ODataLib now provides a way to parse $filter and $orderby expressions into a metadata-bound abstract syntax tree (AST). This functionality is typically intended to be consumed by higher level libraries such as WCF Data Services and Web API.
For a detailed write-up on $filter and $orderby parsing, see this blog post.
General Reliability and Performance
In addition, we’ve invested a little bit more in improving the overall stability and performance of WCF Data Services. While we recognize that we have continued room for improvement, we are actively investing here and will continue to invest in reliability and performance over the next several releases.
What do you need to do?
This release is a little unusual because we fixed bugs in both code gen and the runtime. Most customers should run the installer, which will fix the code gen bug and ensure that new WCF Data Services are created with the other fixes in 5.2.0. If you are only authoring services and you use NuGet to update your dependencies, simply updating to 5.2.0 is sufficient to get the rest of the fixes. (Note, however, that if you don’t run the installer all new services will need to be updated to get the other fixes in 5.2.0.)
What do you think?
As always, we love it when our customers stay on the latest releases and give us feedback about what works, what needs to be improved, and what’s outright broken. If you have any feedback related to this release, please leave a comment below or e-mail me at mastaffo@microsoft.com.
<Return to section navigation list>
Windows Azure Service Bus, Caching Access Control, Active Directory, Identity and Workflow
• Centrify (@CentrifyExpress) asserted it “Builds on Microsoft Active Directory to Enhance Unified Identity Services across Data Center, Cloud and Mobile, Resulting in One Single Login for Users and One Identity Infrastructure for IT” in an introduction to its Centrify Addresses IT and User Challenges around Explosion of Mobile and Business Apps; Unveils Easy-to-Use, Secure Access for SaaS and Cloud Services press release of 12/3/2012 (missed when published):
Centrify Corporation, the leader in Unified Identity Services across data center, cloud and mobile, today introduced a new Windows Azure cloud-based offering that extends Microsoft Active Directory and lets organizations centrally secure and control access to their increasing deployments of Software-as-a-Service (SaaS) apps and other cloud services across a variety of operating systems and platforms. The new solution also gives end users an option to provide much needed Single Sign-on (SSO) to address the password sprawl associated with these new technologies.
The rapid adoption of SaaS applications combined with Bring-Your-Own Device (BYOD) programs means that IT organizations increasingly don't own the endpoint devices or back-end application resources. Centralized management of users' digital identity that spans on-premise and cloud resources provides the visibility and control required for organizations to achieve compliance, reduce costs and mitigate risks, while also enabling productivity and secure access for user centric, mobile workforces.
Today's announcement of comprehensive SaaS and Cloud Services support — coupled with Centrify's support for more than 400 operating systems and dozens of on-premise apps, and rich support for mobile devices — lets Centrify customers take advantage of their existing Microsoft Active Directory investments across the industry's broadest range of systems, mobile devices and apps deployed both on-premise and in the cloud. Centrify's new Identity-as-a-Service (IDaaS) offering — Centrify DirectControl for SaaS — will be unveiled and demonstrated for the first time at the Gartner Identity & Access Management Summit in Las Vegas, in Booth No. PL3 this week.
"As organizational boundaries continue to erode under the pressure of federation and outsourcing, and as enterprise control over IT continues to weaken through increased adoption of mobile devices and cloud services, identity is more important than ever, and more problematic," said Ian Glazer, Research VP at Gartner. "Identity teams must strengthen federation capabilities to properly connect software as a service (SaaS) to the enterprise…Identity teams should also consider an identity bridge to connect to identity as a service (IDaaS) offerings."1
"The Windows Azure cloud platform builds on and utilizes Microsoft's core technologies, including security and identity with Active Directory," said Karri Alexion-Tiernan, Director, Windows Azure Product Marketing, Microsoft. "As a Windows Azure customer and partner, Centrify extends Windows Azure functionality with an on-demand identity service across the data center, cloud, and mobile that lets IT take advantage of their existing skills and Active Directory infrastructure."
One Single Login for Users. One Unified Identity Infrastructure for IT
Centrify DirectControl for SaaS allows users to securely utilize their existing Active Directory credentials to get Single Sign-on to their SaaS apps from a web browser running on any system, laptop or mobile device, irrespective of whether the endpoint is on the corporate network or not. And because mobile devices are fast becoming the dominant endpoint of choice, Centrify also offers "Zero Sign-On" (ZSO) from mobile devices running iOS or Android, and supports both browser and native rich mobile apps through the secure certificate delivered to their mobile devices enrolled with the Centrify Cloud Service. In addition, Centrify DirectControl for SaaS also offers the robust MyCentrify portal where users receive one-click access to all their SaaS apps and can utilize self-service features that let them locate, lock or wipe their mobile devices, and also reset their Active Directory passwords or manage their Active Directory attributes.
"We are seeing a trend in our organization of people using more cloud services and apps that are outside of our own IT department, and we are very interested in helping our users keep control of these services. Providing Single Sign on and password management for the many different apps and services our people are using is a great way to do that," said Dave Miller, IT manager at Front Porch, Inc. "With Centrify, we see how we can have the ability for a one-stop place to manage our accounts and passwords, and our mobile devices that access our apps, while also making our users more productive. We are quite impressed with the Centrify solution."
Centrify's easy-to-deploy cloud-based service and seamless integration into Active Directory means IT does not need to sacrifice control of corporate identities and can leverage existing technology, skillsets and processes already established. Unlike other products, no intrusive firewall changes, changes to Active Directory itself or appliances in the DMZ are required — corporate identity information remains centralized in Active Directory under control of the IT staff and is never replicated or duplicated in the cloud. With centralized visibility and control of all SaaS apps, IT can reduce helpdesk calls by up to 95 percent for SaaS account lockouts and password resets. Single Sign-on also improves security since passwords and password practices not meeting corporate policies are eliminated, and critical tasks such as de-provi¬sioning user access across multiple apps, devices and resources are easily achieved by simply disabling a user's Active Directory account.
Broad Application Support & Highly Scalable Cloud-based Solution
Centrify DirectControl for SaaS includes support for hundreds of applications supporting the Security Assertion Markup Language (SAML) or other Single Sign-on standards such as OAuth and OpenID, and also supports applications that support only forms-based authentication. Examples of applications supported include Box, Google Apps, Marketo, Microsoft Office365, Postini, Salesforce, WebEx, Zendesk and Zoho.
"Today, marketing individuals are increasingly relying on mission critical SaaS applications such as Marketo to execute their strategic marketing initiatives and gain a competitive edge, but to be successful marketers they need these services to ‘just work'," said Robin Bordoli, VP of Partner Ecosystems at Marketo. "Centrify, a Marketo LaunchPoint ecosystem partner, solves the Single Sign-on challenges for our customers by eliminating the need to deal with multiple application passwords and ensuring a consistent secure access experience to Marketo's platform."
Key components of Centrify DirectControl for SaaS include:
- MyCentrify portal is an Active Directory-integrated and cloud-delivered user portal that includes:
- MyApps — one-click interface for SaaS Single Sign-on
- MyDevices — self-service passcode reset, device lock, and remote and device location mapping
- MyProfile — self-service for selected AD user attributes, account unlock and password reset
- MyActivity — detailed activity that helps users self-report suspicious activities on their account
- Centrify Cloud Service is a multi-tenanted service that provides secure communication from on-premise Active Directory to SaaS applications accessed from the MyCentrify user portal. It leverages an existing on-premise Active Directory infrastructure versus providing a directory in the cloud. Built on Microsoft Azure, the service facilitates Single Sign-on and controls access to SaaS applications through a security token service, which authenticates users to the portal with Kerberos, SAML, or an Active Directory username/password. The same highly scalable cloud service is used by Centrify for Mobile — a mobile device management and mobile authentication services solution.
- Centrify Cloud Manager is an administrator interface into the Centrify Cloud Service that provides a single pane of glass to administer SaaS app access and SSO, mobile devices, and user profiles; and provides centralized reporting, monitoring and analysis of all SaaS and mobile activity. It improves security and compliance in organizations through improved visibility, and also reduces administrative complex¬ity by reducing the number of monitoring and reporting interfaces.
- Centrify Cloud Proxy seamlessly leverages and extends Active Directory to SaaS applications and mobile devices via Centrify Cloud Services. The proxy is a simple Windows service that runs behind the firewall providing real-time authentica¬tion, policy and access to user profiles without synchronizing data to the cloud.
"Many of the existing solutions for SaaS SSO do not address what users want and what IT requires," said Corey Williams, Centrify senior director of product management. "Single Sign-on needs to address both browser and mobile access to apps regardless of whether those apps are on premise or in the cloud. We've architected our solution from the ground up to accommodate these scenarios, and with Centrify you can utilize your existing identity infrastructure to go beyond SSO with access control, privilege management, policy enforcement and compliance."
Pricing and Availability
Centrify's DirectControl for SaaS is currently in open beta and is expected to be generally available in the first calendar quarter of 2013. Upon availability, pricing is expected to be $4 per user per month. The free Centrify Express for SaaS is also available now in beta and includes free access to the Express community and online support. For more information, or to participate in the open beta program, see http://www.centrify.com/saas/free-saas-single-sign-on.asp.
About Centrify
Centrify provides Unified Identity Services across the data center, cloud and mobile that results in one single login for users and one unified identity infrastructure for IT. Centrify's solutions reduce costs and increase agility and security by leveraging an organization's existing identity infrastructure to enable centralized authentication, access control, privilege management, policy enforcement and compliance. Centrify customers typically reduce their costs associated with identity lifecycle management and compliance by more than 50 percent. With more than 4,500 customers worldwide, including 40 percent of the Fortune 50 and more than 60 Federal agencies, Centrify is deployed on more than one million server, application and mobile device resources on-premise and in the cloud. For more information about Centrify and its solutions, call (408) 542-7500, or visit http://www.centrify.com/.


Vittorio Bertocci (@vibronet) explained Using [the Windows Azure Authentication Library] AAL to Secure Calls to a Classic WCF Service in a 12/17/2012 post:
[You do remember that this is my personal blog and those are my own opinions, right? ;-)]
After the releases we’ve been publishing in the last few months, I am sure you have little doubt that REST is something we are really interested in supporting. The directory uses OAuth for all sorts of workloads, the Graph API is fully REST based, all the AAL samples use Web API as protected resources, we released a token handler for a format that has REST as one of its main raison d’etre… even if (as usual) here I speak for myself rather than in official capacity, the signs are pretty clear.
With that premise: I know that many of you bet on WCF in its classic stance, and even if you agree with the REST direction long term many of you still have lots of properties based on WCF that can’t be migrated overnight. Ever since I published the post about javascriptnotify, I got many requests for help on how to apply the same principle to classic WCF services. I was always reluctant to go there, on account that 1) I knew it was not aligned to the direction we were going and 2) it would have required a *very* significant effort in terms of custom bindings/behaviors sorcery.
Well, now both concerns are addressed: in the last few months you have clearly seen the commitment to REST, and the combination of AAL and new WIF features in 4.5 now make the task if not drop-dead simple at least approachable.
With that in mind, I decided to write a short post about how to use AAL to add authentication capabilities to your rich client apps (WPF, WinForm, etc) and to secure calls to classic WCF services. That might come in handy for the ones among you who has existing WCF services and want to move them to Windows Azure and/or invoke them by taking advantage of identity providers that would not normally be available outside of browser-based applications.
The advantage is that you’ll be able to maintain the existing service in its current for, svc file and everything, and just change the binding used to secure calls to it: however I want to go on record saying that this is pure syntactic sugar. You’ll pay the complexity price associated with channels and behaviors without reaping its benefits (more sophisticated message securing mechanisms) given that you’ll be using a bearer token (which cannot give more guarantees in this mode than when used in REST style (shove it in the Authorize HTTP header over an SSL connection and you’re good to go)). If you are OK with the security levels offered by a bearer token over an SSL channel, you’d be likely better off by adopting a REST based solution; but as I mentioned above, if you have a really good reason for wanting to use classic WCF then this post might come in handy.
I am going to describe a simple solution composed by two projects:
- A WPF client, which uses AAL to obtain a token and WCF+WIF to invoke a simple service
- A WCF service, which uses WCF+WIF to authenticate incoming calls and work with claims
…aaaand there we go.
The Service
Even if it might be slightly counter-intuitive for some of you, let’s start with the service side. You’ll see that by going this way we’ll be better off later.
The game plan is: create a simple WCF service, then configure it so that will accept calls secured with a bearer token. That’s it.
We plan to use AAL and its interactive flow. Tokens obtained by going through browser flows do not (for now?) contain keys that could be actually be used to secure the message (e.g. by signing it); in absence of such keys, the only way for a service to authenticate a caller is to require that it simply attaches the token to the message (as opposed to using it on the message), hence the term “bearer” (“pay to the bearer on demand”…). That’s about as much as I am going to say about it here, if you are passionate about the topic and you like intricate diagrams go have fun here.
Let’s create a WCF service with the associated VS template. I am using VS2012 here, given that there are some new WIF features that are really handy here. The service must listen on HTTPS, hence make sure to enable SSL in the project properties (IIS Express finally made it trivial).
Let’s modify the interface to make it look like the following:
using System.ServiceModel;

namespace WCFServiceIIS
{

    [ServiceContract]
    public interface IEngager
    {
        [OperationContract]
        string Engage();
    }
}
Given that I am just back from the movies, where I saw the trailer for “Into Darkness”, I am just going to do the entire sample Star Trek-themed (the more I read Kahneman, the less I fight priming and the like :-)).
The implementation will be about as impressive:
using System.Security.Claims;
using System.ServiceModel;

namespace WCFServiceIIS
{
  public class Engager : IEngager
  {
    public string Engage()
    {
      return string.Format("Aye, Captain {0}!",
        ((ClaimsIdentity)
        OperationContext.Current.ClaimsPrincipal.Identity)
           .FindFirst(ClaimTypes.Name).Value);
    }
  }
}
The code is formatted for this narrow column theme, obviously you would not put a newline before .FindFirst, but you get the idea.
The service just sends back a string which includes the value of a claim, to demonstrate that a token did make it through WCF’s pipeline. In this case I picked Name, which is not issued by every ACS IdP; we should remember that when we’ll test this (e.g. no Live ID).Well, now we come to the fun part: crafting the config so that the service will be secured in the way we want. Luckily the VS project template contains most of the code and the right structure, we’ll be just appending and modifying here and there. Let’s go through those changes. First part:
<?xml version="1.0"?>
<configuration>
  <!-- Add the WIF IdentityModel config section-->
  <configSections>
    <section name="system.identityModel"
      type="System.IdentityModel.Configuration.SystemIdentityModelSection,
        System.IdentityModel,
        Version=4.0.0.0, Culture=neutral, PublicKeyToken=B77A5C561934E089"/>
  </configSections>
Once again, it’s formatted funny; I won’t mention this again and assume you’ll keep an eye on it moving forward.
Here we are just adding the type for the WIF config section.<system.serviceModel> <behaviors> <serviceBehaviors> <behavior> <serviceMetadata httpGetEnabled="true" httpsGetEnabled="true"/> <serviceDebug includeExceptionDetailInFaults="false"/> <!-- opt in for the use of WIF in the WCF pipeline--> <serviceCredentials useIdentityConfiguration="true" /> </behavior> </serviceBehaviors> </behaviors>The fragment above defines the behavior for the service, and it mostly comes straight form the boilerplate code found in the project template. The only thing I added is the useIdentityConfiguration switch, which is all that is required in .NET 4.5 for a WCF service to opt in to the use of WIF in its pipeline. That’s one of the advantage s of being in the box: in WIF 1.0 getting WIF in the WCF pipeline was a pretty laborious tasks (and one of hardest parts to work on while writing the WIF book).
    <!-- we want to use ws2007FederationHttpBinding over HTTPS -->
    <protocolMapping>
        <add binding="ws2007FederationHttpBinding"
          scheme="https" />
    </protocolMapping>
    <bindings>
      <ws2007FederationHttpBinding>
        <binding name="">
          <!-- we expect a bearer token sent thru an HTTPS channel -->
          <security mode="TransportWithMessageCredential">
            <message issuedKeyType="BearerKey"></message>
          </security>
        </binding>
      </ws2007FederationHttpBinding>
    </bindings>
    <serviceHostingEnvironment aspNetCompatibilityEnabled="true" multipleSiteBindingsEnabled="true" />
  </system.serviceModel>
We are going to overwrite the default binding with our own ws2007FederationHttpBinding, and ensure it will be on https.
The <ws2007FederationHttpBinding> element allows us to provide more details about how we want things to work. Namely, we want TransportWithMessageCredentials (== the transport must be secure, and we expect the identity of the caller to be expressed as an incoming token) and we’ll expect tokens without a key.Finally:
  <system.identityModel>
    <identityConfiguration>
      <audienceUris>
        <!-- this is the realm configured in ACS for our service -->
        <add value="urn:engageservice"/>
      </audienceUris>
      <issuerNameRegistry>
        <trustedIssuers>
          <!-- we trust ACS -->
          <add name="https://lefederateur.accesscontrol.windows.net/"
             thumbprint="C1677FBE7BDD6B131745E900E3B6764B4895A226"/>
        </trustedIssuers>
      </issuerNameRegistry>
    </identityConfiguration>
  </system.identityModel>
Many of you will recognize that fragment as a WIF configuration element. The useIdentityConfiguration switch told WCF to use WIF, now we need to provide some details so that WIF’s pipeline (and specifically its validation process) will know what a valid token looks like.
The <audienceUri> specifies how to ensure that a token is actually for our service; we’ll need to make sure we use the same value when describing our service as an RP in ACS.The issuerNameRegistry entry specifies that we’ll only accept tokens from ACS, and specifically tokens signed with a certificate corresponding to the stored thumbprint (spoiler alert: the ACS namespace certificate). How did I dream up that value? I stole it from the ws-federation sample in this post, where I obtained it by using the Identity and Access tools for VS2012.
That’s it, code-wise your service is ready to rock & roll; however we are not 100 done yet. The certificate used by the ACS namespace is not trusted, hence if we want to use it for checking signatures (and we do) we have only 2 alternatives: turn off validation (can be done in the WIF & WCF settings) or install it in the local certificate store. Here I am doing the latter, again following the process described here.
The ACS Namespace
For the ACS namespace I got lucky: I have the usual development namespace I keep for these experiment already pre-provisioned, all I had to do was creating a suitable relying party and generating the default claims transformation rules. Let’s take a look at it:
Nothing strange, really. The only notable thing is that I am using urn:engageservice as realm, matching nicely the expected audience on the service side.
Also, note that I didn’t even bother changing the defaults for things like the token format. Finally, remember: even if I am not showing it here, I did visit the rules page and generate the default rules for the “Default Rule Group for EngageService”.
The Client
Finally, the client. Let’s go ahead and create a simple WPF application. Let’s add a button (for invoking the service) and a label (to display the result), nothing fancy.
Double-click on that button, you’ll generate the stub for the click even handler. As it is now tradition, let’s break down the code of the handler that will determine what happens when the user clicks the button. First part:
private void btnCall_Click(object sender, RoutedEventArgs e)
{
      // Use AAL to prompt the user and obtain a token
    Microsoft.WindowsAzure.ActiveDirectory.Authentication.AuthenticationContext
        aCtx =
        new Microsoft.WindowsAzure.ActiveDirectory.Authentication.AuthenticationContext(
          "https://lefederateur.accesscontrol.windows.net");
     AssertionCredential aCr =
         aCtx.AcquireToken("urn:engageservice");
If you already played with AAL, you know what’s going on here: we are creating a new instance of AuthenticationContext, initializing it with our namespace of choice, and using it for obtaining a token for the target service. Literally 2 lines of code. Does it show that I am really proud? :-)
However, do you see something odd with that code? Thought so. Yes, I am fully qualifying AuthenticationContext with its complete namespace path. The reason is that there is another AuthenticationContext class in the .NET Framework, which happens to live in System.IdentityModel.Tokens, which we happen to need in this method, hence the need to specify whihc one we are referring to. If we would not be using the WCF OM, we would not be in this situation. Just sayin’.. ;-) on to the next:
// Deserialize the token in a SecurityToken
IdentityConfiguration cfg = new IdentityConfiguration();
SecurityToken st = null;
using (XmlReader reader =
          XmlReader.Create(
            new StringReader(
                 HttpUtility.HtmlDecode(aCr.Assertion))))
{
    st = cfg.SecurityTokenHandlers.ReadToken(reader);
}
More action! No need to go too much into details here: in a nutshell, we are using WIF to deserialize the (HTMLEncoded) string we got form AAL, containing the token for our service, into a proper SecurityToken instance thnat can then be plugged in the WIF/WCF combined pipeline.
// Create a binding to use the bearer token thru a secure connection
WS2007FederationHttpBinding fedBinding =
    new WS2007FederationHttpBinding(
        WSFederationHttpSecurityMode.TransportWithMessageCredential);
 fedBinding.Security.Message.IssuedKeyType =
        SecurityKeyType.BearerKey;

// Create a channel factory
ChannelFactory<IEngager> factory2 =
    new ChannelFactory<IEngager>(fedBinding,
        new EndpointAddress("https://localhost:44327/Engager.svc"));

// Opt in to use WIF
factory2.Credentials.UseIdentityConfiguration = true;
Now the real WCF sorcery begins. You can think of this as the equivalent of what we did in config on the service, but here it just seemed more appealing to do it in code.
The first two lines create the binding and specify that is it TransportWithMessageCredential, where the credential is a bearer token.
The second block creates a channel factory, tied to the just-created binding and the endpoint of the service (taken from the project properties of the service). Note the HTTPS.
The final line specifies that we want to use the WIF pipeline, just like we did on the service side.
// Create a channel injecting the token obtained via AAL
 IEngager channel2 =
       factory2.CreateChannelWithIssuedToken(st);
Here the WIF object model comes out again. We use the factory method to create a channel to the service, where we inject the token obtained via AAL and converted to SecurityToken to dovetail with the serialization operations thata re about to happen.
// Call the service
lblResult.Content = channel2.Engage();
Finally, in a triumph of bad practices, we call the service and assign the result directly to the content of the label.Yes, this method is terrible: we don’t cache the token for subsequent calls, we do exactly zero error handling, and so on… but hopefully it provides the essential code for accomplishing our goal. Let’s put it test.
Testing the Solution
Let’s make the solution a multi-project start and hit F5. We get the client dialog:
Hit Engage; you’ll see the following:
That’s good ol’ AAL kicking in and showing us the HRD page as configured for our RP in the ACS namespace lefederateur. I usually pick Facebook, given that I am pretty much guaranteed to be always logged in :-) and if you do…
Behold, an especially poignant missive, carrying proof that my claims were successfully delivered, makes its way thru the ether (not really, it’s all on localhost) back to the client.
Great! But how do I know that I didn’t just do useless mumbo-jumbo, and I am actually checking incoming tokens? Here there’s an easy smoke test you can do. Go in the service web.config, delete one character from the issuer thumbprint and save; then run the solution again. As soon as you hit the button, you’ll promptly be hit by the following:
If you want even more details, you can turn on the WCF tracing on the service side and you’ll see that the pipeline fails exactly where you expect it to.
Summary
This post showed how you can take advantage of AAL for handling user authentication within your rich clients, and use the resulting token for invoking classic WCF services. We discussed how in my opinion this would be appropriate mostly when you have important reasons for sticking with classic services, and that the simpler route would be to take advantage of simpler flows (such as Web API & OAuth) whenever possible. I acknowledge that many of you do have important reasons; and given that most of you cannot directly tap on the deep knowledge and expertise in our team (Sri, Brent, I am looking at you guys :-)) I decided to publish this tutorial, knowing that you will make due diligence before applying it.
That said, I cannot hide that the fact that this scenario can be accomplished in relatively few lines of code makes me positively giddy. I still remember the effort it took to heavy-lift this through classic (== sans WIF) WCF, and besides being hard it was also simply not possible to connect to the providers who chose not to expose suitable WS-Trust STSes. AAL, and the browser popup approach in general, has enormous potential and I can’t wait to see what applications will achieve with it!


<Return to section navigation list>
Windows Azure Virtual Machines, Virtual Networks, Web Sites, Connect, RDP and CDN
• Benjamin Guinebertière (@benjguin) described Sample Windows Azure Virtual Machines PowerShell Scripts in a 12/18/2012 post:
I sometimes show a platform that requires a bunch of Windows Azure virtual machines. It has 1 Active Directory domain controller (n123dc1), 3 SQL Server VMs for database mirroring (n123sql1, n123sql2, and n123sp20131 which also happens to have a SharePoint Server 2013 installed), and 2 members of a SharePoint 2012 Web Front End.
Between two demo sessions, I keep the VHD files in Windows Azure blob storage, as well as the virtual network because they don’t cost too much, but I don’t let the virtual machines deployed so that they don’t cost anything.
In order to restart the whole platform I use the following script (I slightly obfuscated one or two values).
#region init
Import-Module 'c:\Program Files (x86)\Microsoft SDKs\Windows Azure\PowerShell\Azure\Azure.psd1'

$subscription = 'Azdem169B44999X'
Set-AzureSubscription -SubscriptionName $subscription -CurrentStorageAccount 'storrageazure2'
Set-AzureSubscription -DefaultSubscription $subscription

$cloudSvcName = 'n123'
#endregion

#region DC
$vmName='n123dc1'
$disk0Name = 'n123dc1-n123dc1-0-20120912092405'
$disk1Name = 'n123dc1-n123dc1-0-20120912105309'
$vNetName = 'Network123'
$subNet = 'DCSubnet'

$vm1 = New-AzureVMConfig -DiskName $disk0Name -InstanceSize ExtraSmall -Name $vmName -Label $vmName |
    Add-AzureDataDisk -DiskName $disk1Name -Import -LUN 0 |
    Set-AzureSubnet $subNet |
    Add-AzureEndpoint -LocalPort 3389 -Name 'RDP' -Protocol tcp -PublicPort 50101

New-AzureVM -ServiceName $cloudSvcName -VMs $vm1 -VNetName $vNetName
#endregion

#region SQL Server
$vmName='n123sql1'
$disk0Name = 'n123dc1-n123sql1-0-20120912170111'
$disk1Name = 'n123dc1-n123sql1-0-20120913074650'
$disk2Name = 'n123dc1-n123sql1-1-20120913080403'
$vNetName = 'Network123'
$subNet = 'SQLSubnet'
$availabilitySetName = 'SQL'

$sqlvms = @()

$vm1 = New-AzureVMConfig -DiskName $disk0Name -InstanceSize Medium -Name $vmName -Label $vmName -AvailabilitySetName $availabilitySetName |
    Add-AzureDataDisk -DiskName $disk1Name -Import -LUN 0 |
    Add-AzureDataDisk -DiskName $disk2Name -Import -LUN 1 |
    Set-AzureSubnet $subNet |
    Add-AzureEndpoint -LocalPort 3389 -Name 'RDP' -Protocol tcp -PublicPort 50604 |
    Add-AzureEndpoint -LocalPort 1433 -Name 'SQL' -Protocol tcp -PublicPort 14330

$sqlvms += ,$vm1

$vmName='n123sql2'
$disk0Name = 'n123-n123sql2-0-20121120105231'
$disk1Name = 'n123-n123sql2-0-20121120144521'
$disk2Name = 'n123-n123sql2-1-20121120145236'
$vm2 = New-AzureVMConfig -DiskName $disk0Name -InstanceSize Small -Name $vmName -Label $vmName -AvailabilitySetName $availabilitySetName |
    Add-AzureDataDisk -DiskName $disk1Name -Import -LUN 0 |
    Add-AzureDataDisk -DiskName $disk2Name -Import -LUN 1 |
    Set-AzureSubnet $subNet |
    Add-AzureEndpoint -LocalPort 3389 -Name 'RDP' -Protocol tcp -PublicPort 50605 |
    Add-AzureEndpoint -LocalPort 1433 -Name 'SQL' -Protocol tcp -PublicPort 14331

$sqlvms += ,$vm2

New-AzureVM -ServiceName $cloudSvcName -VMs $sqlvms
#endregion

#region SharePoint
$vmNamesp1='n123sp1'
$vmNamesp2='n123sp2'
$disk0Namesp1 = 'n123-n123sp1-2012-09-13'
$disk0Namesp2 = 'n123-n123sp2-2012-09-13'
$vNetName = 'Network123'
$subNet = 'SharePointSubnet'
$availabilitySetName = 'WFE'

$spvms = @()

$vm1 = New-AzureVMConfig -DiskName $disk0Namesp1 -InstanceSize Small -Name $vmNamesp1 -Label $vmNamesp1 -AvailabilitySetName $availabilitySetName |
    Set-AzureSubnet $subNet |
    Add-AzureEndpoint -LocalPort 3389 -Name 'RDP' -Protocol tcp -PublicPort 50704 |
    Add-AzureEndpoint -LocalPort 80 -Name 'HttpIn' -Protocol tcp -PublicPort 80 -LBSetName "SPFarm" -ProbePort 80 -ProbeProtocol "http" -ProbePath "/probe/"
$spvms += ,$vm1

$vm2 = New-AzureVMConfig -DiskName $disk0Namesp2 -InstanceSize Small -Name $vmNamesp2 -Label $vmNamesp2 -AvailabilitySetName $availabilitySetName |
    Set-AzureSubnet $subNet |
    Add-AzureEndpoint -LocalPort 3389 -Name 'RDP' -Protocol tcp -PublicPort 50705 |
    Add-AzureEndpoint -LocalPort 80 -Name 'HttpIn' -Protocol tcp -PublicPort 80 -LBSetName "SPFarm" -ProbePort 80 -ProbeProtocol "http" -ProbePath "/probe/"
$spvms += ,$vm2

New-AzureVM -ServiceName $cloudSvcName -VMs $spvms
#endregion

#region SharePoint 2013 and SQL Server witness
$vmName='n123sp20131'
$disk0Name = 'n123-n123sp20131-0-20121120104314'
$disk1Name ='n123-n123sp20131-0-20121120220458'
$vNetName = 'Network123'
$subNet = 'SP2013Subnet'
$availabilitySetName = 'SQL'

$vm1 = New-AzureVMConfig -DiskName $disk0Name -InstanceSize Small -Name $vmName -Label $vmName -AvailabilitySetName $availabilitySetName |
    Add-AzureDataDisk -DiskName $disk1Name -Import -LUN 0 |
    Set-AzureSubnet $subNet |
    Add-AzureEndpoint -LocalPort 3389 -Name 'RDP' -Protocol tcp -PublicPort 50804 |
    Add-AzureEndpoint -LocalPort 80 -Name 'HttpIn' -Protocol tcp -PublicPort 8080

New-AzureVM -ServiceName $cloudSvcName -VMs $vm1
#endregion
In order to stop the whole platform, I use the following script:
#region init
Import-Module 'c:\Program Files (x86)\Microsoft SDKs\Windows Azure\PowerShell\Azure\Azure.psd1'

$subscription = 'Azdem169B44999X'
Set-AzureSubscription -SubscriptionName $subscription -CurrentStorageAccount 'storrageazure2'
Set-AzureSubscription -DefaultSubscription $subscription

$cloudSvcName = 'n123'
#endregion

#region shutdown and delete
echo 'will shut down and remove the following'
Get-AzureVM -ServiceName $cloudSvcName | select name
Get-AzureVM -ServiceName $cloudSvcName | Stop-AzureVM
Get-AzureVM -ServiceName $cloudSvcName | Remove-AzureVM
#endregion
In order to get started, I read Michael Washam’s blog.


<Return to section navigation list>
Live Windows Azure Apps, APIs, Tools and Test Harnesses
• Brian Benz (@bbenz) reported Microsoft Open Technologies releases Windows Azure support for Solr 4.0 in a 12/19/2012 post to the Interoperability @ Microsoft blog:
Microsoft Open Technologies is pleased to share the latest update to the Windows Azure self-deployment option for Apache Solr 4.0.
Solr 4.0 is the first release to use the shared 4.x branch for Lucene & Solr and includes support for SolrCloud functionality. SolrCloud allows you to scale a single index via replication over multiple Solr instances running multiple SolrCores for massive scaling and redundancy.
To learn more about Solr 4.0, have a look at this 40 minute video covering Solr 4 Highlights, by Mark Miller of LucidWorks from Apache Lucene Eurocon 2011.
To download and install Solr on Windows Azure visit our GitHub page to learn more and download the SDK.
Another alternative for implementing the best of Lucene/Solr on Windows Azure is provided by our partner LucidWorks. LucidWorks Search on Windows Azure delivers a high-performance search solution that enables quick and easy provisioning of Lucene/Solr search functionality without any need to install, manage or operate Lucene/Solr servers, and it supports pre-built connectors for various types of enterprise data, structured data, unstructured data and web sites.


<Return to section navigation list>
Visual Studio LightSwitch and Entity Framework 4.1+
• Michael Zlatkovsky described Enhancing LightSwitch Controls with jQuery Mobile from the LightSwitch HTML Client Preview 2 in a 12/19/2012 post:
One of my favorite things about the LightSwitch HTML Client is how easy it is to create forms over data the “LightSwitch way”, and then jump straight into HTML for a bit of custom tweaking. Because the HTML Client makes use of jQuery and jQueryMobile, these two framework are always at your disposal. Of course, you can leverage other frameworks as well, but for this post we’ll focus on building LightSwitch custom controls that “wrap” jQueryMobile functionality. The techniques and patterns you see here will transfer to other frameworks and control types as well.
To install the LightSwitch HTML Client Preview 2 head to the LightSwitch Developer Center.
If you’re just getting started with the LightSwitch HTML Client, you may want to peruse through some of the previous blog posts first.
- Announcing LightSwitch HTML Client Preview 2!
- Building a LightSwitch HTML Client: eBay Daily Deals (Andy Kung)
- New LightSwitch HTML Client APIs (Stephen Provine)
- Custom Controls and Data Binding in the LightSwitch HTML Client (Joe Binder)
OK, let’s get started!
Creating a table with two basic screens
For this post, we’ll start with a new “LightSwitch HTML Application” project, and create a very simple “Customers” table within it. This table will keep track of a customer’s name, family size, and whether or not his/her subscription is active.
To create the table, right-click on the “Server” node in the Solution Explorer, and select “Add Table”. Fill out the information as follows:
Next, let’s create a Browse Data Screen, using “Customers” for the data. Right-click on the Client node in the Solution Explorer, “Add Screen…”, and select “Customers” in the Screen Data dropdown:
Let’s create a second screen, as well, for adding or editing customer data. Again, right-click on the Client node in the Solution Explorer, and add another screen. This time, choose an “Add/Edit Details Screen” template:
Adding screen interaction
Now that we have two screens, let’s add some meaningful interaction between them. Choose the “BrowseCustomers” screen in the Solution Explorer to open the screen designer, and add a new button.
In the dialog that comes up, select “Choose an existing method”, and specify “Customers.addAndEditNew”. The “Navigate To” property is automatically pre-filled to the right default: the Customer Detail screen that we’d created.
If you drag the button above the list and F5, you will get something like this:
If you click the “Add Customer” dialog, you will see a screen that prompts you to fill out some information. It makes sense to have the Name be regular text input, but the Family Size and Active Subscription might be better suited for alternate visual representations.
At the end of this blog post, you’ll be able to transform the “baseline” screen above into something like this:
Setting up a Custom Control
Let’s start with transforming “Family Size” into a Slider control. jQueryMobile offers an excellent slider control, complete with a quick-entry textbox.
This control does not come built-in with LightSwitch, but we can add it as a custom control, with just a bit of render code.
First, navigate to your CustomerDetail screen. With “FamilySize” selected, open the Properties window, and change the control type from “Text Box” to “Custom Control”. You’ll also want to change the width to “Stretch to Container”, so that the slider can take up as much room as it needs.
Now that you’ve switched “FamilySize” to a custom control, navigate to the top of the Property window and select “Edit Render Code”:
A code editor will open, with a method stub automatically generated for you:
myapp.CustomerDetail.FamilySize_render = function (element, contentItem) {
    // Write code here.
};
In the auto-generated function above, “element” is the DOM element (e.g., <div>) that the custom control can write to, while “contentItem” represents view-model information about the item. Thus, we’ll use “element” for where to place the custom control, and “contentItem” for what it represents.
Let’s start with a simple question: assuming you did have a custom control that magically did all the work for you, what parameters would you need to pass to it? Obviously, “element” and “contentItem” from above are necessary. We’d also need to know the minimum and maximum values for the slider… and that’s about it.
A slider control seems like a reasonably generic component, so instead of writing all of the code in this one function, it might be worth separating the generic slider logic from the specifics of this particular instance. Thus, our function above can become:
myapp.CustomerDetail.FamilySize_render = function (element, contentItem) {
    // Write code here.
    createSlider(element, contentItem, 0, 15);
};
Well, that was easy! But now, let’s actually implement the hypothetical “createSlider” function.
Rendering a Slider
The first thing our createSlider function needs to do is create the necessary DOM element. jQueryMobile’s Slider documentation tells us that the Slider operates over a typical <input> tag. So a reasonably first attempt would be to do this:
function createSlider(element, contentItem, min, max) {
    // Generate the input element.
    $(element).append('<input type="range" min="' + min +
        '" max="' + max + '" value="' + contentItem.value + '" />');
}
On F5, you will see that the field indeed renders as a slider. Mission accomplished?
Unfortunately, not quite. If you drag another FamilySize element to the screen (just so you have a regular text box to compare to), you’ll see that the input slider does not seem to do anything. You can drag the slider up and down, yet the other textbox does not reflect your changes. Similarly, you can type a number into the other textbox and tab out, yet the slider is not impacted.
What you need to do is create a binding between contentItem and the slider control. To do this, you’ll actually create two separate one-way bindings: one from contentItem to the slider, and one from the slider to contentItem. Assume for a moment you already have a $slider object, bound to an already-created jQueryMobile slider. The code you would write would be as follows:
// If the content item changes (perhaps due to another control being
//     bound to the same content item, or if a change occurs programmatically),
//     update the visual representation of the slider:
contentItem.dataBind('value', function (newValue) {
    $slider.val(newValue);
});

// Conversely, whenever the user adjusts the slider visually,
//     update the underlying content item:
$slider.change(function () {
    contentItem.value = $slider.val();
});
How do you get the $slider object? The simplest way is to let jQueryMobile do its usual post-processing, but this post-processing happens after the render functions have already executed. The easiest approach is to wrap this latter bit of code in a setTimeout call, which will execute after jQueryMobile’s post-processing gets executed. See Joe’s Custom Controls post for another case – performing actions against a “live” DOM – where you may want to use setTimeout.
Putting it all together, the final createSlider code is:
function createSlider(element, contentItem, min, max) {
    // Generate the input element.
    $(element).append('<input type="range" min="' + min +
        '" max="' + max + '" value="' + contentItem.value + '" />');

    // Now, after jQueryMobile has had a chance to process the
    //     new DOM addition, perform our own post-processing:
    setTimeout(function () {
        var $slider = $('input', $(element));

        // If the content item changes (perhaps due to another control being
        //     bound to the same content item, or if a change occurs programmatically),
        //     update the visual representation of the slider:
        contentItem.dataBind('value', function (newValue) {
            $slider.val(newValue);
        });

        // Conversely, whenever the user adjusts the slider visually,
        //     update the underlying content item:
        $slider.change(function () {
            contentItem.value = $slider.val();
        });
    }, 0);
}
When you F5, you’ll see that both Family Size controls – the textbox and the custom slider – stay in sync. Success!
Creating a Flip Switch for a Boolean field
Having created the Slider, let’s create another control for the Boolean field of “Active Subscription”. Just as with the Slider control, jQueryMobile offers a great Flip Toggle Switch (with customizable labels, if you’d like):
As with the “Family Size” field, we can go to the Active Subscription’s properties and switch it from a Text Box to a Custom Control. I will also change the width to “Stretch to Container”, change the Display Name to just “Subscription”, and finally click “Edit Render Code”:
myapp.CustomerDetail.ActiveSubscription_render = function (element, contentItem) {
    // Write code here.
};
As before, let’s encapsulate the main functionality in a function, that we’ll call from the ActiveSubscription_render method. The information we want to pass in is similar to the Slider. We’ll need “element” and “contentItem”, and we’ll need the analog of a “min” and “max”: in this case, the labels for the true and false states. Reading over the Flip Toggle Switch documentation, we’ll also notice that width must be set explicitly in case for non-standard on/off labels. Thus, we’ll pass in a width parameter as well.
myapp.CustomerDetail.ActiveSubscription_render = function (element, contentItem) {
    // Write code here.
    createBooleanSwitch(element, contentItem, 'Active', 'Inactive', '15em');
};
Now for the fun part – the createBooleanSwitch function. Conceptually, the function is very similar to createSlider.
First we initialize the DOM:
var $selectElement = $('<select data-role="slider"></select>').appendTo($(element));
    $('<option value="false">' + falseText + '</option>').appendTo($selectElement);
    $('<option value="true">' + trueText + '</option>').appendTo($selectElement);
Then, inside a setTimeout (which allows us to operate with the jQuery object for the flip switch), we:
- Set the initial value of the flip switch (we did this in the DOM for the slider, but it’s a little trickier with the flip switch, so I’ve encapsulated it into a shared function that’s used both during initialization and on updating)
- Bind contentItem’s changes to the flip switch control
- Bind the flip switch’s changes back to the contentItem
- One additional step, which we didn’t need to do for the slider: explicitly set the flip switch’s width, as per the documentation.
The resulting createBooleanSwitch code is as follows:
function createBooleanSwitch(element, contentItem, trueText, falseText, optionalWidth) {
    var $selectElement = $('<select data-role="slider"></select>').appendTo($(element));
    $('<option value="false">' + falseText + '</option>').appendTo($selectElement);
    $('<option value="true">' + trueText + '</option>').appendTo($selectElement);

    // Now, after jQueryMobile has had a chance to process the
    //     new DOM addition, perform our own post-processing:
    setTimeout(function () {
        var $flipSwitch = $('select', $(element));

        // Set the initial value (using helper function below):
        setFlipSwitchValue(contentItem.value);

        // If the content item changes (perhaps due to another control being
        //     bound to the same content item, or if a change occurs programmatically),
        //     update the visual representation of the control:
        contentItem.dataBind('value', setFlipSwitchValue);

        // Conversely, whenver the user adjusts the flip-switch visually,
        //     update the underlying content item:
        $flipSwitch.change(function () {
            contentItem.value = ($flipSwitch.val() === 'true');
        });

        // To set the width of the slider to something different than the default,
        //    need to adjust the *generated* div that gets created right next to
        //    the original select element.  DOM Explorer (F12 tools) is a big help here.
        if (optionalWidth != null) {
            $('.ui-slider-switch', $(element)).css('width', optionalWidth);
        }

        //===============================================================//

        // Helper function to set the value of the flip-switch
        //     (used both during initialization, and for data-binding)
        function setFlipSwitchValue(value) {
            $flipSwitch.val((value) ? 'true' : 'false');

            // Because the flip switch has no concept of a "null" value
            //    (or anything other than true/false), ensure that the
            //    contentItem's value is in sync with the visual representation
            contentItem.value = ($flipSwitch.val() === 'true');
        }
    }, 0);
}
On F5, we see that our control works. Again, I put in a dummy textbox for “Active Subscription” to show that changes made in one field automatically get propagated to the other. You’ll notice that on initial load, the text field is set to “false”, rather than empty, as before. This is because of the flip switch has no concept of a “null” value, so I explicitly synchronize contentItem to the flip switch’s visual representation in the setFlipSwitchValue function above.
Removing the temporary “Active Subscription”, we get to this final result:
Next Steps:
Hopefully, this post whets you appetite for what you can do with Custom Controls in the LightSwitch HTML Client, and gives you a clear sense on how to wrap arbitrary controls into LightSwitch-usable components. Leave a comment if you have any questions, and, once again, thank you for trying out Preview 2!


Paul Cotton reported Breaking news: HTML 5.0 and Canvas 2D specification’s definition is complete! in a 12/17/2012 post to the Interoperability @ Microsoft blog:
Today marks an important milestone for Web development, as the W3C announced the publication of the Candidate Recommendation (CR) version of the HTML 5.0 and Canvas 2D specifications.
This means that the specifications are feature complete: no new features will be added to the final HTML 5.0 or the Canvas2D Recommendations. A small number of features are marked “at risk,” but developers and businesses can now rely on all others being in the final HTML 5.0 and Canvas 2D Recommendations for implementation and planning purposes. Any new features will be rolled into HTML 5.1 or the next version of Canvas 2D.
It feels like yesterday when I was publishing a previous post on HTML5 progress toward a standard, as HTML5 reached "Last Call" status in May 2011. The W3C set an ambitious timeline to finish HTML 5.0, and this transition shows that it is on track. That makes me highly confident that HTML 5.0 can reach Recommendation status in 2014.
The real-world interoperability of many HTML 5.0 features today means that further testing can be much more focused and efficient. As a matter of fact, the Working Group will use the “public permissive” criteria to determine whether a feature that is implemented by multiple browsers in an interoperable way can be accepted as part of the standard without expensive testing to verify.
Work in this “Candidate Recommendation” phase will focus on analyzing current HTML 5.0 implementations, establishing priorities for test development, and working with the community to develop those tests. The WG will also look into the features tagged as “at risk” that might be moved to HTML 5.1 or the next version of Canvas2D if they don’t exhibit a satisfactory level of interoperability by the end of the CR period.
At the same time, work on HTML 5.1 and the next version of Canvas2D are underway and the W3C announced first working drafts that include features such as media and graphics. This work is on a much faster track than HTML5 has been, and 5.1 Recommendations are expected in 2016. The HTML Working Group will consider several sources of suggested new features for HTML 5.1. Furthermore, HTML 5.1 could incorporate the results of various W3C Community Groups such as the Responsive Images Community Group or the WHATCG. HTML 5.1 will use the successful approach that the CSS 3.0 family of specs has used to define modular specifications that extend HTML’s capabilities without requiring changes to the underlying standard. For example, the HTML WG already has work underway to standardize APIs for Encrypted Media Extensions, which would allow services such as Netflix to stream content to browsers without plugins, and Media Source Extensions to facilitate streaming content in a way that adapts to the characteristics of the network and device.
Reaching Candidate Recommendation further indicates the high level of collaboration that exists in the HTML WG. I would especially like to thank the W3C Team and my co-chairs, Sam Ruby (IBM) and Maciej Stachowiak (Apple), for all their hard work in helping to get to CR. In addition, the HTML WG editorial team lead by Robin Berjon deserves a lot of credit for finalizing the CR drafts and for their work on the HTML 5.1 drafts.
/paulc
Paul Cotton, Microsoft Canada
W3C HTML Working Group co-chair


This post is germane because the Visual Studio LightSwitch HTML Client Preview provides a front-end for SharePoint apps autohosted in Windows Azure Web Sites (see my LightSwitch HTML Client Preview 2: OakLeaf Contoso Survey Application Demo on Office 365 SharePoint Site post updated 12/18/2012 for details.)

Return to section navigation list>
Windows Azure Infrastructure and DevOps
•• Scott Guthrie (@scottgu) reported availability of Updates to Windows Azure (Mobile, Web Sites, SQL Data Sync, ACS, Media, Store) in a 12/21/2012 post:
This morning we released a number of enhancements to Windows Azure. These new capabilities include:
- Mobile Services (job scheduler support, Europe Region Support, Command Line Support)
- Web Sites (scale improvements, integrated source control)
- SQL Data Sync (support in the new HTML portal)
- ACS Management (support in the new HTML portal)
- Media Services (job and task management, blob storage support, reserved compute)
- Virtual Network enhancements
- Subscription Filtering Support
- Windows Azure Store (now available in more countries)
All of these improvements are now live in production and available to start using immediately. Below are more details on them:
Mobile Services
Windows Azure Mobile Services now supports the ability to easily schedule background jobs (aka CRON jobs) that execute on a pre-set timer interval, and which can run independently of a device accessing the service (ensuring that you don’t block or slow-down any requests from your users). This job scheduler functionality allows you to perform a variety of useful scenarios without having to create or manage a separate VM. Some of the scenarios you can enable with it include:
- Periodically purging old/duplicate data from your tables.
- Periodically querying and aggregating data from external web service (tweets, RSS entries, location information) and cache it in your tables for subsequent use.
- Periodically processing/resizing images submitted by users of your service.
- Scheduling the sending of push notifications or SMS messages to your customers to ensure they arrive at the right time of the day.
Using today’s release you can now easily register background tasks by navigating to the new Scheduler tab of your mobile service in the Windows Azure portal, and then by clicking the Create button:
Doing this enables you to name a new job, and select how often you want to run it (note: you can also change the schedule later on):
Once a job is created, you can drill into it and select the Script tab to author the server script you want to be executed on a recurring interval. As an example, the below script fetches Twitter updates about “red polos” and sends out a push notification from the mobile service:
Once you’ve entered the script, you can save and then click the Run Once button to execute a trial run. The Run Once functionality lets you easily test your job script before you enable the job for recurring execution. To enable recurring execution of the job, click either the Enable button within the script-view or go back to the Scheduler tab, select the job, and click the Enable button to activate it.
This new job scheduler capability makes it incredibly easy to integrate background work within your Mobile Service (without having to create or manage a separate VM to run it in). It can be used by all Mobile Service (even the free-tier level). The free-tier of Mobile Services includes support that allows you to run one background job every hour. If you upgrade your mobile service to have a reserved instance you can run up to 10 jobs every 15 minutes.
Check-out the Windows Azure Mobile Services documentation for an even more in-depth job scheduler tutorial.
Mobile Service Region Support in Europe
Before today, our preview of Windows Azure Mobile Services was only supported in the US East and US West regions of Windows Azure. With this week’s update you can now also create Mobile Services in the North Europe region as well. As with every Windows Azure service, over time we will extend Mobile Services to all Windows Azure regions world-wide:
Mobile Service Command Line Support
Earlier this year we released a cross-platform Windows Azure Command Line Tool (a.k.a ‘azure’) that allows you to manage Windows Azure Web Sites, VMs and other services from the command line on Windows, Mac, and Linux. You can learn more about it here. Today we have released an update for this tool that adds support for Windows Azure Mobile Services as well. To get started, install the ‘azure’ tool for Windows or Mac.
If you haven’t used the tool before, you need to perform a one-time step and download/import the Windows Azure management credentials for your account. In a command prompt run the following command to download Windows Azure publish settings:
> azure account download
then import the .publishsettings file you just downloaded:
> azure account import "C:\temp\my-credentials.publishsettings"
Once you do this you’ll be able to access your Windows Azure subscription and perform operations against it entirely from the command-line. For example, using today’s update we can now create a new Window Azure Mobile Service entirely from the command-line (no portal interaction required at all):
> azure mobile create scottgucli
And with that simple command we now have a newly created Windows Azure Mobile Service!
Creating new tables with the mobile service can likewise now be done entirely from the command-line:
> azure mobile table create scottgucli products
Many users have asked for the ability to directly upload scripts from their file system (without having to go through the portal) and the new CLI support makes this really easy. For example, to upload an “insert” script for the products table we just created above you can use the following command:
> azure mobile script upload scottgucli table/products.insert -f c:\code\products.js
Now this script will run every time a record is inserted into the products table.
Web Sites
With today’s release we have increased the scaling capabilities of our Windows Azure Web Sites service.
Previously a web-site could only be scaled up to run across 3 shared instances or 3 reserved VMs. With today’s release we now support the ability for you to scale up a web-site to run across 6 shared instances (beyond which it is cheaper to switch to a reserved instance):
With today’s release we also now support the ability for you to scale up a web-site to run across 10 reserved VM instances (where you are guaranteed to be the only customer using those VMs). You can use either Small, Medium, or Large sized VMs when doing this:
This provides you the ability to dramatically scale up (or scale down) your web-site resources in only seconds.
New Custom Create Workflow for Websites
One of the other nice improvements with today’s release is a new Custom Create workflow for setting up web-sites that allows you to configure source control settings as part of the site creation (instead of having to do it after the fact). Choose the NEW->Website->Custom Create command to try this out:
Selecting the “Publish from Source Control” checkbox above will display a new second-step with the custom-create wizard that allows you to configure either TFS based publishing:
Or enable Git based publishing, and allow you to push either from a local repository or associate with a Git-based hosting provider:
This makes it super easy to setup a new site with continuous delivery already enabled in only seconds.
SQL Data Sync
With today’s release you can also now leverage SQL Data Sync Services from within the new Windows Azure Management Portal. SQL Data Sync lets you synchronize data between multiple SQL databases. These SQL databases can span across your on-premises environment and the cloud, or across multiple cloud hosted databases (for example: within multiple Windows Azure regions around the world). It is a very powerful capability that can enable a variety of interesting scenarios.
To use SQL Data Sync, go to the SQL Databases section of the new Windows Azure Management Portal and click on the new ADD SYNC command in the bottom tray of it:
CREATING A SYNC AGENT
If you plan on synchronizing with SQL Server databases that reside in your on-premises environment (or another cloud hosting provider besides Windows Azure) then you will first need to download, install and configure an agent with your SQL Server. Click the NEW SYNC AGENT command above to then associate this agent with Windows Azure:
After you create an agent endpoint (or any Data Sync resource) you will see a new SYNC preview tab that appears when the “SQL Databases” extension is selected in the left navigation pane of the portal. The agent you just created will appear in the list within that tab. Click MANAGE KEY to generate and copy the key you’ll need to use when configuring the on-premises SQL Server Agent to connect to Windows Azure.
CREATING A SYNC GROUP
Once you have your databases ready, you can create a new Sync Group. A sync group defines references to databases that will be sync’d as well as the configuration that defines how and when the syncing will occur.
Select the New Sync Group command in the portal and use the wizard to complete the following steps:
1. Give it a name.
2. Choose the hub database, and provide connection credentials. The hub database is the central database within the group and must be a SQL Database in Windows Azure:
3. Then add a reference database, and provide connection credentials. Think of reference databases as “spoke” or “member” databases that connect with the hub database. They can be any combination of on-premise SQL Servers or other Windows Azure SQL Databases. They can sync bi-directionally with the hub, to the hub, or from the hub:
Once you’ve completed the above steps, your sync group is setup.
DEFINING SYNC RULES
You can now drill into the sync group to define your sync rules, manage the reference databases, add new reference databases, configure sync settings, and view historical sync logs. Note that you must define your sync rules via the SYNC RULES tab before syncing will begin. These rules determine the tables, columns, and even the rows that will be involved in the sync. You will want to choose the rules based on the needs of the application.
CONFIGURING SYNC
Once the sync rules have been defined, the sync group can be synchronized, either on demand using the SYNC button or on regular scheduled interval. Use the CONFIGURE tab to setup a sync schedule to have the synchronization happen automatically.
Once setup, your databases will automatically synchronize. This can work either between your on-premises environment and the cloud, or between multiple cloud databases (for example: within multiple Windows Azure regions around the world). It is a very powerful capability that can enable a variety of compelling scenarios.
Active Directory Access Control Management (ACS) Support
With today’s release, you can also now create and manage Windows Azure Active Directory Access Control namespaces from the new Windows Azure Management Portal.
Windows Azure AD Access Control is a service that lets you authenticate and authorize users for your web applications and services, while allowing authentication and authorization features to be factored out of your code. ACS works with standards-based identity providers, including enterprise directories such as Active Directory, and web identities such as Windows Live ID, Google, Yahoo!, and Facebook. For more information, see Windows Azure AD Access Control.
Creating an ACS Namespace
To create an Access Control namespace, click NEW in the Windows Azure Management Portal, and select APP SERVICES -> ACCESS CONTROL ->QUICK CREATE. In the namespace field, type the name of the Access Control namespace that you want to create:
Managing a Namespace
To manage an Access Control namespace, click on the new Active Directory node in the navigation bar on the left-hand side of the portal:
Then, select the namespace you want to manage, and click the MANAGE button in the command bar at the bottom of the screen. This will open the ACS Management Portal. You can additionally move your ACS namespaces from one subscription to another via the CHANGE SUBSCRIPTION command in the bottom of the page.
For more information about other recent enhancements that make Windows Azure AD more useful for developers, read Alex Simons’ blog post here, and Bill Hilf’s post here. Even more Active Directory functionality will be integrated within the Windows Azure Portal next year.
Media Service Enhancements
Today’s release contains a number of great enhancements to Windows Azure Media Services. This release includes investments to:
- Job and Task management
- Adding content from a Windows Azure storage account
- Scaling your media services account to increase encoding concurrency
Job and Task Management
You can now track the progress and history of your media encoding jobs from within the Windows Azure Portal. The new JOBS tab within the Media Services extension lets you define custom queries for jobs by status, timeframe, or Job Id:
The results of your queries will appear below the query editor. You can expand jobs to see information about the tasks that make up the job giving you deeper insight into each individual job and determine where things are progressing as planned or might require attention. You can also select a job within the list to either cancel the job or view details including errors related to the tasks.
Adding Content from Windows Azure Storage
Prior to this release, the only way to get content into your media services account was to write code using the Azure Media SDK, or upload a file within the portal from your local computer. Today we are introducing a new feature within the Windows Azure Portal that lets you choose existing media files from Windows Azure Blob Storage, thereby reducing your upload latency. From the CONTENT tab within the Media Services extension, you can select the UPLOAD command.
Notice the file browser now offers a FROM STORAGE option in addition to the previous “FROM LOCAL” support we already shipped. Note that the 200 MB limit mentioned in the header only applies to the FROM LOCAL option. Files sizes in the tens of gigabytes are supported via the FROM STORAGE option:
The FROM STORAGE option will open the storage browser; you will be able to select a media file from blob storage from here.
Reserved Capacity for Media Service Jobs
With today’s release we have also added a new capability that allows you to scale up the number of encoding tasks you are processing. By default, we only support having one active encoding task at a time. Using the new SCALE page, you can reserve encoding units that let you encode multiple tasks concurrently and have even more processing power reserved for your media workflows:
Virtual Networking Simplifications
Based on customer feedback, we have significantly simplified the virtual network creation workflow within the Windows Azure Portal. In an earlier release, we had introduced a “Quick Create” workflow that simplified the most common virtual networking scenarios. In this release, we have further simplified the “Custom Create” experience to make creating more advanced scenarios easier as well. Here’s a quick tour of the updates.
In the Portal, Start with NEW -> NETWORKS -> CUSTOM CREATE
This opens up the Create Virtual Network wizard, where you can fill in the name of the VNET and Affinity group, just as you do today.
When you do this, you then be presented with a new experience – an updated page where we abstract away the complexities of CIDR:
The experience is pretty simple. Need to add another address space? Click the add address space button. Need to add a subnet? Click the add subnet button. The best part is, we do the calculations for you and automatically provide you with the starting IP address. With a few clicks, soon it can be fully fleshed out and ready to use:
Subscription Filtering Support within the Windows Azure Portal
Many Windows Azure users have multiple Azure subscriptions that are used for different scenarios. Some users have one subscription for each department in their company; others have one for each environment (development, testing, and production). Some users even have one for each external customer that they work with. Regardless of which category you fall into, you might find that managing all of the resources across all subscriptions can be challenging, difficult to navigate, and can result in a sluggish experience.
Starting today a new subscription filter UI now appears next to your user name in the top right-hand side of the Windows Azure portal to help filter your views by one or more subscriptions. Selecting it will display a drop-down list that enables you to quickly filter which subscriptions you want to see in the portal:
By default, all of your subscriptions are selected and loaded into the portal. Using the dropdown, you can now pick and choose exactly which subscriptions you want to manage. This will provide a few noticeable benefits:
- Resources associated with hidden subscriptions are filtered out of all the experiences across the portal.
- Your filter selection roams with you across sessions and devices. If you set a filter on your laptop it will take affect when you return to your desktop or mobile device.
- Users with many subscriptions will notice a significant performance improvement when loading only a small subset of their subscriptions since data for subscriptions that are filtered out is never loaded.
Note: If you only have one subscription, this change doesn’t affect you one bit. Your experience remains unchanged. In fact, you’ll only see the subscription filter UI show-up if you have more than subscription.
Windows Azure Store Now Available in More Countries
This week we have also expanded the number of countries that the Windows Azure Store is available within (previously it was only available in the United States). The Windows Azure Store enables you to easily subscribe to services provided by 3rd party partners of ours – and have them automatically added to your Windows Azure bill. It is an incredibly cool capability – and one I’ll be blogging a lot more about shortly.
In the mean-time, try it out by selecting the New->Store command within the portal and sign-up for one of the services in it today.
Summary
The above features are all now live in production and available to use immediately. If you don’t already have a Windows Azure account, you can sign-up for a free trial and start using them today. Visit the Windows Azure Developer Center to learn more about how to build apps with it.
Hope this helps,
Scott


![clip_image002[4]](http://weblogs.asp.net/blogs/scottgu/clip_image0024_15C9C761.png "clip_image002[4]")
![clip_image004[4]](http://weblogs.asp.net/blogs/scottgu/clip_image0044_27A8EBDF.png "clip_image004[4]")
![clip_image006[4]](http://weblogs.asp.net/blogs/scottgu/clip_image0064_3DFE9124.png "clip_image006[4]")
![clip_image010[4]](http://weblogs.asp.net/blogs/scottgu/clip_image0104_48BE792A.png "clip_image010[4]")

Alex Williams (@alexwilliams) asserted Windows Azure Gets More Competitive With AWS, Launches New Mobile Features, Website Scaling, Data Sync And More in a 9/21/2012 article for TechCrunch:
Windows Azure has added eight new features, including new mobile services, website scaling, and data sync.
Vice President Scott Guthrie detailed the new features on his blog. Here are some of the more noteworthy improvements:
Mobile Services: Better capability to schedule background jobs so the user experience doesn’t get disrupted. Jobs can be scheduled on pre-set time intervals, allowing the developer to perform scenarios without creating or managing a separate virtual machine. In addition, Azure mobile services are now available in Northern Europe. Previously, Windows Azure Mobile Services was only supported in the US East and US West regions of Windows Azure.
Website Scaling: Developers can now scale websites to six shared instances and up to 10 reserved instances. These can be small, medium or large in size. Previously, a developer could only scale to three shared instances and three reserved ones. Guthrie also writes that Azure now has a new custom create workflow that allows for the configuration of source control settings as part of the site creation.
Data Sync: SQL Data Sync Services are now available from within the new Windows Azure Management Portal. Guthrie explains that SQL Data Sync lets you synchronize data between multiple SQL databases. These SQL databases can span across your on-premises environment and the cloud, or across multiple cloud-hosted databases that might include multiple Windows Azure regions around the world.
Here’s the full list of what’s available:
- Mobile Services (job scheduler support, Europe Region Support, Command Line Support)
- Web Sites (scale improvements, integrated source control)
- SQL Data Sync (support in the new HTML portal)
- ACS Management (support in the new HTML portal)
- Media Services (job and task management, blob storage support, reserved compute)
- Virtual Network enhancements
- Subscription Filtering Support
- Windows Azure Store (now available in more countries)
There have been a number of recent updates to Windows Azure, which illustrates that it trying to be more competitive with Amazon Web Services (AWS). Azure is still a ways from being a true challenger but it has continually been adding new features that shows that it is intent on closing the gap.
Earlier this month, the team reported that a developer can do automatic push updates for iOS mobile apps. It also announced a drop in price for storage. Earlier this week Forrester Research reported that Azure is second in popularity with developers to AWS. It’s still far behind Amazon Web Services, but the Azure team is showing it has credibility with developers. That’s a big deal, showing that a community is indeed emerging on the Azure cloud.


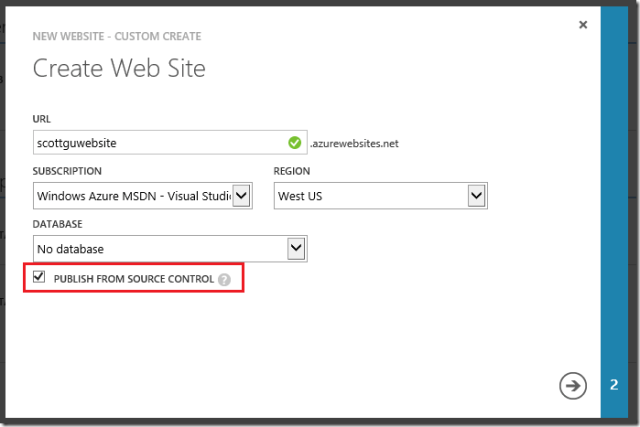
• Peter Wayner asserted “Microsoft's cloud wows with great price-performance, Windows toolchain integration, and plenty of open source options” in a deck for his Review: Windows Azure shoots the moon article of 12/20/2012 for InfoWorld’s Cloud Computing|Test Center:
A long time ago in a century slipping further and further away, Bill Gates compared MSN with the exploding World Wide Web, saw the future, and pivoted nicely to embrace the Internet. A few decades later, someone at Microsoft looked at the cloud and recognized that the old days of selling Windows Server OS licenses were fading. Today we have Windows Azure, Microsoft's offering for the cloud.
Azure is a cloud filled with racks and racks of machines like other clouds, but it also offers a wider collection of the building blocks enterprise managers need to assemble modern, flexible websites. There are common offerings such as virtual machines, databases, and storage blocks, along with not-so-common additions such as service buses, networks, and connections to data farms address verifiers, location data, and Microsoft's own Bing search engine. There are also tools for debugging your code, sending emails, and installing databases like MongoDB and ClearDB's version of MySQL.
All of these show that Microsoft is actively trying to build a system that lets developers easily produce a working website using the tools of their choice. Azure is not just delivering commodity Microsoft machines and leaving the rest up to you -- it's starting to make it simpler to bolt together all of the parts. The process still isn't simple, but it's dramatically more convenient than the old paradigm.
Not-only-Windows Azure
The Azure service is a godsend for those who are heavily invested in Microsoft's operating systems. Many of the big clouds offer only Linux or BSD machines. Rackspace charges 33 percent more to build out a Microsoft Windows server, but Azure rents a Windows machine at the same bargain rate as Linux.Did I say the same as Linux? Yes, because Microsoft is fully embracing many open source technologies with Azure. You can boot up a virtual machine and install a few of the popular Linux distros like Ubuntu Server 12.04 or OpenSuse 12.1. There aren't many choices of open source distros, but Microsoft has chosen a few of the more popular ones. They cost the same as the standard Windows Server 2008 R2 and Windows Server 2012 offerings.
Microsoft's embrace of open source is on full display with Azure. The company is pushing PHP, Node.js, Python, Java (if you consider Java open source), and even MySQL. Well, that's not exactly true. You can create running versions of Drupal or WordPress, and Azure will set up MySQL back ends for you. If you go to the SQL tab to start up your own SQL database, you can provision an instance of Microsoft SQL Server, but there's no mention of MySQL. That's because Microsoft is letting a third party, ClearDB, deliver MySQL. It's one of a dozen or so extras you can buy.
The websites with Drupal or WordPress are among many options available. Microsoft will let you have up to 10 free ones with your account. Then you push your HTML or PHP to them with Git, and the server does the rest. (Notice the embrace of Git too.)
These free options are come-ons. If your website takes off and you start getting traffic, you can upgrade to shared services or full, managed machines that can be load balanced. The documentation is a bit cagey about what happens as you start fiddling with the Scale control panel, but you get better guarantees of service and less throttling. If you move over to the Reserved setting, you get dedicated virtual machines with resource guarantees. This is a pretty simple way to build and test a website before deploying it for production.
Your list of Azure virtual machines and services can grow pretty quickly. …
Also on InfoWorld: Peter Wayner reviews

• Glenn Block (@gblock) reported azure-cli 0.6.9 ships, pure joy on 12/19/2012:
In the past few months we’ve really been fleshing out our cli and surfacing more and more Azure services to your fingertips, literally! In this release there is a lot of goodness, I think you are going to like what you see!
Here’s a quick summary of what you should expect to find when grab the latest bits.
- Custom website deployment “azure site deploymentscript”.
- Mobile Service support “azure mobile”.
- Windows installer.
- Service Bus “azure sb”.
- Storage accounts “azure account storage”.
Custom Website Deployment – Deployment your way
One of the common requests we hear is that folks want to customize how their code is deployed in their Azure Websites. For example, some folks want to run a custom step on the server every time they deploy to a staging environment.
In this release, we’re introducing a new command for doing just that, “azure site deploymentscript”. This will generate for you a script either in bash or cmd format which contains all the server logic that will execute when your site is deployed. You can then easily customize that script to your heart’s content.
When you use this feature, you really are too cool for school. To see it in action, I am going to show you how to enable a common scenario, that is make my mocha scripts run for my node app every time I push via git. Assume I created a simple express hello world by running the “express” cli.
I then created a dummy test.js which will always fail.
Now in my app folder, I run the deploymentscript command specifying a node app and to create a bash script.
You can see the generated script here in this gist: https://gist.github.com/4331260/revisions by looking at the last file.
If you look at the script you’ll see several different sections.
- #Prerequisites – This section defines code that should run before anything else. For a node app here is where it detects if node is installed.*
- #Setup – This handles setting up script variables or installing other necessary modules. For example you’ll see it installs the node “kudusync” module which is used for moving files from where the files are pushed to the target website.
- #Deployment – This handles actually deploying the code (calling kudusync) and other steps like calling npm for node modules.
*Note: There is a bug currently in the bash version of this, which uses the “where” command to find node which does not work on bash. The fix is in the gist above at line 24.
One great thing about this script, is it is designed to actually allow you to run it locally. It detects whether you are in the local folder and will just create an artifacts folder for the files that are copied over. This is really useful when developing.
For my unit test scenario I want to do things a little differently than the generated script does by default.
- I want it to install mocha, the same way it installs kudusync
- I want it to run npm before it copies the files to the website, not after.
- I then want it to run mocha and if the tests fail I want the deployment to abort.
Doing that means moving a few things around and adding some new steps. In order to make it also work locally there’s some light mental gymnastics, but nothing rocket science.
The final script is the top file in the gist revisions (https://gist.github.com/4331260/revisions)
I’ve annotated the parts I changed with “# gb:” and thanks to github’s awesome diff feature you can easily see the comments and what was changed.
Now when I deploy the site, it runs my tests and I get the output right when I git commit.
Notice above that my tests failed and my website was not updated.
This is just one of many scenarios that are now opened up to you through the new custom deployment feature.
Mobile Services
With this release we’re bringing you commands for Windows Azure Mobile Services so you can create mobile back ends for your Win 8, Windows Phone, IOS and Android applications right from the shell. You can create new services, provision databases, create and query tables, manage scripts and more with just a few commands!
Below you can see that I am creating a new Mobile Service using “azure mobile create”. In the create call I’ve passed my service name, user and password and that’s it.
As you can see it has created a new service, and deployed a new SQL Server and Database. You can also pass parameters in like –sqlServer and –sqlDb to use existing servers and databases.
Next I use “azure mobile table create” to create two new tables and display their details.
Now that I have tables, I can even upload a script using the “azure mobile script upload”, list existing scripts with “azure mobile script list” and download using “azure mobile script download”.
With my scripts in place, I am now ready to build my mobile app to consume my mobile service. To talk to the service I need my application url and key, which I can get thanks to the “azure mobile show” command.
For this example, I built a very simple example that looks a whole lot like our hello world that we create in the portal only morphed to a mini contact manager :-)
Now that I have data there’s one more bit of icing on the cake, I can query my tables right from the cli!
This is just a preview of the features “azure mobile” offers. Type “azure mobile –help” to see what else is in the box.
CLI Installer for Windows
With this release we’re introducing a one click, no hassle installer for Windows.
That means if you are not a node developer, you don’t have to worry about installing, node, getting the module from npm, etc. Use the installer and everything is taken care of for you.
Download the installer here.
Storage Accounts and Service Bus
If you are using our SDKs to talk to Windows Azure Storage or Service Bus then you are most likely using the Azure portal to create your storage account or namespace and to manage your keys. No longer is that the case! You can now use the cli for both.
Storage Accounts
Below you can see where I am creating a new storage account using “azure account storage create” and then retrieving the storage keys.
Service Bus
Next I am creating a new Service Bus namespace using “azure sb namespace create”. Notice you get returned the connection string which you can then pass directly to our SDKs when you use them.
You can also retrieve the namespace information (including connection string) at any time by using the “azure sb namespace show” command.
More good stuff on the way
Over the coming months, you are going to see some really useful (at least we think so) features finding their way into our new CLI. For example today you can only work with accounts and subscriptions, but in the future you’ll be able to also work directly with Storage and Service Bus like uploading blobs, querying tables or even sending messages.
And just to whet your appetite, here is a preview of one more very useful feature you’ve been asking for ;-). (Make sure to read what it says by ‘.description’)


• Mary Jo Foley (@maryjofoley) asserted “It was a busy year for the Microsoft public cloud team in 2012. And 2013 is shaping up to be another fast-paced one on the Azure front” in a deck for her Windows Azure: A look back and hints of what's ahead article of 12/19/2012 for ZDNet’s All About Microsoft blog:
This past year was a busy one for Microsoft's Windows Azure team. And next year seems to be shaping up as an equally fast-paced one for the groups building, maintaining and selling Microsoft's public cloud platform.
In January 2012, I posted a roadmap with which Microsoft had provided some of its partners, listing many of the planned Azure features slated to roll out in the coming months. Looking back on that now, it seems like the Softies made good on pretty much all of the listed promises.
Arguably, the biggest announcement of the year for Azure was the addition of persistent virtual machines, allowing users to run Linux and Windows Server on Microsoft's cloud. (The persistent VM capability is still in "preview," with no word as to when it will be deemed "final.") With that addition, Microsoft took on infrastructure-as-a-service kingpin Amazon head-on.
Bill Hilf, General Manager of Azure -- and former Linux point man at Microsoft -- said the Azure team began putting in place the people and the infrastructure to enable this year's Azure updates over a year and a half ago.
Hilf said the team had a few fundamental priorities for 2012. First off, it wanted to make Azure the cloud-development platform of choice for the .Net faithful. Visual Studio .Net is still "the fastest, best and most enjoyable way" to build Azure apps and will continue to be, Hilf said.
At the same time, however, the team also wanted to expand the appeal of Azure to non-Microsoft tech users and developers. Microsoft added support for PHP, Python, Java and full-stack solutions, meaning things like MongoDB, caching technologies, the ability to use Macs to write and deploy on Azure. But as Hilf understood from his years working on Linux, support needed to go beyond press releases and check-box items.
"We had to get deep in these communities to provide real stuff they wanted, like Github publishing, open, RESTful endpoints and Linux on VMs (virtual machines)," Hilf said.
In spite of the play Microsoft gave its Linux and Windows on VM announcement, it remains committed to building out Azure as a premier platform-as-a-service (PaaS) play, Hilf said. Microsoft's contention is PaaS still provides users the best economic value and best way to scale. He said Microsoft's investment in PaaS "is as strong as ever," and pointed to Azure Media Services, which provides live streaming and video-on-demand, as a proof point for potential payoff.
Up Next: Service-level agreement options, prepackaged app stacks?
Going in 2013, Microsoft will continue to emphasize the availability and importance of a hybrid public/private cloud, Hilf said. The message is users can opt for cloud deployments in their own datacenter, in Windows Azure and/or using third-party hosters and have all of these work together. Hilf called this guarantee "an insurance policy" for customers, as well as a differentiator between Azure and cloud offerings from Amazon and Google.
"This (hybrid) approach is one of our most valuable assets," Hilf said.
Hilf said to watch for Microsoft to do some "creative things" around service-level agreements for enterprise customers in the coming year.
"If you can run apps better and more reliably than us, run it in your own datacenter," Hilf said as a tease. "And many enterprises do run very efficiently already."
(Could this be the resurrection of Microsoft's "Azure in a Box"/Azure appliance strategy? Perhaps.)
Hilf also said the Azure team is evaluating what customers may want in terms of prepackaed application stacks on Windows Azure. Would users be interested in Microsoft providing SQL Server on a persistent Windows Server VM on Azure, for example? If it's good enough for Oracle....
Hilf didn't have anything new to say about how and when Microsoft plans to allow users to take applications they build specifically to run on Windows Azure and move them back into their own datacenters. He did acknowledge that this is something users do want, but that the timing and strategy for this is still up in the air. Microsoft's recently announced strategy to make some Azure capabilities available to hosters on Windows Server is a first step in this direction, Hilf said.
"Strategically, we want to enable PaaS applications to come back to on-premises datacenters. Our 'CloudOS' strategy means we ant to enable consistency," he said.
Moving Microsoft's core services to Azure: The dream is still alive
One of Microsoft's goals for Azure remains to make it the platform upon which many, if not most, of Microsoft's own services run, Hilf confirmed.
"In the long term, we want all of our first-party services to be on Azure," Hilf said.
Currently, there are a number of Microsoft services that don't run on Azure, including Office 365, Dynamics CRM, Bing, Hotmail and Xbox Live. But many of Microsoft's more recently introduced services -- HealthVault, So.cl, Team Foundation Service, Bing Finance, Bing Sports -- already are running on Azure.
"Some of these (not currently on Azure) are really complicated systems, but parts of them do run on Azure," Hilf noted.
He said Microsoft is continuing to make headway on this front, and that the recently-enabled federation between Active Directory and Windows Azure Active Directory is a step along the path.
While a cloud-deployment and -servicing model implies more rapid update cycles, Microsoft's enterprise experience has given the Azure team an appreciation for process, Hilf said.
"We are still doing things like security and compliance in a very vigorous way," even in the cloud, Hilf said. "It doesn't pay just to go fast to get there first."
The motto for the team in 2013 and beyond, Hilf said, is "to "go slow to go fast."


No significant articles today
<Return to section navigation list>
Windows Azure Platform Appliance (WAPA), Hyper-V and Private/Hybrid Clouds
• Kevin Remde (@KevinRemde) produced TechNet Radio: Cloud Innovators – (Part 4) Private Cloud IaaS on 12/18/2012:
In Part 4 of our Private Cloud basics series, I spoke with Tom Shinder, Yuri Diogenes about Infrastructure as a Service (IaaS) and how this component factors into your Private Cloud planning. Tune in as we chat about the differences between this and Software as a Service and Platform as a Service, what security considerations you should be aware of, as well as how Windows Server 2012 and Windows Azure fits into this equation.
After watching this video, follow these next steps:
Step #1 – Download Windows Server 2012
Step #2 – Download Your FREE Copy of Hyper-V Server 2012
Step #3 – Start your FREE 90-day Trial of Windows AzureIf you're interested in learning more about the products or solutions discussed in this episode, click on any of the below links for free, in-depth information:
Resources:
Websites & Blogs:
- Kevin Remde’s Blog – Full of I.T.
- TechNet Private Cloud Scenario Hub
- TechNet Private Cloud Architecture Blog
- Yuri Diogenes’ Blog
- TechNet Article: “What is Infrastructure as a Service”
- “Building an Infrastructure as a Service (IaaS) Cloud Using Windows Server 2012”
- Microsoft solutions for Service Provider cloud
Videos:
- TechNet Radio: Cloud Innovators – (Part 1) Private Cloud Principles
- TechNet Radio: Cloud Innovators – (Part 2) Private Cloud Security
- TechNet Radio: Cloud Innovators – (Part 3) Private Cloud Planning
Virtual Labs:
Follow @technetradio
Become a Fan @ facebook.com/MicrosoftTechNetRadio
Follow @KevinRemde
Become a Fan of Full of I.T. @ facebook.com/KevinRemdeIsFullOfIT

No significant articles today
<Return to section navigation list>
Cloud Security, Compliance and Governance

<Return to section navigation list>
Cloud Computing Events
• Scott Guthrie (@scottgu) reported Applications are now open for the Microsoft Accelerator for Windows Azure - 2013 on 12/19/2012:
In October, I introduced the finalists for the Microsoft Accelerator for Windows Azure, powered by TechStars. Over the past couple of months, these startups have been mentored by business and technology leaders, met with investors, learned from each other, and, most importantly, been building great products. You can learn more about the startups in the first class and how they’re using Windows Azure here.
As the first class approaches Demo Day on January 17th, I’m happy to announce that today we are opening applications for the second class of the Microsoft Accelerator for Windows Azure. The second class will begin on April 1,, 2013 and conclude with Demo Day on June 26, 2013.
If you are currently working at a startup or considering founding your own company, I encourage you to apply. We’re accepting applications through February 1st, 2013. You can find more information about the Accelerator and the application process here.
It’s been truly inspiring to work with the current class of startups. This inaugural class has brought with them incredible energy and innovation and I look forward to reviewing the applications for this next class.
Hope this helps,
Scott

Business Wire reported PASS Announces Business Analytics Conference in Chicago, April 10-12, 2013 on 12/18/2012:
New event supports Microsoft business intelligence and analytics professionals using Microsoft Office, Microsoft SharePoint, SQL Server, and Windows Azure
The not-for-profit PASS technology community today announced the new PASS Business Analytics (BA) Conference, which will take place at the Sheraton Chicago Hotel and Towers, April 10-12, 2013.
“Microsoft empowers organizations to speed their time to insight from any data of any size, anywhere through a comprehensive data platform which enables accelerated business decision making with the familiar applications that information workers use every day”
Over 1,200 business analysts, data scientists, line-of-business managers, and IT pros are expected to take part in the inaugural PASS BA Conference, which will deliver the real-world insights, prescriptive guidance, best practices, and strategic vision for successfully analyzing, managing, and sharing business information and insights through Microsoft’s collaborative BA platform.
“Microsoft empowers organizations to speed their time to insight from any data of any size, anywhere through a comprehensive data platform which enables accelerated business decision making with the familiar applications that information workers use every day,” said Doug Leland, general manager of product management for SQL Server at Microsoft. “Microsoft looks forward to supporting the PASS organization’s BA Conference and its mission of bringing together data enthusiasts from business and IT to discuss effective and integrated data management solutions.”
Four optional full-day pre-conference workshops will lead into the two-day main conference program, featuring over 60 business and technical sessions across six topic tracks, real-world customer and partner presentations, executive keynotes, and an exhibit hall showcasing the latest partner solutions. Combined with evening receptions and other networking opportunities, attendees will walk away with the contacts, tools, and expertise they need to get the most out of their organization’s data and information.
Topics will encompass everything from big data, advanced analytics, data warehousing, and enterprise information management to BI information delivery and user experience, including self-service analytics and mobility.
Registration for the PASS BA Conference is now open, with the $1,095 early-bird rate available until December 7, 2012. For more information and to register, visit http://www.passbaconference.com.
About PASS
PASS is an independent, not-for-profit association dedicated to supporting, educating, and promoting the global Microsoft SQL Server and Business Intelligence community. From local user groups and virtual chapters to webcasts and the annual PASS Summit, PASS enables knowledge sharing, in-depth learning, and the ability to influence the direction of Microsoft Business Intelligence technologies. For more information, visit the PASS Web site at http://www.sqlpass.org.
All brand names, product names, and trademarks belong to their respective holders.
Mark Brown (@markjbrown) posted Windows Azure Community News Roundup (Edition #49) on 12/17/2012:
Welcome to the latest edition of our weekly roundup of the latest community-driven news, content and conversations about cloud computing and Windows Azure.
Here is what we pulled together this week based on your feedback:
Articles, Videos and Blog Posts
- Blog: Bright HDInsight Part 5: Better status reporting in HDInsight by @andybareweb (posted Dec. 13)
- Blog:Bright HDInsight Part 4: Blob Storage in Azure Storage Vault (examples in C#) by @andybareweb(posted Dec. 10)
- Blog: Bright HDInsight Part 3: Using custom Counters in HDInsight by @andybareweb (posted Dec. 9)
- Blog: Deploy your legacy ASP.NET Web Site to Windows Azure Web Sites by @sandrinodm (posted Dec. 12)
- Blog: A way to upload files to Windows Azure Mobile Services by @ZeroKoll (posted Dec. 13)
- Github Project: SQL Database backups to Azure Storage by Richard Astbury (posted Dec. 14)
Upcoming Events and User Group Meetings
North America
- October - June, 2013: Windows Azure Developer Camp – Various (50+ cities)
- January 8 - 11: CodeMash 2013 – Sandusky, OH
Europe
- January 16 - 17: Warm Crocodile Developer Conference – Copenhagen, Denmark
- January 17: A Windows Azure Update – West Yorkshire, England
- January 25: HDInsight on Azure – London, England
Rest of World/Virtual
- Ongoing: Windows Azure Virtual Labs – On-demand
Interesting Recent Windows Azure Discussions onStack Overflow
- "physicalDirectory" and "Port" in.csdef file– 1 answer, 0 votes
- Prevent hotlinking in Azure Blob Storage – 1 answer, 0 votes
- Currency Settings in Azure – 2 answers, 1 vote
- Lucene.NET and storing data on Azure Blob Storage – 1 answer, 3 votes
If you have comments or suggestions for the weekly roundup, or would like to get more involved in a Windows Azure community, drop me a line on twitter @markjbrown

<Return to section navigation list>
Other Cloud Computing Platforms and Services
Alex Williams (@alexwilliams) posted Forrester Report Shows Amazon AWS Reigns Supreme With Developers As Windows Azure Gains Momentum to the TechCrunch blog on 12/17/2012:
Amazon Web Services (AWS) reigns supreme as the developer platform of choice while Windows Azure is showing impressive growth, according to a survey conducted by Forrester Research.
The third-quarter survey compares how cloud developers are using the cloud. The report looks at the potential growth of the different services; the state of the platform as a service (PaaS) market; how developers are using cloud services; their expectations for future usage; types of apps deployed and what to expect going forward.
AWS, the dominant cloud player, is an overwhelming favorite among developers, but it’s good to see Windows Azure showing momentum. Of interest is the lacking presence of OpenStack deployments, with Rackspace as the exception. It is still early days for services that use OpenStack and Cloudstack, the Citrix-led open cloud effort operating as an Apache Software Foundation project.
Respondents said they expect usage to increase on AWS and Azure. Developers have mixed expectations of Force.com, Google App Engine and Rackspace.
According to Forrester, the PaaS market is still emerging. Developers don’t delineate as much between PaaS and infrastructure as a service (IaaS) offerings. The survey notes AWS’s addition of abstracted development services such as AWS Beanstalk, Elastic MapReduce, and DynamoDB.
Expect AWS to continue adding services that complement its core infrastructure. Redshift is its most recent addition. The service is an alternative to traditional data warehouse offerings. Forrester cites AWS, Rackspace, and Microsoft as creating ecosystems of PaaS and SaaS in their walled gardens. These are services that exemplify how developers are blurring the lines between PaaS and IaaS. They use them all in AWS instead of using other services for different aspects of their work.
Microsoft, Salesforce.com and Google offer integrated IaaS/PaaS platforms. Forrester also recognizes ActiveState and CloudBees pioneering on-premises PaaS services. Apprenda, AppFog and Dell also offer private PaaS.
Speed of delivery is the top reason that developers cite for why they use the cloud.
Internal business apps were the top app deployed on cloud services. That will change in the next year as more developers say they will deploy more social and collaborative apps and services. Developers will use platforms that offer tools that better support their more sophisticated needs. This will drive deeper use of platform services. Capabilities that will be in demand include mobile back-end as a service (MBaaS), message and app-level caching.
In the next few years, developers will put more code in the cloud, with JavaScript being the programming language of choice.
The Forrester study reinforces that developers will go to the services that offer what they need. The use cases are relatively simple now. Most developers are deploying internal apps, and as the apps become more sophisticated, developers will look for platforms that offer both infrastructure and platform capabilities. That points to an opportunity for AWS, Azure and the platforms that integrate with infrastructure environments.


• Jeff Barr (@jeffbarr) described AWS Elastic Beanstalk - Environment Resource Support + Updated PHP Runtime in a 12/18/2012 post:
AWS Elastic Beanstalk can now provision and configure AWS resources to power your application. In conjunction with a new version of our PHP runtime, you get more control and more flexibility with less code.
In October, we announced the Elastic Beanstalk configuration files and talked about how they can help you configure EC2 instances without creating and maintaining custom AMIs. We have extended these configuration files to allow you to provision and configure resources such as SQS queues and DynamoDB tables for your Elastic Beanstalk application. The configuration file format is YAML-based, and you can find the details in the AWS Elastic Beanstalk Developer Guide.
We are also announcing an updated PHP runtime that supports configuration files as well as the seamless integration with Amazon RDS and Amazon VPC - see my previous blog post for details. The PHP runtime supports 5.3 and 5.4. You can also install dependencies using Composer. Visit the Elastic Beanstalk Developer Guide to learn more about the updated PHP runtime and for walkthroughs of how to deploy CakePHP and Symfony2.
I'd lke to show you how simple and powerful it is to use Elastic Beanstalk to create and configure the new environment resources. I’ll use the updated PHP runtime and show you how to configure DynamoDB backed session management. You can find the full example in the AWS Elastic Beanstalk Developer Guide.
Here's what you need to do:
- Launch an Elastic Beanstalk PHP environment (see the AWS Elastic Beanstalk Developer Guide).
- Create an IAM role with enough permission to read and write to the DynamoDB table (let’s call it “SessionRole”).
- Add an .ebextensions directory to your application.
- In that directory, create a configuration file called dynamodb.config with the following content:
Resources:
SessionTable:
Type: AWS::DynamoDB::Table
Properties:
KeySchema:
HashKeyElement:
AttributeName: Index
AttributeType: S
ProvisionedThroughput:
ReadCapacityUnits: 1
WriteCapacityUnits: 1- Add the role to the Elastic Beanstalk environment (this and all of the subsequent snippets also belong in the dynamodb.config file):
AWSEBAutoScalingLaunchConfiguration:
Properties:
IamInstanceProfile:
Fn::GetOptionSetting:
OptionName: IAMInstanceProfileARN
DefaultValue: "arn:aws:iam::123456789123:instance-profile/SessionRole"- Pass the details of the DynamoDB table to the EC2 instances in your environment:
files:
"/var/app/sessiontable":
mode: "000444"
content: |
`{"Ref" : "SessionTable"}`
`{"Ref" : "AWS::Region"}`- Add a CloudWatch Alarm so that you are alerted when requests to DynamoDB get throttled:
SessionThrottledRequestsAlarm:
Type: AWS::CloudWatch::Alarm
Properties:
AlarmDescription: { "Fn::Join" : ["", [{ "Ref" : "AWSEBEnvironmentName" }, ": requests are being throttled." ]]}
Namespace: AWS/DynamoDB
MetricName: ThrottledRequests
Dimensions:
- Name: TableName
Value: { "Ref" : "SessionTable" }
Statistic: Sum
Period: 300
EvaluationPeriods: 1
Threshold:
Fn::GetOptionSetting:
OptionName: SessionThrottledRequestsThreshold
DefaultValue: 1
ComparisonOperator: GreaterThanThreshold
AlarmActions:
- Ref: SessionAlarmTopic
InsufficientDataActions:
- Ref: SessionAlarmTopic- Make sure to include a require for the AWS SDK for PHP 2 in your composer.json file:
"require": {
"aws/aws-sdk-php": "*"
}
- Finally, add the following code to your PHP application to connect it to the configuration file:
<?php
// Include the SDK using the Composer autoloader
require 'vendor/autoload.php';
use Aws\DynamoDb\DynamoDbClient;
// Grab the session table name and region from the configuration file
list($tableName, $region) = file(__DIR__ . '/../sessiontable');
// Create a DynamoDB client and register the table as the session handler
$dynamodb = DynamoDbClient::factory(array('region' => $region));
$handler = $dynamodb->registerSessionHandler(array('table_name' => $tablename, 'hash_key' => 'Index'));
?>As you can see, you can use this new Elastic Beanstalk feature to set up and configure the AWS resources needed by your application.
-- Jeff, with lots of help from Saad


Jeff Barr (@jeffbarr) reported EBS Snapshot Copy (Between Regions) in a 12/18/2012 post:
To make it even easier for you to build AWS applications that span regions, we're introducing a new EBS Snapshot Copy feature today. You can now copy EBS snapshots between EC2 Regions.
Why Copy?
So, why would you want to copy an EBS Snapshot from one AWS Region to another? Here are some of the more common use cases:
- Geographic Expansion - You want to be able to launch your application in a new Region.
- Migration - You want to be able to migrate your application from one Region to another.
- Disaster Recovery - You want to back up your data and your log files across different geographical locations at regular intervals to minimize data loss and recovery time.
EBS Snapshot Copy simplifies each of these use cases by simplifying the copy process.
Ok, How do I Copy Snapshots?
You can now copy EBS Snapshots from one AWS Region to another. You can copy any accessible Snapshots that are in the "completed" status. This includes Snapshots that you created, Snapshots that were shared with you, and also Snapshots from the AWS Marketplace, VM Import/Export, and Storage Gateway. If you copy a Marketplace product to a new Region, you need to make sure that the product is supported in the destination Region.You can initiate copies from the AWS Management Console or from the command line. You can also use the new [CopySnapshot] function from your own code. Here's how you initiate a copy operation from the Console:
After you choose the Copy Snapshot operation, the Console will ask you where you would like to copy the snapshot:
While the copy is underway, you can watch the progress by switching to the destination Region:
What Else Do I Need to Know?
Here are a few important facts about this new feature:
- The AWS Management Console shows the progress of a Snapshot copy in progress, you can check the percentage complete there.
- You can initiate multiple Snapshot Copy commands simultaneously either by selecting and copying multiple Snapshots to the same region, or by copying a snapshot to multiple regions in parallel. The in-progress copies do not affect the performance of the associated EBS Volumes.
- The console-based interface is push-based; you log in to the source Region and tell the console where you'd like the Snapshot to end up. The API and the command line are, by contrast, pull-based and you must run them within the destination Region.
Pricing
You will be charged the regular data transfer prices when you copy snapshots between Regions. Once you have created a new Snapshot, you'll pay the regular price to store it in the destination Region.Coming Soon
As you can see, EBS Snapshot Copy, will let you simplify your geographic expansion, data center migration, and disaster recovery. As a next step, we will implement copying of AMIs (Amazon Machine Images) between Regions. You'll be able to copy public and custom-created AMIs to the Region of your choice.


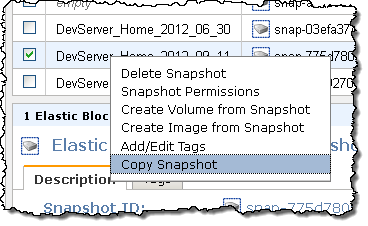
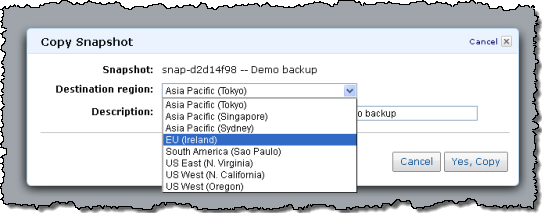
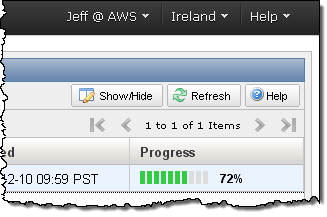
<Return to section navigation list>


1 comments:
Cloud computing has been made easier with the release of windows 8 as shown in http://heresjaken.com/windows-8-and-cloud-computing/ windows is incorporating more into its OS then ever before
Post a Comment