Windows Azure and Cloud Computing Posts for 12/8/2013+
Top Stories This Week:
- Carlos Figueira (@carlos_figueira) explained Application settings in Azure Mobile Services in a 12/9/2013 post in the Windows Azure SQL Database, Federations and Reporting, Mobile Services section.
- Courtenay Bernier described Multi-Factor Authentication… the simple way in a 12/2/2013 post in the Windows Azure Access Control, Active Directory, and Identity section.
- Pradeep M G posted Understanding the Temporary Drive on Windows Azure Virtual Machines on 12/6/2013 in the Windows Azure Virtual Machines, Virtual Networks, Web Sites, Connect, RDP and CDN section.
| A compendium of Windows Azure, Service Bus, BizTalk Services, Access Control, Caching, SQL Azure Database, and other cloud-computing articles. |
Note: This post is updated weekly or more frequently, depending on the availability of new articles in the following sections:
- Windows Azure Blob, Drive, Table, Queue, HDInsight and Media Services
- Windows Azure SQL Database, Federations and Reporting, Mobile Services
- Windows Azure Marketplace DataMarket, Power BI, Big Data and OData
- Windows Azure Service Bus, BizTalk Services and Workflow
- Windows Azure Access Control, Active Directory, and Identity
- Windows Azure Virtual Machines, Virtual Networks, Web Sites, Connect, RDP and CDN
- Windows Azure Cloud Services, Caching, APIs, Tools and Test Harnesses
- Windows Azure Infrastructure and DevOps
- Windows Azure Pack, Hosting, Hyper-V and Private/Hybrid Clouds
- Visual Studio LightSwitch and Entity Framework v4+
- Cloud Security, Compliance and Governance
- Cloud Computing Events
- Other Cloud Computing Platforms and Services
Windows Azure Blob, Drive, Table, Queue, HDInsight and Media Services
<Return to section navigation list>
Philip Fu posted [Sample Of Dec 8th] How to CRUD table storage entities without knowing the schema at runtime in Windows Azure to the Microsoft All-In-One Code Framework on 12/8/2013:
This sample shows how to dynamically create a table entity, and how to dynamically get the table entity schema.
DynamicEntityTable is a new class in Azure SDK 2.0 which provides a generic entity table for all the Azure storage table, so you needn't to create the dynamic table yourself.
You can find the answers to following questions in the code sample:
- How to use DynamicEntityTable to insert data to Azure storage?
- How to get Table schema with DynamicEntityTable?
- How to covert the data in DynamicEntityTable to data table?
You can find more code samples that demonstrate the most typical programming scenarios by using Microsoft All-In-One Code Framework Sample Browser or Sample Browser Visual Studio extension. They give you the flexibility to search samples, download samples on demand, manage the downloaded samples in a centralized place, and automatically be notified about sample updates. If it is the first time that you hear about Microsoft All-In-One Code Framework, please watch the introduction video on Microsoft Showcase, or read the introduction on our homepage http://1code.codeplex.com/.

Michael Collier (@MichaelCollier) offered an Azure Management Studio and Blob Container ACLs tip on 11/27/2013 (missed when published):
Here’s a quick tip I recently learned from my friend, and Cerebrata evangelist, Mike Wood . . .
When using Cerebrata’s Azure Management Studio to work with Windows Azure blob storage, you need to explicitly tell AMS to retrieve the access permissions for blob containers. By default, AMS will only list the containers.
To make this tool even more useful, instruct AMS to retrieve the permissions when listing the containers.
Under the “Tools” menu at the top, select “Options”.
- In the “Options” window, go to the “Blob” tab.
- In the “Blob behaviour” section, check the box next to “Fetch Blob Container ACL when listing Blob Containers”.
This will instruct AMS to get the permissions and thus color highlight the containers. Ooooh . . . pretty colors!
How is AMS getting this info to know what the permission is for the containers? Simple – it’s just calling into the Windows Azure storage API. The Get Container ACL operation retrieves the blob container permissions. If we open Fiddler and take a look at the requests AMS is making, we can see 4 requests for my example – one to retrieve the list of containers and one for each of the containers.
Note: I instructed AMS to not use HTTPS for connections. I did this only to make visualizing the requests/responses in Fiddler easier. I would recommend HTTPS for most production scenarios.
Let’s look at just the request to get the ACL for the “myimages” container.
Notice the “x-ms-blob-public-access” response header. It is set to “Container”. This indicates full public read access for the container and blob data. Therefore, AMS colors this container a lovely shade of green.
A word to the wise – there is a reason why this option is not enabled in Azure Management Studio by default. If the storage account contains many containers, this could result in many extra requests to Windows Azure to determine the ACL – one roundtrip per container. This could slow down your time to view all the containers. If you just have a few containers, it’s probably not a big deal as this request/response dance happens pretty fast.
So that didn’t exactly turn out to be a quick tip. But, still hopefully useful. Enjoy!


<Return to section navigation list>
Windows Azure SQL Database, Federations and Reporting, Mobile Services
Carlos Figueira (@carlos_figueira) explained Application settings in Azure Mobile Services in a 12/9/2013 post:
This little feature was released over a month ago with little fanfare, and since I haven’t seen it covered anywhere I decided to write about it now. The idea of application settings is a set of key-value pairs which can be set for the mobile service (either via the portal or via the command-line interface), and those values could be then read in the service runtime. There are quite a few scenarios where this can be useful: defining a debug flag which can be easily toggled, storing secrets which shouldn’t be stored in code, or even enabling some preview features (as mentioned in this blog post). Let’s look at those scenarios:
Storing secrets
I have an account in the Twilio service which I use in some (personal) projects to send SMS messages. In one of those projects I work together with a colleague, and we develop the back-end together. To be able to access my Twilio account, I need to pass my credentials (account SID and auth token) to the Twilio SDK (in this case, the twilio npm package), as can be shown in this tutorial for accessing Twilio from an Azure Mobile Service. But I don’t want my colleague to see my credentials (in my case I wouldn’t mind, but you can imagine that the development is being done by some people who you don’t have that high of a trust relationship). So I’ll store the secrets in my app settings, and we only share the code.
Adding application settings is simple: go to the ‘configure’ tab in the Azure Mobile Services portal, and enter the key value pairs with the secrets I want to store:
Now, on the server side I can access those via the ‘process.env’ variable:
- function insert(item, user, request) {
- request.execute({
- success: function () {
- request.respond(); // send the response to the client
- // then send a SMS about the new item
- var twilio = require('twilio');
- var accountSid = process.env.TwilioAccountSid;
- var authToken = process.env.TwilioAuthToken;
- var myTwilioNumber = '+14045551234 begin_of_the_skype_highlighting
+14045551234 FREE end_of_the_skype_highlighting';
- var myPhoneNumber = '+12065555678 begin_of_the_skype_highlighting
- var client = new twilio.RestClient(accountSid, authToken);
- client.sendSms({
- to: myPhoneNumber,
- from: myTwilioNumber,
- body: 'Item inserted, with id = ' + item.id
- }, function (err, msg) {
- if (err) {
- console.warn('Error sending SMS: ', err);
- } else {
- console.log('SMS sent successfully: ', msg);
- }
- });
- }
- });
- }
Now that code can be shared with my collaborators and my credentials will remain secure…
Conditional code execution
In one of my services I was tracking down an issue that happened in my API script which was returning a 500 (Internal Server Error) for some unknown reason. I started then adding tracing to the script. Once I found the issue I could have simply deleted all the tracing, but since they were helpful for me to debug that problem I decided to leave them there, but disabled until I needed to. So this is a (very simplified) version of my script:
- exports.get = function (request, response) {
- var config = request.service.config;
- var isDebug = config.appSettings.isDebug === 'true';
- if (isDebug) {
- console.log('request url: ', request.url);
- console.log('request headers: ', request.headers);
- console.log('request query: ', request.query);
- }
- var result = process(request);
- response.send(200, result);
- if (isDebug) {
- console.log('API execution reached the end');
- }
- }
And if I wanted to enable that debugging again, all I need is to add the app setting ‘isDebug’ with the value ‘true’. Notice that I’m accessing the app setting via a config object this time instead of directly via the process environment. More on that later on this post…
Enabling preview features
Starting a couple of weeks back, the mobile services team started releasing some runtime features in a preview mode, and they can be enabled via app settings. The idea is that if enough people start using them, they will get the first-class treatment of other features in the Azure Mobile Services portal. As I mentioned in this blog post, during login you can now request additional scopes from some of the authentication providers (Facebook, Google, Microsoft) via an app setting. This gives more information to the user object which is passed to table and API scripts. For example, before this feature the only information you could get from the Facebook Graph API about the logged in user was some basic information. But if you wanted the user’s e-mail and the list of their friends, you were out of luck with the simple authentication, having to use a native Facebook SDK instead. Let’s see how this can be done with this new preview feature (authentication scopes)
First, you need to set, on the Facebook app itself (from https://developers.facebook.com) define those permissions
After that, you can tell the mobile service to request those permissions when presenting the authentication page, by setting the ‘MS_FacebookScope’ app setting:
Now, if you have a logged in user, if you talk to the Facebook Graph API (as I showed in this blog post) you’ll get the user’s e-mail if you request the ‘/me’ resource in the API.
The mobile service configuration
I mentioned that you can use the process.env object, or the config object to access the application settings. But those objects aren’t restricted to settings you define in the configure tab in the portal – they contain a lot more useful information as well, including information about the mobile service name, keys, identity providers and so on. Depending on what you have configured in your service, you’ll have more or less information on the config object.
This simple API can be used to show all the information from the config:
- exports.get = function (request, response) {
- console.log('Config: ', request.service.config);
- response.send(statusCodes.OK, {
- message: 'Look at logs for config info'
- });
- };
After invoking the API from Fiddler, I go to the logs and this is the output for my service (with lots of secret information redacted).
{
"mobileServiceName":"blog20131124",
"masterKey":"The-master-key-of-my-mobile-serv",
"applicationKey":"The-app-key-of-my-mobile-service",
"sqlConnectionString":"The-connection-string-to-the-database",
"dynamicSchemaEnabled":"True",
"microsoftClientID":"my-ms-client-id",
"microsoftClientSecret":"my-ms-client-secret",
"facebookAppID":"my-facebook-app-id",
"facebookAppSecret":"my-facebook-app-secret",
"facebookScope":"email user_friends",
"googleClientID":"my-google-client-id",
"googleClientSecret":"my-google-secret",
"twitterConsumerKey":"my-twitter-consumer-key",
"twitterConsumerSecret":"my-twitter-consumer-secret",
"apnsCertificatePassword":"",
"apnsCertificateMode":"None",
"crossDomainWhitelist":"[{\"host\":\"localhost\"}]",
"appSettings":{
"MS_FacebookScope":"email user_friends",
"isDebug":"true"
}
}One more thing to notice: in custom APIs the configuration object can be obtained via the ‘request.service’ object. In scripts for table operations, there’s no place from where the “services” can be accessed, so you need to require the special ‘mobileservice-config’ module that exports that object. This table read script will do exactly the same as the API shown above:
- function read(query, user, request) {
- var config = require('mobileservice-config');
- console.log('Config: ', config);
- request.respond(statusCodes.OK, {
- message: 'Look at logs for config info'
- });
- }
And I’ll leave to your creativity to decide what you can do with all this new information that you can get in your runtime scripts :)
Coming up
In the next post I’ll expand on the authentication scopes feature, with examples from more authentication providers.


Phillip Van Nortwick (@kingsnort) described What's new in Azure Mobile Services SDK 1.1.1 in a 12/6/2013 to the Azure Mobile Services Team Blog:
These are the major highlights for 1.1.1 SDK:
iOS SDK:
- Now has built in support for retrieving the system property columns on tables (__updatedAt, __createdAt, and __version). These can be retrieved using the new systemProperties property on the table:
MSTable *todoItem = [self.client tableWithName:@"todoItem"];
todoItem.systemProperties = MSSystemPropertyAll;
...
[item objectForKey:MSSystemColumnCreatedAt];
- We also now support optimistic concurrency, which you will get when you ask for the version column. The iOS tutorial is not available yet, but you can review the Windows Store tutorial for optimistic concurrency here.
// Enable optimistic concurrency by retrieving __version
todoItem.systemProperties |= MSSystemPropertyVersion;
Then, after an update, you can check the error for a conflict:
if (error.code == MSErrorPreconditionFailed) { // Handle Error }Managed SDK:
- With the latest update, you will notice that the nuget package will no longer install in projects targeting Windows Phone 7. For more information see this blog post
Additional details on this version can be found on our github change log

This is a minor (point) release.

Windows Azure Marketplace DataMarket, Cloud Numerics, Big Data and OData
No significant articles so far this week.
<Return to section navigation list>
Windows Azure Service Bus, BizTalk Services and Workflow
No significant articles so far this week.

<Return to section navigation list>
Windows Azure Access Control, Active Directory, Identity and Workflow
Courtenay Bernier described Multi-Factor Authentication… the simple way in a 12/2/2013 post (missed when published):
Do you support or are you planning to implement a multi-factor authentication solution?
I have a simple, easy to set up multi-factor authentication solution for you!
First we need to define what multi-factor authentication is:
Multi-factor authentication or two-factor authentication is used to increase security around user access.
It works by requiring any two or more of the following:
- Something you know such as a password.
- Something you have e.g. a phone or device.
- Something you are e.g. thumb print, retinal scan, etc.
There are many types of multi-factor solutions available today. Some utilize hardware tokens while others utilize certificates and more increasingly phones are being utilized as an authentication method.
Microsoft offers a multi-factor authentication solution called Windows Azure Multi-Factor Authentication (MFA). Don’t be fooled by the name as Windows Azure MFA can be used for applications hosted in the cloud and on premises.
I’ll now walk through the steps to set up Windows Azure MFA as well setting up MFA for on premises applications.
Technologies/Services Utilized
- Windows Azure
- Windows Server
- Windows Azure MFA mobile app (available on Windows Phone, iOS, Android)
- Internet Information Services (IIS)
Let’s get started!
SETTING UP WINDOWS AZURE MULTI-FACTOR AUTHENTICATION
Navigate to http://manage.windowsazure.com/ and either log into your account or sign up for a trial account.
From the portal, on the left hand navigation, select ACTIVE DIRECTORY
If you’re new to Windows Azure you may not have integrated your Active Directory with Windows Azure Active Directory. If you’re interested in integration visit: http://technet.microsoft.com/en-us/library/jj573653.aspx
For the purposes of this walk-through, I’m going to start by creating a new instance of Windows Azure Active Directory (within Azure not AD on a VM).
CREATING A NEW ACTIVE DIRECTORY INSTANCE IN WINDOWS AZURE
Select ACTIVE DIRECTORY and then select ADD:
Create a NAME, DOMAIN NAME, select a COUNTRY or REGION, and select the check mark when finished.
After the new domain is created select it from the list.
ENABLING MULTI-FACTOR AUTHENCIATION FOR WINDOWS AZURE ACTIVE DIRECTORY
From the main page of the AD instance select “Enable multi-factor authentication”
Read through the disclaimer and select the check mark:
ADDING A USER TO WINDOWS AZURE ACTIVE DIRECTORY
Now I’ll add a user manually by selecting USERS:
Now I’ll select ADD USER from the bottom of the page:
I’ll create a new user within my Windows Azure Active Directory instance:
Fill in the necessary info on the User Profile page, select a role, and check the Enable MULI-FACTOR AUTHENTICATION box to enable the user to use MFA:
The final step is to generate a temporary password:
Copy and save the password to be referenced later:
I now have a new AD user account created (e.g. Charlie Brown)
INSTALL THE MULTIFACTOR AUTHENTICATION SERVER FOR ON PREMISIS APPLICATIONS
To use MFA or on premises application download and install the MFA server from the MFA portal. Select MULTI-FACTOR AUTH PROVIDERS, the AD instance, and MANAGE at the bottom of the page:
You’ll be taken to the MFA management portal where you’ll have access to reports, configuration, and downloads. Select DOWNLOADS from the main page:
Select “Download” and save the MFA Server install file to the machine you plan to host the MFA Server on and select “Generate Activation Credentials”. The activation credentials will be used to link the MFA Server with the Windows Azure MFA instance:
For example: when an on premises application such as a web site is enabled to use MFA the MFA Server hosted in your environment will communicate out to Windows Azure MFA which will then make a call, send a text, or communicate with the MFA mobile app on the user’s phone.
The MFA Server is very light weight so I won't go through how to install it other than double click on the file and install the MFA Server.
Here's what my MFA Server looks like:
Here is the MFA Configuration Wizard for application however these are only common apps you can add whatever apps or use the SDK to incorporate MFA into your own apps.
You can enable an existing web site for MFA by using the IIS Native Module within the MFA Server configuration:
Under the Native Module tab select the web site:
Let’s summarize what we did:
- Created an Active Directory instance in Windows Azure,
- Enabled it to use Multi-Factor Authentication,
- Added a User,
- Installed the MFA Server on premises,
- Enabled an on premises hosted web site in IIS to use MFA.
WORKING WITH MULTI-FACTOR AUTHENTICATION
Now that we have MFA configured how does it work?
There are a number of options available to enable an application to use MFA as I covered in the MFA Server section. However within Windows Azure, MFA may be enabled for applications hosted in the cloud as well. There is an MFA application available for Windows Phone, iOS, and Android or MFA can simple call you’re phone or send a text.
Multi-Factor Authentication app:
(note: code and URL are accessed as the user logs in and sets up MFA as shown in the steps below)
To test MFA, use the login credentials received by email and select the “sign-in page” link:
Type in the user name provided in the mail and select Continue:
Type in the temporary password provided in the emails and select Sign in:
Change the password and select submit:
Log in with your new password:
Select “Set it up now” to set up the account to use MFA:
Specify your preferences for MFA:
Select “verify now” and a call or text will be sent to the number specified.
Alternatively you may configure to use the mobile app available for Windows Phone, iOS, and Android:
Select configure to set up the mobile app after it’s been downloaded (the code and URL are provided in this section):
After scanning the barcode (or type in the code and URL in the app) it will verify and authenticate. From that point on the MFA mobile app will prompt to verify authentication to apps. To clarify, verification can be through a text, a phone call, or through the mobile MFA app.
Congratulations, you’ve set up Windows Azure Multi-Factor Authentication in the cloud and on premises!
For detailed pricing please visit: http://www.windowsazure.com/en-us/pricing/calculator/?scenario=full
For more information on Windows Azure Multi-Factor Authentication and videos please visit: http://www.windowsazure.com/en-us/documentation/services/multi-factor-authentication/


<Return to section navigation list>
Windows Azure Virtual Machines, Virtual Networks, Web Sites, Connect, RDP and CDN
Mark Brown posted IP and Domain Restrictions for Windows Azure Web Sites to the Windows Azure blog on 12/9/2013:
Editor's Note: This post was written by Stefan Schackow, Principal Program Manager Lead on the Windows Azure Web Sites Team
Configuring an Azure Web Sites (WAWS) for IP and Domain Restrictions has been one of our most requested asks, and it is now finally available. IP and Domain restrictions provide an additional security option that can also be used in combination with the recently enabled dynamic IP address restriction (DIPR) feature.
Developers can use IP and Domain Restrictions to control the set of IP addresses, and address ranges, that are either allowed or denied access to their websites. With Windows Azure Web Sites developers can enable/disable the feature, as well as customize its behavior, using web.config files located in their website.
There is an overview of the IP and Domain Restrictions feature from IIS available on the IIS.Net website. A full description of individual configuration elements and attributes is available on TechNet.
The example configuration snippet below shows an ipSecurity configuration that only allows access to addresses originating from the range specified by the combination of the ipAddress and subnetMask attributes. Setting allowUnlisted to false means that only those individual addresses, or address ranges, explicitly specified by a developer will be allowed to make HTTP requests to the website. Setting the allowed attribute to true in the child add element indicates that the address and subnet together define an address range that is allowed to access the website.
If a request is made to a website from an address outside of the allowed IP address range, then an HTTP 404 not found error is returned as defined in the denyAction attribute.
One final note, just like the companion DIPR feature, Windows Azure Web Sites ensures that the client IP addresses “seen” by the IP and Domain Restrictions module are the actual IP addresses of Internet clients making HTTP requests.


Pradeep M G posted Understanding the Temporary Drive on Windows Azure Virtual Machines on 12/6/2013:
Special thanks to our WATS Linux experts- Joao Madureira, Vittorio Franco Libertucci and Patrick Catuncan for reviewing this post.
When you create a VM in Windows Azure you are provided with a temporary storage automatically. This temporary storage is “D:” on a Windows VM and it is “/dev/sdb1” on a Linux VM.
This temporary storage must not be used to store data that you are not willing to lose.
Windows VM:
Linux VM:
Note: In any linux distro on Windows Azure, the sdb1 will be the temporary drive to be mounted. The mount point and directory mounted might be different between linux distros.
The temporary storage is present on the physical machine that is hosting your VM. Your VM can move to a different host at any point in time due to various reasons (hardware failure etc.). When this happens your VM will be recreated on the new host using the OS disk from your storage account. Any data saved on the previous temporary drive will not be migrated and you will be assigned a temporary drive on the new host.
What is the size of the temporary storage?
The temporary storage varies with size of the VM that you have selected. Below is the list of VM size and its corresponding temporary disk size.
Temporary disk size may change in the future, always refer to this link for accurate information on the temporary drive size.
Is there any cost associated with temporary storage?
The temporary storage provided with each VM has no extra cost associated with it for storage space as well as for transactions.
What is the purpose of temporary storage?
This temporary storage is used to save the system paging file.
You can also use this drive only to store temporary data, which you can afford to lose at any time.
Like for example: If your workflow involves getting content from the blob, processing it and storing it back to the blob then you could download content to the temporary storage, process the content, then take the processed content and save it back to the blob.
Windows VM:
Linux VM:
Note:
- Keep in mind the /dev/shm uses the swap file on /mnt/resources to do what on windows would be the pagefile.sys.
Reference for /dev/shm
http://superuser.com/questions/45342/when-should-i-use-dev-shm-and-when-should-i-use-tmp
What is the IOPS for temporary storage?
This temporary storage drive is present on the physical machine which is hosting your VM and hence can have higher IOPS and lower latency when compared to the persistent storage like data disk.
When will the data on temporary drive be lost?
When you resize the VM, when your VM is moved to a different host server, when the host is updated, when the host experiences a hardware failure etc.
Is there a way to recover data from the temporary drive?
There is no way to recover any data from the temporary drive.
What should I do to store data that I cannot afford to lose?
You can attach a data disk to the virtual machine to store data that you cannot afford to lose. OS disk and data disks are persistent storage. More information on data disks here.
So always remember not to store any important data on the temporary storage and use data disks for additional storage requirement.


<Return to section navigation list>
Windows Azure Cloud Services, Caching, APIs, Tools and Test Harnesses
Nick Harris (@cloudnick) and Chris Risner (@chrisrisner) produced CloudCover Episode 122: Java on Windows Azure on 12/6/2013:
In this episode Nick Harris and Chris Risner are joined by Martin Sawicki, Program Manager at MS Open Tech where he focuses on Java on Windows Azure. In this episode Martin gives an overview on how to use Java with Windows Azure including:
The Java Developer Center
- The Windows Azure Java SDK
- Java Virtual Machines running on Oracle Software in Windows Azure
- Installing and using the Eclipse plugin for Windows Azure
- Creating a deployment project with configuration for:
Caching
- Debugging
- Endpoints
- Session affinity
- Local storage
- Deploying the java app to the local Windows Azure Emulator
- Deploying to Windows Azure


Return to section navigation list>
Windows Azure Infrastructure and DevOps
David Linthicum (@DavidLinthicum) asserted “Gartner's Alessandro Perilli has made some outrageous statements about OpenStack. Could he be right?” in a deck for his OpenStack under fire: The critics aren't all wrong post to InfoWorld’s Cloud Computing blog:
When others make strong statements about cloud computing technology, the bloggers swarm in and argue the point. I'm certainly not innocent of making provocative statements about the cloud computing market. Having set off a few of these blog wars myself, it's not often that I let myself be drawn into the arguments.
The latest instance is a blog post entitled "Why vendors can't sell OpenStack to enterprises." Alessandro Perilli, a Gartner research director, describes how he came away from the recent OpenStack summit thinking, "In fact, for the largest part, vendors don't know how to articulate the OpenStack story to win enterprises. They simply don't know how to sell it."
For Perilli, a few core issues lead to OpenStack's marketing problems, including:
- Lack of clarity about what OpenStack does and does not do
- Lack of transparency about the business model around OpenStack
- Lack of vision and long-term differentiation
- Lack of pragmatism
Of course, the vendors selling OpenStack had kittens, including Bryan Che of Red Hat -- as major an OpenStack vendor as there could be -- who responded on his own blog to Perilli's points. He notes that "open source projects are not the same as products" and goes on to tout how Red Hat's OpenStack implementation is meant to be "an answer to that issue."
I tend to agree with Che. You can't consider OpenStack a product, albeit both the tech press and analysts seem to see it that way. Enterprises often tell me they use "OpenStack" for their private cloud, always talking about the brand and not the standard. The market confuses it as a product because OpenStack promotes itself as a standard that doubles as product.
Still, Perilli's assessment of OpenStack has some truth to it -- specifically, the lack of vision and pragmatism. OpenStack has underwhelmed me in terms of momentum and number of implementations. However, the last release seems solid, and those that sell OpenStack-based clouds seem committed to the standard. Although there is less growth than promised, there has been progress.
OpenStack won't be a "big boom" standard. Instead, it will see systemic growth over time. And I'm sure there will be some huge failures to report. That said, the market needs a private cloud standard for enterprises that is cost-effective and meets core enterprise private cloud requirements. If not OpenStack, then what?

<Return to section navigation list>
Windows Azure Pack, Hosting, Hyper-V and Private/Hybrid Clouds
No significant articles so far this week.
<Return to section navigation list>
Visual Studio LightSwitch and Entity Framework 4.1+
Rowan Miller described the need for Microsoft.SqlServer.Types NuGet Package (Spatial on Azure) in a 12/9/2013 post to the ADO.NET blog:
Any application that uses Entity Framework’s spatial data type support to target SQL Server requires the ‘CLR Types for SQL Server’ to be available on the machine the application runs on. This also applies to applications that use SQL Server spatial data types directly, without using Entity Framework.
Deployment Issues
When developing your application the CLR Types for SQL Server are usually installed system-wide, since they are included in Visual Studio. Issues arise when you try to deploy to a machine that does not have the CLR Types for SQL Server installed. Initially you will get the following InvalidOperationException.
Spatial types and functions are not available for this provider because the assembly 'Microsoft.SqlServer.Types' version 10 or higher could not be found.
If you were to find and deploy the Microsoft.SqlServer.Types assembly you’ll then get the following DllNotFoundException.
Unable to load DLL 'SqlServerSpatial110.dll': The specified module could not be found. (Exception from HRESULT: 0x8007007E)
The Solution
If you have control over the server you can just install the CLR Types for SQL Server. The SQL Server 2012 SP1 version of the CLR Types can be downloaded here. SQLSysClrTypes.msi is the installer you want and there is an x86 (32 bit) and x64 (64 bit) version depending on the architecture of the machine you are deploying to.
However, installing extra software on the target machine is not always an option – especially if you are deploying to a machine you don’t own (such as Windows Azure Web Sites). Fortunately the required assemblies can be deployed along with your application.
- Step 1: Install the Microsoft.SqlServer.Types NuGet package.
PM> Install-Package Microsoft.SqlServer.Types
Step 2: Ensure the appropriate version of the native SqlServerSpatial110.dll assembly is copied to the output directory and deployed with your application. Steps on how to do this are included in a ReadMe.txt file that will open in Visual Studio when you install the package.
What the Microsoft.SqlServer.Types Package Does
The Microsoft.SqlServer.Types package gives you the two assemblies that need to be deployed along with your application:
- Microsoft.SqlServer.Types.dll – This is a .NET assembly that is added as a reference to your project. This assembly will be automatically copied to the output directory of you application and deployed for you.
- SqlServerSpatial110.dll – This is a native assembly so it cannot be added as a project reference. Instead, installing the NuGet package will add the x86 and x64 version of this assembly as items in your project under a SqlServerTypes folder. You will then need to ensure the appropriate version of this assembly is copied to the output directory and deployed with your application. Steps on how to do this are included in a ReadMe.txt file that will open in Visual Studio when you install the package.
Note: The version of SqlServerSpatial110.dll you require will depend on the architecture of the machine you are deploying to. If you happen to deploy the wrong version you will see the following BadImageFormatException:
An attempt was made to load a program with an incorrect format. (Exception from HRESULT: 0x8007000B)


<Return to section navigation list>
Cloud Security, Compliance and Governance

<Return to section navigation list>
Cloud Computing Events
No significant articles so far this week.
<Return to section navigation list>
Other Cloud Computing Platforms and Services
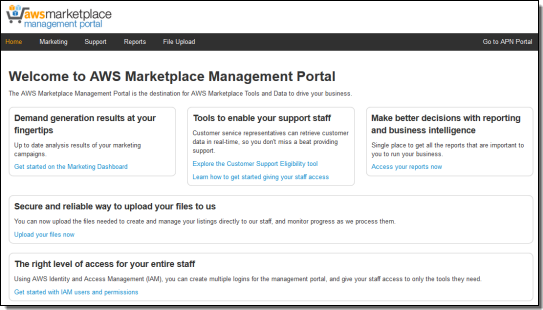
Jeff Barr (@jeffbarr) described AWS Marketplace - New Management Portal for ISVs & VARs
The AWS Marketplace provides an easy way for sellers (ISVs / Independent Software Vendors and VARs / Value Added Resellers) to market and sell their software to developers and IT professionals.
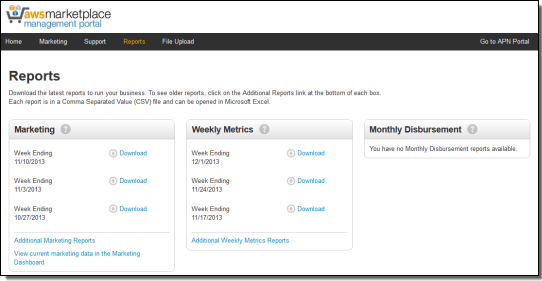
Today we are introducing a new AWS Marketplace Management Portal. This portal provides our partners with access to demand generation and business metrics reports, real-time data on customer subscriptions, and secure file uploading.
Let's take a tour of the new portal! Here's the main page:
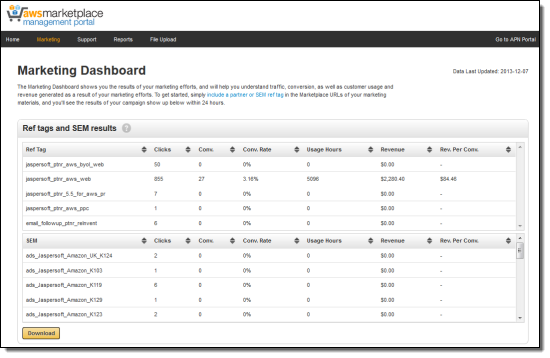
If you use search engine marketing or link-building to generate demand for your marketplace products, you'll love the next feature. The Marketing Dashboard provides you with click and conversion information to help you to track and optimize your campaigns. You need only include the appropriate reference tag (see our handy guide) to initiate the tracking process.
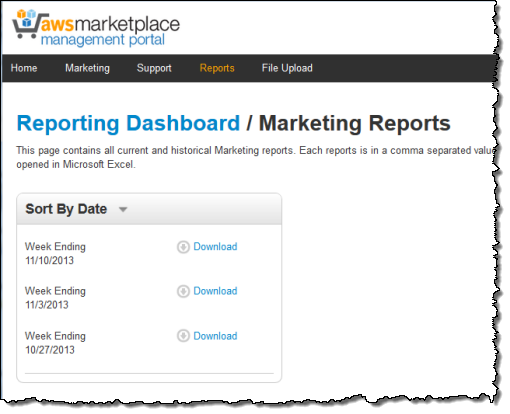
You have access to current and historical marketing reports:
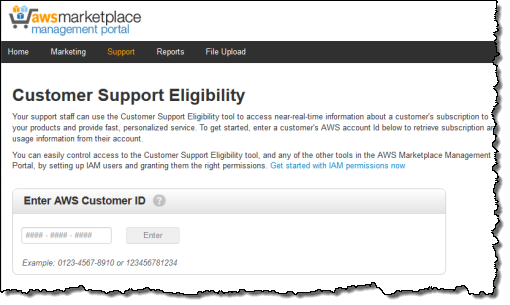
The next feature gives you the ability to verify that a particular AWS customer has purchased a subscription to one of your products. Simply enter their AWS Customer ID:
The Management Portal gives you access to weekly marketing, metrics, and disbursement reports in CSV format:
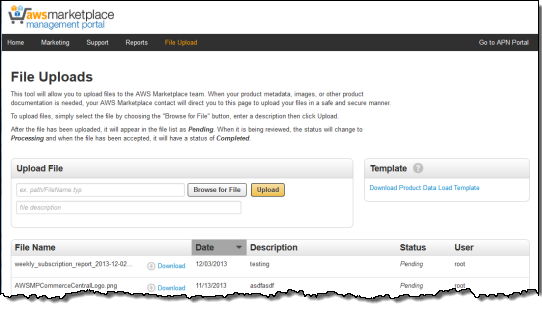
Last but not least, you can upload your product metadata, images, and other documentation to the Marketplace:
This new feature is available to all AWS Marketplace sellers today. Take the AWS Marketplace Management Portal Tour to learn more.


Aditi Technologies (@WeAreAditi) posted Cloud Weekly Roundup: Google enters IaaS Cloud battle + HP Public Cloud releases version 13.5 on 12/9/2013:
The next highly competent player Google has entered the Infrastructure-as-a-Service Cloud battle with the General Availability (GA) of Google Compute Engine (GCE). GCE is available with 24/7 support and a 99.95% monthly SLA for mission-critical workloads. The new features introduced are listed below:
- Now supports SUSE & Red Hat Enterprise Linux
GCE now supports Linux distributions or any kernels or any software including Docker FOG, xfs and aufs. They also support SUSE and Red Hat Enterprise Linux (in Limited Preview) and FreeBSD.- Transparent maintenance with live migration and automatic restart
GCE introduced transparent maintenance that combines software and data center innovations with live migration technology to perform proactive maintenance while your virtual machines keep running. Furthermore, in the event of a failure, automatically restarts and gets VMs back online in minutes.- Three new instance types
GCE has launched three new instance types in Limited Preview with up to 16 cores and 104 gigabytes of RAM with even greater computational power and memory for applications that range from silicon simulation to running high-scale NoSQL databases.- Faster & cheaper Persistent Disks
GCE has lowered the price of Persistent Disk by 60% per Gigabyte and I/O available to a volume scales linearly with size, and the largest Persistent Disk volumes have up to 700% higher peak I/O capability.- Price reduction for Standard Instances
GCE has lowered prices on standard Compute Engine instances by 10% in all regions.HP has announced the release of HP Public Cloud version 13.5 with several new features and functionality to enterprise customers. This 13.5 release delivers increased capacity for resource-hungry workloads, Virtual Private Cloud (VPC) capability through software defined networking, easier management of multi-AZ deployments, and higher memory instance flavors.
Microsoft has planned to launch Windows Azure in Brazil early next year. This launch represents its first major expansion into South America and will start on –board preview customers in the next 4 to 6 weeks.
Amazon has announced new resource-level permissions for AWS OpsWorks. This new feature lets grant users access to specific stacks, set user-specific permissions for actions on each stack, delegate management of each OpsWorks stack to a specific user or set of users and control user-level SSH access to Amazon EC2 instances. They have also introduced a new tagging feature for Elastic MapReduce. Users are now allowed to add up to 10 tags per cluster at launch time. Any changes that a user makes to the tags on the cluster will be mirrored to the EC2 instances in the cluster.

<Return to section navigation list>


0 comments:
Post a Comment