Windows Azure and Cloud Computing Posts for 1/21/2013+
| A compendium of Windows Azure, Service Bus, EAI & EDI, Access Control, Connect, SQL Azure Database, and other cloud-computing articles. |
•• Updated 1/26/2013 with new articles marked ••.
• Updated 1/25/2013 with new articles marked •.
Note: This post is updated daily or more frequently, depending on the availability of new articles in the following sections:
- Windows Azure Blob, Drive, Table, Queue, HDInsight and Media Services
- Windows Azure SQL Database, Federations and Reporting, Mobile Services
- Marketplace DataMarket, Cloud Numerics, Big Data and OData
- Windows Azure Service Bus, Caching, Access Control, Active Directory, Identity and Workflow
- Windows Azure Virtual Machines, Virtual Networks, Web Sites, Connect, RDP and CDN
- Live Windows Azure Apps, APIs, Tools and Test Harnesses
- Visual Studio LightSwitch and Entity Framework v4+
- Windows Azure Infrastructure and DevOps
- Windows Azure Platform Appliance (WAPA), Hyper-V, System Center and Private/Hybrid Clouds
- Cloud Security, Compliance and Governance
- Cloud Computing Events
- Other Cloud Computing Platforms and Services
Azure Blob, Drive, Table, Queue, HDInsight and Media Services
•• Nathan Totten (@ntotten) and Nick Harris (@cloudnick) produced CloudCover Episode 99 - Windows Azure Media Services General Availibility on 1/25/2013:
In this episode Nick Harris and Nate Totten are joined by Mingfei Yan Program Manager II on Windows Azure Media Services. With Windows Azure Media Services reaching General Availability Mingfei joined us to demonstrate how you can use it to build great, extremely scalable, end-to-end media solutions for streaming on-demand video to consumers on any device and in this particular demo shows off the portal, encoding and both a Windows Store app and iOS device consuming encoded content.
For more information visit the Windows Azure Media Services page to learn more about the capabilities, and visit the Windows Azure Media Service Dev Center for tutorials, how-to articles, blogs, and more information and get started building applications with it today

Craig Kitterman (@craigkitterman) announced SQL Server Backup and Restore to Cloud Simplified in a 1/24/2013 post:
Editor’s Note: Today’s post was written by Guy Bowerman and Karthika Raman from the Microsoft Data Platform team.
SQL Server 2012 SP1 Cumulative Update 2 includes new functionality that simplifies the backup and restore capability of an on-premises SQL Server database to Windows Azure. You can now directly create a backup to Windows Azure Storage using SQL Server Native Backup functionality. Read the information below to get a brief introduction to the new functionality and follow the links for more in-depth information.
To download the update, go to the SQL Release Services Blog.
Overview:
In addition to disk and tape you can now use SQL Server native backup functionality to back up your SQL Server Database to the Windows Azure Blob storage service. In this release, backup to Windows Azure Blob storage is supported using T-SQL and SMO. SQL Server Databases on an on premises instance of SQL Server or in a hosted environment such as an instance of SQL Server running in Windows Azure VMs can take advantage of this functionality.
Benefits:
- Flexible, reliable, and limitless off-site storage for improved disaster recovery: Storing your backups on Windows Azure Blob service can be a convenient, flexible and easy to access off-site option. Creating off-site storage for your SQL Server backups can be as easy as modifying your existing scripts/jobs. Off-site storage should typically be far enough from the production database location to prevent a single disaster that might impact both the off-site and production database locations. You can also restore the backup to a SQL Server Instance running in a Windows Azure Virtual Machine for disaster recovery of your on-premises database. By choosing to geo replicate the Blob storage you have an extra layer of protection in the event of a disaster that could affect the whole region. In addition, backups are available from anywhere and at any time and can easily be accessed for restores.
- Backup Archive: The Windows Azure Blob Storage service offers a better alternative to the often used tape option to archive backups. Tape storage might require physical transportation to an off-site facility and measures to protect the media. Storing your backups in Windows Azure Blob Storage provides an instant, highly available and durable archiving option.
- No overhead of hardware management: There is no overhead of hardware management with Windows Azure storage service. Windows Azure services manage the hardware and provides geo-replication for redundancy and protection against hardware failures.
- Currently for instances of SQL Server running in a Windows Azure Virtual Machine, backing up to Windows Azure Blob storage services can be done by creating attached disks. However, there is a limit to the number of disks you can attach to a Windows Azure Virtual Machine. This limit is 16 disks for an extra-large instance and fewer for smaller instances. By enabling a direct backup to Windows Azure Blob Storage, you can bypass the 16 disk limit.
- In addition, the backup file which now is stored in the Windows Azure Blob storage service is directly available to either an on-premises SQL Server or another SQL Server running in a Windows Azure Virtual Machine, without the need for database attach/detach or downloading and attaching the VHD.
- Cost Benefits: Pay only for the service that is used. Can be cost-effective as an off-site and backup archive option.
The Windows Azure pricing calculator can help estimate your costs.
Storage: Charges are based on the space used and are calculated on a graduated scale and the level of redundancy. For more details, and up-to-date information, see the Data Management section of the Pricing Details article.
Data Transfers: Inbound data transfers to Windows Azure are free. Outbound transfers are charged for the bandwidth use and calculated based on a graduated region-specific scale. For more details, see the Data Transfers section of the Pricing Details article.
How it works:
Backup to Windows Azure Storage is engineered to behave much like a backup device (Disk/Tape). Using the Microsoft Virtual Backup Device Interface (VDI), Windows Azure Blob storage is coded like a “virtual backup device”, and the URL format used to access the Blob storage is treated as a device. The main reason for supporting Azure storage as a destination device is to provide a consistent and seamless backup and restore experience, similar to what we have today with disk and tape.
When the Backup or restore process is invoked, and the Windows Azure Blob storage is specified using the URL “device type”, the engine invokes a VDI client process that is part of this feature. The backup data is sent to the VDI client process, which sends the backup data to Windows Azure Blob storage.
As previously mentioned, the URL is much like a backup device used today, but it is not a physical device, so there are some limitations. For a full list of the supported options, see SQL Server Backup and Restore with Windows Azure Blob Storage Service.
How to use it
To write a backup to Windows Azure Blob storage you must first create a Windows Azure Storage account, create a SQL Server Credential to store storage account authentication information. By using Transact-SQL or SMO you can issue backup and restore commands.
The following Transact-SQL examples illustrate creating a credential, doing a full database backup and restoring the database from the full database backup. For a complete walkthrough of creating a storage account and performing a simple restore, see Tutorial: Getting Started with SQL Server Backup and Restore to Windows Azure Blob Storage Service.
Create a Credential
The following example creates a credential that stores the Windows Azure Storage authentication information.
Backing up a complete database
The following example backs up the AdventureWorks2012 database to the Windows Azure Blob storage service.
Restoring a database
To restore a full database backup, use the following steps.
Resources:
Please send your feedback on the feature and or documentation to karaman@microsoft.com or guybo@microsoft.com.


Scott Guthrie (@scottgu) posted Announcing Release of Windows Azure Media Services on 1/22/2013:
I’m excited to announce the general availability (GA) release of Windows Azure Media Services. This release is now live in production, supported by a new media services dev center, backed by an enterprise SLA, and is ready to be used for all media projects.
With today’s release, you now have everything you need to quickly build great, extremely scalable, end-to-end media solutions for streaming on-demand video to consumers on any device. For example, you can easily build a media service for delivering training videos to employees in your company, stream video content for your web-site, or build a premium video-on-demand service like Hulu or Netflix. Last year several broadcasters used Windows Azure Media Services to stream the London 2012 Olympics.
Media Platform as a Service
With Windows Azure Media Services, you can stream video to HTML5, Flash, Silverlight, Windows 8, iPad, iPhone, Android, Xbox, Windows Phone and other clients using a wide variety of streaming formats:
Building a media solution that encodes and streams video to various devices and clients is a complex task. It requires hardware and software that has to be connected, configured, and maintained. Windows Azure Media Services makes this problem much easier by eliminating the need to provision and manage your own custom infrastructure. Windows Azure Media Services accomplishes this by providing you with a Media Platform as a Service (PaaS) that enables you to easily scale your business as it grows, and pay only for what you use.
As a developer, you can control Windows Azure Media Services by using REST APIs or .NET and Java SDKs to build a media workflow that can automatically upload, encode and deliver video. We’ve also developed a broad set of client SDKs and player frameworks which let you build completely custom video clients that integrate in your applications. This allows you to configure and control every aspect of the video playback experience, including inserting pre-roll, mid-roll, post-roll, and overlay advertisement into your content.
Upload, Encode, Deliver, Consume
A typical video workflow involves uploading raw video to storage, encoding & protecting the content, and then streaming that content to users who can consume it on any number of devices. For each of these major steps, we’ve built a number of features that you’ll find useful:
Upload
Windows Azure Media Services supports multiple different options to upload assets into Media Services:
- Using REST APIs, or .NET or Java SDKs you can upload files to the server over HTTP/S with AES 256 encryption. This works well for smaller sets of files and is for great uploading content on a day to day basis.
- Bulk upload an entire media library with thousands of large files. Uploading large asset files can be a bottleneck for asset creation and by using a bulk ingesting approach, you can save a lot of time. For bulk upload, you can use the Bulk Ingest .NET Library or a partner upload solution such as Aspera which uses UDP for transporting files at very rapid speeds.
- If you already have content in Windows Azure blob storage, we also support blob to blob transfers and storage account to storage account transfers.
- We also enable to you to upload content through the Windows Azure Portal – which is useful for small jobs or when first getting started.
Encode and then Deliver
Windows Azure Media Services provides built-in support for encoding media into a variety of different file-formats. With Windows Azure Media Services, you don’t need to buy or configure custom media encoding software or infrastructure – instead you can simply send REST calls (or use the .NET or Java SDK) to automate kicking off encoding jobs that Windows Azure Media Services will process and scale for you.
Last month, I announced we added reserved capacity encoding support to Media Service which gives you the ability to scale up the number of encoding tasks you can process in parallel. Using the SCALE page within the Windows Azure Portal, you can add reserved encoding units that let you encode multiple tasks concurrently (giving you faster encode jobs and predictable performance).
Today, we have also added new reserved capacity support for on-demand streaming (giving you more origin server capacity) - which can also now be provisioned on the same SCALE page in the management portal:
In addition to giving your video service more origin streaming capacity to handle a greater number of concurrent users consuming different video content, our on-demand streaming support also now gives you a cool new feature we call dynamic packaging.
Traditionally, once content has been encoded, it needs to be packaged and stored for multiple targeted clients (iOS, XBox, PC, etc.). This traditional packaging process converts multi-bitrate MP4 files into multi-bitrate HLS file-sets or multi-bitrate Smooth Streaming files. This triples the storage requirements and adds significant processing cost and delay.
With dynamic packaging, we now allow users to store a single file format and stream to many adaptive protocol formats automatically. The packaging and conversion happens in real-time on the origin server which results in significant storage cost and time savings:
Today the source formats can be multi-bitrate MP4 or Smooth based, and these can be converted dynamically to either HLS or Smooth. The pluggable nature of this architecture will allow us, over the next few months, to also add DASH Live Profile streaming of fragmented MP-4 segments using time-based indexing as well. The support of HLS and the addition of DASH enables an ecosystem-friendly model based on common and standards-based streaming protocols, and ensures that you can target any type of device.
Consume
Windows Azure Media Services provides a large set of client player SDKs for all major devices and platforms, and they let you not only reach any device with a format that’s best suited for that device - but also build a custom player experience that uniquely integrates into your product or service.
Your users can consume media assets by building rich media applications rapidly on many platforms, such as Windows, iOS, XBox, etc. At this time, we ship SDKs and player frameworks for:
- Windows 8
- iOS
- Xbox
- Flash Player (built using Adobe OSMF)
- Silverlight
- Windows Phone
- Android [Emphasis added.]
- Embedded devices (Connected TV, IPTV)
To get started with developing players, visit the Developer tools for Windows Azure Media Services. The SDKs and player frameworks contain player samples that you can use as-is or customize with very little effort.
Start Today
I’m really excited about today’s the general availability (GA) release of Windows Azure Media Services. This release is now live in production, backed by an enterprise SLA, and is ready to be used for all projects. It makes building great media solutions really easy and very cost effective.
Visit the Windows Azure Media Services page to learn more about the capabilities, and visit the Windows Azure Media Service Dev Center for tutorials, how-to articles, blogs, and more information and get started building applications with it today!


Finally! A Windows Azure Service with an SDK that supports Android.![]()
Haddy El-Haggan (@Hhaggan) offered a Blob Storage using .NET (all the predefined functions) white paper on 1/19/2013 (missed when published):
Following a previous blog post on how to develop on Windows Azure, Microsoft Platform of Cloud Computing, I have [written] a document that I hope
itmight help you with your development with all the predefined functions of the blob storage. This type of storage is most likely used for storing unstructured data on the cloud. This is mainly all about the Microsoft.WindowsAzure.StorageClient..
Hope you like them, waiting for your feedback J


<Return to section navigation list>
Windows Azure SQL Database, Federations and Reporting, Mobile Services
•• Josh Twist (@joshtwist) described Dispatching to different query functions in Mobile Services in a 1/25/2013 post:
It’s common to want to run trigger differing behaviors inside your read script based on a parameter. For example, imagine we have a table called ‘foo’ and we want to have a default path and two special operations called ‘op1’ and ‘op2’ that do something slightly different (maybe one loads a summary of the objects to reduce the amount of traffic on the wire whilst the other expands a relationship to load child records).
Here’s my approach to this:
So now, if I hit the HTTP endpoint for my table
http://todolist.azure-mobile.net/tables/foo
We’ll load the records as normal, returning a JSON array. However, if we add a parameter
http://todolist.azure-mobile.net/tables/foo?operation=op1Then we’ll get the following response:
"this result is from operation1"And if we hit ?operation=op2 then we’ll get:
"this result is from operation2"And, with the script above if we hit some undeclared operation (?operation=nonsense) then we’ll go back to the default path (you may decide to throw an error).


Glenn Gailey (@ggailey777) described New Samples and Videos Featured for Mobile Services in a 1/24/2013 post:
I just wanted to take a few minutes to share some exciting new videos and samples-related activity for Mobile Services—particularly for Windows Store apps. (You can find even more details at http://www.nickharris.net/2013/01/new-windows-azure-mobile-services-getting-started-content/).
New WindowsAzure.com Resources
Mobile Services guru Nick Harris has been busy adding value to Mobile Services content and samples, including creating videos for many of the Mobile Services tutorials. Links to these videos from the Channel 9 series are embedded in the Tutorials and Resources page.
We also have a new Code Samples page in the Mobile Services dev center, featuring (at this point) Windows Store samples.
New Scenario-Based Samples
Nick has also written 5 kickin’ new samples that address cool app-driven scenarios for Mobile Services and Windows Store apps.
I should point out that these samples are documented at least as well as our Mobile Services tutorials on WindowsAzure.com.
5 stars all the way….Geolocation sample end to end using Windows Azure Mobile Services (New)
This sample provides an end to end location scenario with a Windows Store app using Bing Maps and a Windows Azure Mobile Services backend. It shows how to add places to the Map, store place coordinates in a Mobile Services table, and how to query for places near your location.
Enqueue and Dequeue messages with Windows Azure Mobile Services and Services Bus (New)
My Store - This sample demonstrates how you can enqueue and dequeue messages from your Windows Store apps into a Windows Azure Service Bus Queue via Windows Azure Mobile Services. This code sample builds out an ordering scenario with both a Sales and Storeroom and app.
Capture, Store and Email app Feedback using Windows Azure Mobile Services (New)
This sample shows how you can implement a Feedback charm option in your Windows Store application and submit the feedback to be both stored Windows Azure Mobile Services and emailed directly to you.
Upload File to Windows Azure Blob Storage using Windows Azure Mobile Services (New)
This demonstrates how to store your files such as images, videos, docs or any binary data off device in the cloud using Windows Azure Blob Storage. In this example we focus on capturing and uploading images, with the same approach you can upload any binary data to Blob Storage.
Create a Game Leaderboard using Windows Azure Mobile Services (New)
The My Trivia sample demonstrates how you can easily add, update and view a leaderboard from your Windows Store applications using Windows Azure Mobile Services.
Keep it up Nick!


The Windows Azure Mobile Services Team described how to Build Real-time Apps with Mobile Services and Pusher [for iOS] in a 1/23/2012 tutorial:
This topic shows you how can add real-time functionality to your Windows Azure Mobile Services-based app. When completed, your TodoList data is synchronized, in real-time, across all running instances of your app.
The Push Notifications to Users tutorial shows you how to use push notifications to inform users of new items in the Todo list. Push notifications are a great way to show occasional changes. However, a service like Pusher is much better at delivering frequent and rapid changes to users. In this tutorial, we use Pusher with Mobile Services to keep a Todo list in sync when changes are made in any running instance of the app.
Pusher is a cloud-based service that, like Mobile Services, makes building real-time apps incredibly easy. You can use Pusher to quickly build live polls, chat rooms, multi-player games, collaborative apps, to broadcast live data and content, and that’s just the start! For more information, see http://pusher.com.
This tutorial walks you through these basic steps to add realtime collaboration to the Todo list application:
This tutorial is based on the Mobile Services quickstart. Before you start this tutorial, you must first complete Get started with Mobile Services.
Create a new Pusher account
Your first step is to create a new account to use for the tutorial. You can use the FREE Sandbox plan, it's perfect for this tutorial.
To sign up for a Pusher account
Log in to the Windows Azure Management Portal.
In the lower pane of the management portal, click New.
Click Store.
In the Choose an Add-on dialog, select Pusher and click the right arrow.
In the Personalize Add-on dialog select the Pusher plan you want to sign up for.
Enter a name to identify your Pusher service in your Windows Azure settings, or use the default value of Pusher. Names must be between 1 and 100 characters in length and contain only alphanumeric characters, dashes, dots, and underscores. The name must be unique in your list of subscribed Windows Azure Store Items.
Choose a value for the region; for example, West US.
Click the right arrow.
On the Review Purchase tab, review the plan and pricing information, and review the legal terms. If you agree to the terms, click the check mark. After you click the check mark, your Pusher account will begin the provisioning process.
After confirming your purchase you are redirected to the add-ons dashboard and you will see the message Purchasing Pusher.
Your Pusher account is provisioned immediately and you will see the message Successfully purchased Add-On Pusher. Your account has been created and you are now ready to use the Pusher service.
To modify your subscription plan or see the Pusher contact settings, click the name of your Pusher service to open the Pusher add-ons dashboard.
When using Pusher you will need to supply your Pusher app connection settings.
To find your Pusher connection settings
Click Connection Info.
In the Connection info dialog you will see your app ID, key and secret. You will use these values later in the tutorial so copy them for late use.
For more information on getting started with Pusher, see Understanding Pusher.
Update your app
Now that you have your Pusher account set up, the next step is to modify the iOS app code for the new functionality.
Install the libPusher library
The libPusher library let’s you access Pusher from iOS.
Download the libPusher library from here.
Create a group called libPusher in your project.
In Finder, unzip the downloaded zip file, select the libPusher-combined.a and /headers folders, and drag these items into the libPusher group in your project.
Check Copy items into destination group’s folder, then click Finish
This copies the libPusher files into your project.
On the project root in the project explorer, click Build Phases, then click Add Build Phase and Add Copy Files.
Drag the libPusher-combined.a file from the project explorer into the new build phase.
Change the Destination to Frameworks and click Copy only when installing.
Within the Link Binary With Libraries area, add the following libraries:
- libicucore.dylib
- CFNetwork.framework
- Security.framework
- SystemConfiguration.framework
Finally within Build Settings, locate the target build setting Other Linker Flags and add the -all_load flag.
This shows the -all_load flag set for the Debug build target.
The library is now installed ready for use.
Add code to the application
In Xcode, open the TodoService.h file and add the following method declarations:
// Allows retrieval of items by id
- (NSUInteger) getItemIndex:(NSDictionary *)item;


// To be called when items are added by other users
- (NSUInteger) itemAdded:(NSDictionary *)item;


// To be called when items are completed by other users
- (NSUInteger) itemCompleted:(NSDictionary *)item;
Replace the existing declarations of addItem and completeItem with the following:
- (void) addItem:(NSDictionary *) item;
- (void) completeItem: (NSDictionary *) item;
In TodoService.m, add the following code to implement the new methods:
// Allows retrieval of items by id
- (NSUInteger) getItemIndex:(NSDictionary *)item
{
    NSInteger itemId = [[item objectForKey: @"id"] integerValue];


return [items indexOfObjectPassingTest:^BOOL(id currItem, NSUInteger idx, BOOL *stop)
     {
         return ([[currItem objectForKey: @"id"] integerValue] == itemId);
     }];


}


// To be called when items are added by other users
-(NSUInteger) itemAdded:(NSDictionary *)item
{
    NSUInteger index = [self getItemIndex:item];


// Only complete action if item not already in list
if(index == NSNotFound)
{
    NSUInteger newIndex = [items count];
    [(NSMutableArray *)items insertObject:item atIndex:newIndex];
    return newIndex;
}
else
    return -1;


}


// To be called when items are completed by other users
- (NSUInteger) itemCompleted:(NSDictionary *)item
{
    NSUInteger index = [self getItemIndex:item];


// Only complete action if item exists in items list
if(index != NSNotFound)
{
    NSMutableArray *mutableItems = (NSMutableArray *) items;
    [mutableItems removeObjectAtIndex:index];
}
return index;


}
The TodoService now allows you to find items by id and add and complete items locally without sending explicit requests to the remote service.
Replace the existing addItem and completeItem methods with the following code:
-(void) addItem:(NSDictionary *)item
{
    // Insert the item into the TodoItem table and add to the items array on completion
    [self.table insert:item completion:^(NSDictionary *result, NSError *error) {
        [self logErrorIfNotNil:error];
    }];
}


-(void) completeItem:(NSDictionary *)item
{
    // Set the item to be complete (we need a mutable copy)
    NSMutableDictionary *mutable = [item mutableCopy];
    [mutable setObject:@(YES) forKey:@"complete"];


// Update the item in the TodoItem table and remove from the items array on completion
[self.table update:mutable completion:^(NSDictionary *item, NSError *error) {
    [self logErrorIfNotNil:error];
}];


}
Note that items are now added and completed, along with updates to the UI, when events are received from Pusher instead of when the data table is updated.
In the TodoListController.h file, add the following import statements:
#import "PTPusherDelegate.h"
#import "PTPusher.h"
#import "PTPusherEvent.h"
#import "PTPusherChannel.h"
Modify the interface declaration to add PTPusherDelegate to look like the following:
@interface TodoListController : UITableViewController<UITextFieldDelegate, PTPusherDelegate>Add the following new property:
@property (nonatomic, strong) PTPusher *pusher;Add the following code that declares a new method:
// Sets up the Pusher client
- (void) setupPusher;
In TodoListController.m, add the following line under the other @synthesise lines to implement the new property:
@synthesize pusher = _pusher;Now add the following code to implement the new method:
// Sets up the Pusher client
- (void) setupPusher {


// Create a Pusher client, using your Pusher app key as the credential
// TODO: Move Pusher app key to configuration file
self.pusher = [PTPusher pusherWithKey:@"**your_app_key**" delegate:self encrypted:NO];
self.pusher.reconnectAutomatically = YES;


// Subscribe to the 'todo-updates' channel
PTPusherChannel *todoChannel = [self.pusher subscribeToChannelNamed:@"todo-updates"];


// Bind to the 'todo-added' event
[todoChannel bindToEventNamed:@"todo-added" handleWithBlock:^(PTPusherEvent *channelEvent) {


    // Add item to the todo list
    NSUInteger index = [self.todoService itemAdded:channelEvent.data];


    // If the item was not already in the list, add the item to the UI
    if(index != -1)

    {
        NSIndexPath *indexPath = [NSIndexPath indexPathForRow:index inSection:0];
        [self.tableView insertRowsAtIndexPaths:@[ indexPath ]
                      withRowAnimation:UITableViewRowAnimationTop];
    }
}];


// Bind to the 'todo-completed' event
[todoChannel bindToEventNamed:@"todo-completed" handleWithBlock:^(PTPusherEvent *channelEvent) {


    // Update the item to be completed
    NSUInteger index = [self.todoService itemCompleted:channelEvent.data];


    // As long as the item did exit in the list, update the UI
    if(index != NSNotFound)
    {
        NSIndexPath *indexPath = [NSIndexPath indexPathForRow:index inSection:0];
        [self.tableView deleteRowsAtIndexPaths:@[ indexPath ]
                      withRowAnimation:UITableViewRowAnimationTop];
    }
}];


}
Replace the
**your_app_key**placeholder with the app_key value you copied from the Connection Info dialog earlier.Replace the onAdd method with the following code:
- (IBAction)onAdd:(id)sender
{
    if (itemText.text.length  == 0) {
        return;
    }


NSDictionary *item = @{ @"text" : itemText.text, @"complete" : @(NO) };
[self.todoService addItem:item];


itemText.text = @"";


}
In the TodoListController.m file, locate the (void)viewDidLoad method and add a call to the setupPusher method so the first few lines are:
- (void)viewDidLoad
{
    [super viewDidLoad];
    [self setupPusher];
At the end of the tableView:commitEditingStyle:forRowAtIndexPath method, replace the call to completeItem with the following code:
// Ask the todoService to set the item's complete value to YES
[self.todoService completeItem:item];
The app is now able to receive events from Pusher, and to update the local Todo list accordingly.
Install server scripts
All that remains is setting up your server scripts. We'll insert a script for when an item is inserted or updated into the TodoList table.
Log on to the Windows Azure Management Portal, click Mobile Services, and then click your mobile service.
In the Management Portal, click the Data tab and then click the TodoItem table.
In TodoItem, click the Script tab and select Insert.
This displays the function that is invoked when an insert occurs in the TodoItem table.
Replace the insert function with the following code:
var Pusher = require('pusher');


function insert(item, user, request) {


request.execute({
    success: function() {
        // After the record has been inserted, trigger immediately to the client
        request.respond();


        // Publish event for all other active clients
        publishItemCreatedEvent(item);
    }
});


function publishItemCreatedEvent(item) {


    // Ideally these settings would be taken from config
    var pusher = new Pusher({
      appId: '**your_app_id**',
      key: '**your_app_key**',
      secret: '**your_app_secret**'
    });


    // Publish event on Pusher channel
    pusher.trigger( 'todo-updates', 'todo-added', item );
}


}
Replace the placeholders in the above script with the values you copied from the Connection Info dialog earlier:
**your_app_id**: the app_id value**your_app_key**: the app_key value**your_app_key_secret**: the app_key_secretClick the Save button. You have now configured a script to publish an event to Pusher every time a new item is inserted into the TodoItem table.
Select Update from the Operation dropdown.
Replace the update function with the following code:
var Pusher = require('pusher');


function update(item, user, request) {


request.execute({
    success: function() {
        // After the record has been updated, trigger immediately to the client
        request.respond();


        // Publish event for all other active clients
        publishItemUpdatedEvent(item);
    }
});


function publishItemUpdatedEvent(item) {


    // Ideally these settings would be taken from config
    var pusher = new Pusher({
      appId: '**your_app_id**',
      key: '**your_app_key**',
      secret: '**your_app_secret**'
    });


    // Publish event on Pusher channel
    pusher.trigger( 'todo-updates', 'todo-completed', item );


}


}
Repeat step 5 for this script to replace the placeholders.
Click the Save button. You have now configured a script to publish an event to Pusher every time a new item is updated.
Test your app
To test the app you'll need to run two instances. You can run one instance on an iOS device and another in the iOS simulator.
Connect your iOS device, press the Run button (or the Command+R key) to start the app on the device, then stop debugging.
You now have your app installed on your device.
Run the app on the iOS simulator, and at the same time start the app on your iOS device.
Now you have two instances of the app running.
Add a new Todo item in one of the app instances.
Verify that the added item appears in the other instance.
Check a Todo item to mark it complete in one app instance.
Verify that the item disappears from the other instance.
Congratulations, you have successfully configured your mobile service app to synchronise across all clients in realtime.
Next Steps
Now that you’ve seen how easy it is to use the Pusher service with Mobile Services, follow these links to learn more about Pusher.
- Pusher API documentation: http://pusher.com/docs
- Pusher tutorials: http://pusher.com/tutorials
To learn more about registering and using server scripts, see Mobile Services server script reference.


Nick Harris (@cloudnick) updated CodePlex’s Windows Azure Toolkit for Windows 8 Release Preview’ Release Notes on 1/21/2013:
During the early previews of Windows 8, the Windows Azure Toolkit for Windows 8 provided developers with the first support for building backend services for Windows Store apps using Windows Azure. The main areas of feedback we received from mobile developers was that they wanted a turn-key set of services for common functionality such as notifications, auth, and data.
Windows Azure Mobile Services directly reflects this feedback by enabling developers to simply provision, configure, and consume scalable backend services. The downloads for this toolkit will be removed on the week of Feb 1st 2013. Future improvements will be channeled into Windows Azure Mobile Services rather than this toolkit.
To get started with Mobile Services, sign up for a Windows Azure account and receive 10 free Mobile Services.


Josh Twist (@joshtwist) described Using the scheduler to backup your Mobile Service database in a 1/20/2013 post:
Recently I launched my first iOS application called ‘doto’. doto is a todolist app with two areas of focus: simplicity and sharing. I wanted a super simple application to share lists with my wife (groceries, trip ideas, gift ideas for the kids, checklist for the camping trip etc). For more info, check out the mini-site or watch the 90 second video:

Now that I have a real app that stores real people’s data, I feel a responsibility to ensure that I take good care of it. Whilst it’s unlikely; it is possible that I could do something silly like drop a SQL table and lose a lot of data that is important to those users. So taking a periodic backup and keeping that in a safe location is advisable.
SQL Azure has a cool export feature that creates a ‘.bacpac’ file that contains your schema and your data – it saves the file to blob storage. And what’s more, they have a service endpoint with a REST API.
This means it’s easy for me to invoke an export from a Mobile Services script, even better, I can use the scheduler to do a daily backup.
Here’s the script I use; notice how the URL of the export service varies depending on the location of your database and server.
And now I just have to set a schedule, I’m going to go for 1 minute past midnight UTC.

Restore
If I ever need to restore the backup data I can create a new database from an import, right in the portal:

Which opens a cool wizard that even helps me navigate my blob storage containers to find the appropriate .bacpac file. To hook this new database up to my Mobile Service I could do an ETL over to the existing connected database or use the Change DB feature in the Mobile Service CONFIGURE tab:


<Return to section navigation list>
Marketplace DataMarket, Cloud Numerics, Big Data and OData
• Sara M G Silva (@saramgsilva) posted Consuming Odata Service in Windows Store Apps (Include MVVM Pattern) to the Windows Dev Center - Windows Store Apps | Samples forum on 1/22/2013:
Introduction
This demo has the main goal to show the steps that is need to consuming an OData service in Windows Store Apps, and use the MVVM Pattern and has Ioc container for manage the dependencies.
Building the Sample
You only need Visual Studio 2012 and Windows 8, both the RTM version.
Description
For concretizate this sample i used the Netflix OData Catalog API (Preview), that can be found where:
For who is starting with OData service in Windows Store Apps i recommend to install the:
WCF Data Services Tools for Windows Store Apps
“The WCF Data Services Tools for Windows Store Apps installer extends the Add Service Reference experience with client-side OData support for Windows Store Apps in Visual Studio 2012.”
Here are the main points:
1. Creating a Blank Project like you can see in the following image:
2. Add Service Reference
3. Analizing the NetflixService
4. The IServiceManager, FakeServiceManager and ServiceManager
4.1. The LoadNewDVDMoviesAsync method
4.2. The LoadTopDVDMoviesAsync method
4.3. The DataServiceContextAsyncExtension
4.4 The model
5. The TitlesViewModel
5.1 The LoadDataAsync method
5.2 The GroupView and ItemView
6. Binding the view model with the view
6.1. ViewModelLocator
6.2. In App.xaml
6.3. In the TitlesPage.xaml
6.4. In the TitlesPage.xaml.cs
6.5. Binding Data
7. The output / running the demo
8. Fiddler
Let's start:
1. Creating a Blank Project like you can see in the following image:
Note: I used te name Netflix.ClientApp (Win8) for the project, but i will change the namespace forNetflix.ClientApp and in the future if I need to create theNetflix.ClientApp (WP8, i can use the same namespace and if need to "linked as" some file i will not have problems with namespaces.
2. Add Service Reference
The service reference that i added is: http://odata.netflix.com/v2/Catalog/ …


Sara continues with sections 3 and later and shows the Titles page in section 7:

• The Team Foundation Services group released the Team Foundation Service OData API (Beta) on 1/22/2013:
IMPORTANT: Beta Notes
- The OData service landing page is hosted at https://tfsodata.visualstudio.com/
- The OData service endpoint is hosted at https://tfsodata.visualstudio.com/DefaultCollection
- View changelog, up-to-date notes on known issues at: PublicNotes.txt
Overview
The Team Foundation Service OData API is an implementation of the OData protocol built upon the existing Team Foundation Service client objet model used to connect to Team Foundation Service. The API is subject to change as we get feedback from customers.
To learn more about the OData protocol, you can browse the OData site at http://www.odata.org.
If you have questions or feedback about this service, please email TFSOData@Microsoft.com. Please note that this service is provided "as-is", with no guaranteed uptime and is not officially supported by Microsoft. But if you are having problems please let us know and we'll do our best to work with you.
See the Demo: There is a video for Channel 9 which shows how to get started using the v1 of the service. Most of the same concepts from that video still apply for this version, but a revised video has not yet been created.
Samples: Windows 8 client (see Nisha Singh's blog entry)
On-Premises version of service (see Brian Keller's blog entry). This version of the codebase can be used against on-premises deployments of Team Foundation Server 2010 and 2012.
Getting Started
In the following section you will find meaningful information about how to consume data from the Team Foundation Service taking advantage of the OData API.
In order to authenticate with the service, you will need to enable and configure basic auth credentials on tfs.visualstudio.com:
- Navigate to the account that you want to use on https://tfs.visualstudio.com. For example, you may have https://account.visualstudio.com.
- In the top-right corner, click on your account name and then select My Profile
- Select the Credentials tab
- Click the 'Enable alternate credentials and set password' link
- Enter a password. It is suggested that you choose a unique password here (not associated with any other accounts)
- Click Save Changes
To authenticate against the OData service, you need to send your basic auth credentials in the following domain\username and password format:
- account\username
- password
- Note: account is from account.visualstudio.com, username is from the Credentials tab under My Profile, and password is the password that you just created.
Collections
The main resources available are Builds, Changesets, Changes, Builds, Build Definitions, Branches, Work Items, Attachments, Projects, Queries, Links and Area Paths. A couple of sample queries are provided for each resource, although complete query options are provided further in this page.
Case Sensitivity: Be aware that the OData resources are case-sensitive when making queries.
Page size defaults: the default page sizes returned by the OData service are set to 20, although you can certainly use the top and skip parameters to override that. …
The article continues with detailed resources tables.
Brian Benz (@bbenz) described Using Drupal on Windows Azure to create an OData repository in a 1/18/2013 post to the Interoperability @ Microsoft blog:
OData is an easy to use protocol that provides access to any data defined as an OData service provider. Microsoft Open Technologies, Inc., is collaborating with several other organizations and individuals in development of the OData standard in the OASIS OData Technical Committee, and the growing OData ecosystem is enabling a variety of new scenarios to deliver open data for the open web via standardized URI query syntax and semantics. To learn more about OData, including the ecosystem, developer tools, and how you can get involved, see this blog post.
In this post I’ll take you through the steps to set up Drupal on Windows Azure as an OData provider. As you’ll see, this is a great way to get started using both Drupal and OData, as there is no coding required to set this up.
It also won’t cost you any money – currently you can sign up for a 90 day free trial of Windows Azure and install a free Web development tool (Web Matrix) and a free source control tool (Git) on your local machine to make this happen, but that’s all that’s required from a client point of view. We’ll also be using a free tier for the Drupal instance, so you may not need to pay even after the 90 day trial, depending on your needs for bandwidth or storage.
So let’s get started!
Set up a Drupal instance on Windows Azure using the Web Gallery.
The Windows Azure team has made setting up a Drupal instance incredibly easy and quick – in a few clicks and a few minutes your site will be up and running. Once you’ve signed up for Windows Azure and have your account set up, click on New > Quick Create > from Gallery, as shown here:
Then click on the Drupal 7 instance, as shown here. The Web Gallery is where you’ll find images of the latest Web applications, preconfigured and ready to set up. Currently we’re using the Acquia version of Drupal 7 for Drupal:
Enter some basic information about your site, including the URL (.azurewebsites.net will be added on t what you choose), the type of database you want to work with (currently SQL Server and MySQL are supported for Drupal), the region you want your app instance deployed :
Next, add a database name, username and password for the database, and a region that the database should be deployed :
That’s it! In a few minutes your Windows Azure Web Site dashboard will appear with options for monitoring and working with your new Drupal instance:
Setting up the OData provider
So far we have a Drupal instance but it’s not an OData provider yet. To get Drupal set up as an OData provider, we’re going to have to add a few folders and files, and configure some Drupal modules.
Because good cloud systems protect your data by backing it up and providing seamless, invisible redundancy, working with files in the cloud can be tricky. But the Windows Azure team provide a free, easy to use tool to work with files on Windows azure, called Web Matrix. Web Matrix lets you easily download your files, work with them locally, test your work and publish changes back up to your site when you’re ready. It’s also a great development tool that supports most modern Web application development languages.
Once you’ve downloaded and installed Web Matrix on your local machine, you simply click on the Web Matrix icon on the bottom right under the dashboard, as show in the image above. Web Matrix will confirm that you want to make a local copy of your Windows Azure Web site and download the site:
Web Matrix will detect the type of Web site you’re working with, set up a local instance Database and start downloading the Web site to the instance:
When Web Matrix is done downloading your site you’ll see a dashboard showing you options for working with your local site. For this example, we’re only going to be working with files locally, so click the files icon shown here:
We need to add some libraries and modules to our Drupal Instance to make the Windows Azure standard configuration of Drupal 7 become an OData provider. There are three sets of files we need to download and place in specific places in our instance. You’ll need Git, or your favorite Git-compatible tool installed on your local machine to retrieve some of these files:
1) Download the OData Producer Library for PHP V1.2 to your local machine from https://github.com/MSOpenTech/odataphpprod/
Under the sites > all folder, create a folder called libraries> odata (create the libraries folder if it doesn’t exist ) and copy in the downloaded files.2) Download version 2 of the Drupal Libraries API from your local machine from http://drupal.org/project/libraries
Under the sites > all folder, create a folder called modules > libraries (yes, there are two libraries directories in different places) and copy in the downloaded files.3) Download r2integrated's OData Server files to your local machine from //git.drupal.org/sandbox/r2integrated/1561302.git
Under the sites > all folder, create a folder called modules > odata_server and copy in the downloaded files.Here’s what the directories should look like when you’re done:
Next, click on the Publish button, to upload the new files to your Windows Azure Web site via WebMatrix. After a few minutes your files should be loaded up and ready to use.
OData Configuration in Drupal on Windows Azure
Next, we will configure the files we just uploaded to provide data to OData clients.
From the top Menu, Go to the Drupal modules, and navigate down to the “other”section.
Enable Libraries and OData Server, then save configuration. The modules should look like this when you’re done:
Next, go to Site Configuration from the top menu, and navigate down to the Development section. Under development, click on OData Settings
Under Node, enable page and or article, (click on expose then to OData clients), the select the fields from each Node you want to return in an OData search. You can also return Comments, Files, Taxonomy Terms, Taxonomy Vocabularies, and Users. All are off by default and have to be enabled to expose properties, fields, and references through the OData server:
Click Save Configuration and you’re ready to start using your Windows Azure Drupal Web site as an OData provider!
One last thing - unfortunately, the default data in Drupal consists of exactly one page, so search results are not too impressive. You’ll probably want to add some data to make the site useful as an OData provider. The best way to do that is via the Drupal feeds module.
Conclusion
As promised at the beginning of this post, we’ve now created an OData provider based on Drupal to deliver open data for the open Web. From here any OData consumer can consume the OData feed and doesn’t have to know anything about the underlying data source, or even that it’s Drupal on the back end. The consumers simply see it as an OData service provider. Of course there’s more effort involved in getting your data imported, organizing it and building OData clients to consume the data, but this is a great start with minimal effort using existing, free tools.

![clip_image002[13]](http://blogs.msdn.com/cfs-file.ashx/__key/communityserver-blogs-components-weblogfiles/00-00-01-15-67-metablogapi/5241.clip_5F00_image002_5B00_13_5D00_.jpg "clip_image002[13]")
![clip_image004[13]](http://blogs.msdn.com/cfs-file.ashx/__key/communityserver-blogs-components-weblogfiles/00-00-01-15-67-metablogapi/5153.clip_5F00_image004_5B00_13_5D00_.jpg "clip_image004[13]")
![clip_image006[13]](http://blogs.msdn.com/cfs-file.ashx/__key/communityserver-blogs-components-weblogfiles/00-00-01-15-67-metablogapi/5756.clip_5F00_image006_5B00_13_5D00_.jpg "clip_image006[13]")
![clip_image008[13]](http://blogs.msdn.com/cfs-file.ashx/__key/communityserver-blogs-components-weblogfiles/00-00-01-15-67-metablogapi/1856.clip_5F00_image008_5B00_13_5D00_.jpg "clip_image008[13]")
![clip_image010[13]](http://blogs.msdn.com/cfs-file.ashx/__key/communityserver-blogs-components-weblogfiles/00-00-01-15-67-metablogapi/0535.clip_5F00_image010_5B00_13_5D00_.jpg "clip_image010[13]")
![clip_image012[13]](http://blogs.msdn.com/cfs-file.ashx/__key/communityserver-blogs-components-weblogfiles/00-00-01-15-67-metablogapi/5340.clip_5F00_image012_5B00_13_5D00_.jpg "clip_image012[13]")
![clip_image014[13]](http://blogs.msdn.com/cfs-file.ashx/__key/communityserver-blogs-components-weblogfiles/00-00-01-15-67-metablogapi/8461.clip_5F00_image014_5B00_13_5D00_.jpg "clip_image014[13]")
![clip_image016[13]](http://blogs.msdn.com/cfs-file.ashx/__key/communityserver-blogs-components-weblogfiles/00-00-01-15-67-metablogapi/0066.clip_5F00_image016_5B00_13_5D00_.jpg "clip_image016[13]")
![clip_image018[13]](http://blogs.msdn.com/cfs-file.ashx/__key/communityserver-blogs-components-weblogfiles/00-00-01-15-67-metablogapi/3000.clip_5F00_image018_5B00_13_5D00_.jpg "clip_image018[13]")
![clip_image020[13]](http://blogs.msdn.com/cfs-file.ashx/__key/communityserver-blogs-components-weblogfiles/00-00-01-15-67-metablogapi/2021.clip_5F00_image020_5B00_13_5D00_.jpg "clip_image020[13]")
![clip_image022[15]](http://blogs.msdn.com/cfs-file.ashx/__key/communityserver-blogs-components-weblogfiles/00-00-01-15-67-metablogapi/2526.clip_5F00_image022_5B00_15_5D00_.jpg "clip_image022[15]")
<Return to section navigation list>
Windows Azure Service Bus, Caching Access Control, Active Directory, Identity and Workflow
•• Haishi Bai (@Haishi Bai2010) described New features in Service Bus Preview Library (January 2013) - 1: Message Pump in a 1/25/2013 post:
Recently Microsoft has announced the new Windows Azure Service Bus Push Notification Hubs. And many samples and videos have been posted on the new feature. To support Notification Hubs, a new Service Bus previews features library (Microsoft.ServiceBus.Preview.dll) has been released to NuGet gallery. In this series of post I’ll drill down to several other cool new features and important enhancements contained in this library.
Message Pump
Up until now, if you want to receive messages from a Windows Azure Service Bus queue or topic/subscription, you need to periodically poll the queue or the subscription asking for new messages. The following code should look quite familiar:
while (!IsStopped)
{
    ...
    BrokeredMessage receivedMessage = null;
    receivedMessage = Client.Receive();

     if (receivedMessage != null)
    {
        ...
        receivedMessage.Complete();
    }
    ...
    Thread.Sleep(10000);
}
Actually, the above code is a simplified version of auto-generated code when you used “Worker Role with Service Queue” template to add a new Worker Role. This pattern works well in this case because you do need a loop or other blocking wait in your Run() method to keep your role instances running. However, there are a couple of problems with this pattern. First, the Thread.Sleep() calls cause unnecessary delays in the system – the above code can only respond to at most one message every ten seconds. This kind of throughputs is unacceptable to many systems. Of course we can reduce the sleep interval, let’s say to get it down to 1 second. This makes the system more responsive, but it creases number of service calls by 10 times. Polling at a 1 second interval generates 86,400 billable messages (60 * 60 * 24) per day, even if most of them are NULL messages. That doesn’t cost much – at the price of $0.01 per 10,000 billable messages it translates to 8.64 cents per day. However that IS a lot of service calls. Second, in some applications, especially client applications, event-driving programming model is often preferred. Service Bus preview features changes all these. Underneath it uses long-polling so that you don’t occur service transactions as often. And you get immediate feedbacks when a new message shows up in the pipeline. For instance, let’s say if default long-polling timeout is 1 minute, the number of billable messages reduces to 1,440 (60 * 24) per day. That’s quite a improvement in terms of reducing number of service calls. In addition, the preview library supports event-driven model instead of polling - you can simply wait for OnMessage events.
The following is a walkthrough of using the preview library. The walkthrough uses a simple WPF application that allows you to send and receive messages.
- Create a new WFP application.
- Install the preview NuGet package:
install-package ServiceBus.Preview- Get a minimum UI in place:
<Window x:Class="EventPumpWPF.MainWindow" xmlns="http://schemas.microsoft.com/winfx/2006/xaml/presentation" xmlns:x="http://schemas.microsoft.com/winfx/2006/xaml" Title="Message-Driven Messaging" Height="350" Width="525" FontSize="18"> <StackPanel Grid.Column="0"> <TextBox x:Name="messageText" /> <Button x:Name="sendMessage" Click="sendMessage_Click_1">Send</Button> <ListBox x:Name="messageList"/> </StackPanel> </Window>- Modify the code-behind:
public partial class MainWindow : Window { const string conString = "[SB connection string]"; const string queueName = "workqueue"; QueueClient mSender, mReceiver; public MainWindow() { InitializeComponent(); mSender = QueueClient.CreateFromConnectionString(conString, queueName); mReceiver = QueueClient.CreateFromConnectionString(conString, queueName, ReceiveMode.ReceiveAndDelete); mSender.OnMessage((m) => { messageList.Dispatcher.Invoke(() => { messageList.Items.Add(m.GetBody<string>()); }); }, 1); } private void sendMessage_Click_1(object sender, RoutedEventArgs e) { mSender.Send(new BrokeredMessage(messageText.Text)); messageText.Text = ""; } }- And that’s all! The only line that is new is highlighted – very simple and very straightforward.

If you’ve observed closely, you might notice there’s a second parameter (highlight in green) to OnMessage() method. This method controls how many concurrent calls to the callback (the first parameter) can occur. To illustrate the effect of this parameter, let’s modify the code a little.
- First, we add a randomizer to MainWindow class:
Random rand = new Random();- And we’ll update or message handler to add a random sleep. This is to simulate fluctuations in processing time:
mSender.OnMessage((m) => { Thread.Sleep(rand.Next(1000, 3000)); messageList.Dispatcher.Invoke(() => { messageList.Items.Add(m.GetBody<string>()); }); }, 1);- Finally, we change the sending code to send 10 messages instead of 1:
for (int i = 0; i < 10; i++) { mSender.Send(new BrokeredMessage(messageText.Text + i.ToString())); }- Now launch the program and send a message “m”, which morphs into ten messages. The code takes a while to execute because of the random sleeps and there’s only a single entry is allowed to the callback. But because the single-entrance limit, you eventually get all messages back in-order.

- Now modify the second parameter (highlighted in green) to 10. Run the app again. Now the code takes shorter time to execute because the callback can be invoked multiple times at the same time. But the message display may be out-of-order:

There you go. A very cool addition to Service Bus provided by Service Bus preview features. The feature is very useful when you want to use event-driven programming


• Vittorio Bertocci (@vibronet) posted Group & Role Claims: Use the Graph API to Get Back IsInRole() and [Authorize] in Windows Azure AD Apps on 1/22/2013:
Welcome to a new installment of the “addressing the most common questions about Windows Azure AD development” series! This time I am going to tackle one question that I know is very pressing for many of you guys:
How do I get role and group membership claims for users signing in via Windows Azure AD?
Right now the tokens issued by Windows Azure AD in Web sign-on flows do not contain groups or role claims. In this post I will show you how to leverage the Graph API and the WIF extensibility model to work around the limitation; I will also take advantage of this opportunity to go a bit deeper in the use of the Graph API, which means that the post will be longer (and at times more abstract) than a simple code walkthrough. As usual, those are my personal musings and my own opinions. I am writing this on a Saturday night (morning?) hence I plan to have fun with this :-) For the ones among you who are in a hurry or have low tolerance for logorrhea, please feel free to head to the product documentation on MSDN.
Bird’s Eye View of the Solution
Most pre-claims authorization constructs in ASP.NET are based on the idea of roles baked in IPrincipal: namely, I am thinking of the <authorization> config element, the [Authorize] attribute and of course the IsInRole() method. There’s an enormous amount of existing code based on those primitives, and abundant literature using those as the backbone of authorization enforcement in .NET applications.
This state of affair was well known to the designer of the original WIF 1.0, who provided mechanisms for projecting claims with the appropriate semantic (and specifically http://schemas.microsoft.com/ws/2008/06/identity/claims/role) as roles in IPrincipal. We even have a mechanism which allows you to specify in config a different, arbitrary claim type to be interpreted as role, should your STS use a different claim type to express roles.As mentioned in the opening, right now Windows Azure AD does not send anything that can be interpreted as a role claim. The good news, however, is that Windows Azure AD offers the Graph API, a complete API for querying the directory and retrieve any information stored there, for any user; that includes the signed-in user, of course, and the roles he/she belongs to. If you need to know what roles your user is in, all you need to do (over-simplifying a bit, for now) is to perform a GET on a resource of the form https://graph.windows.net/yourtenant.onmicrosoft.com/Users('guido@yourtenantname.onmicrosoft.com')/MemberOf. That is pretty sweet, and in fact is just a ridiculously tiny sliver of all the great things you can do with the Graph API; however, if you’d do this from your application code that would not help you to leverage the user’s role information from <authorization> and the like. When you are in your application’s code is kind of too late, as the ClaimsPrincipal representing the caller has already been assembled and that’s where the info should be for those lower-level mechanisms to kick in. True, you could do something to the ClaimsPrincipal retroactively, but that’s kind of brittle and messy.
There is another solution here, which can save both goat and cabbage (can you really say this in English?:-)). The WIF processing pipeline offers plenty of opportunities for you to insert custom logic for influencing how the token validation and ClaimsPrincipal creation takes place: details in Chapter 3 of Programming WIF. Namely, there is one processing stage that is dedicated to incoming claims processing. Say that you have logic for filtering incoming claims, modifying them or extending the claims set you are getting from the STS with data from other sources. All you need to do is to derive from the ClaimsAuthenticationManager class, override the Authenticate method and add a reference to your custom class in the application’s config.
So, the solution I propose is simple: we can create a custom ClaimsAuthenticationManager that at sign-in time reaches back to the Graph, retrieves the roles information, creates roles claims accordingly and adds them to the ClaimsPrincipal. Everything else downstream from that will be able to see the roles information just like if they would have been originally issued by the STS.
The code of custom ClaimsAuthenticationManager is going to be pretty simple, also thanks to the use of AAL for obtaining the necessary access token: just a tad more than 30 lines, and most of it string manipulation. In my experience, the thing that people often find tricky is the work that is necessary for enabling your Web application to invoke the Graph; furthermore, even if AAL reduces to a mere 3 the lines of code necessary for obtaining an access token, the structure of the parameters you need to pass is not always immediately clear to everybody. Here I’ll do my best to explain both: they are not especially hard and I am confident you’ll grok it right away. That said, I do hope we’ll manage to automate A LOT of this so that in the future you won’t be exposed to this complexity unless you want to change the defaults. We kind of already do this for the Web SSO part, if you use the MVC tool you can get a functioning MVC4 app which uses Windows Azure AD for Web SSO in no time. In fact, in this post I’ll use such an app as starting point.
Ready? Let’s dive.
Prepping the GraphClaimsAuthenticationManager Wireframe
Let’s get this immediately out of the way; also, it will provide structure for the rest of the work.
As mentioned, I assume you already have an MVC4 app that you configured with the MVC tool to integrate with your Windows Azure AD tenant for sign-in. If you didn’t do it yet, please head to this page now and follow the instructions for configuring your application. You can skip the publication to Windows Azure Web Sites, for this post we’ll be able to do everything on the local box. If you want to see the tool in action, check out this BUILD talk.
Create a new class library (though you could just add a class to your web project) and call it something meaningful: I called mine GraphClaimsAuthenticationManager.
Add a reference to System.IdentityModel, rename the class1.cs file to GraphClaimsAuthenticationManager.cs, then change the code as follows:1: public class GraphClaimsAuthenticationManager : ClaimsAuthenticationManager2: {3: public override ClaimsPrincipalAuthenticate(string resourceName, ClaimsPrincipal incomingPrincipal)4: {5: if (incomingPrincipal != null &&incomingPrincipal.Identity.IsAuthenticated == true)6: {7: // get a token for calling the Graph8:9: // query the Graph for the current user's memberships10:11: // add a role claim for every membership found12:13: }14: return incomingPrincipal;15: }16: }This is pretty much the default ClaimsAuthenticationManager implementation: it passes through all the incoming claims to the next stage undisturbed. Our job will be to fill in the method’s body following the comment placeholders I wrote there. You can make your application pick up and execute your class by adding a reference to the class library project and inseriting the proper config element to the web.config, as shown below (sci-fi formatting, you would not break strings IRL).
 <system.identityModel>
    <identityConfiguration>
      <claimsAuthenticationManager
        type="GraphClaimsAuthenticationManager.GraphClaimsAuthenticationManager,
              GraphClaimsAuthenticationManager" />
I’d suggest hitting F5 and see if everything still works, often something silly like misspelled namespaces in the type attribute will create stumble points and you want to catch that before there will be more moving parts later on.
Enabling An MVC App to Invoke the Graph API
Alrighty, now for the first interesting part.
The next thing we need to do is enabling your MVC application to call back into the Graph and inquiry about the user’s roles. But in order to do that, we first need to understand how our MVC application is represented in Windows Azure AD and what do we need to change.
When you run the MVC tool for enabling Windows Azure authentication you are basically getting lots of the steps I described here done for you. As a quick recap, the tool
- asks you which directory tenant you want to work with
- gathers your admin credentials and uses them to get an access token for the Graph API
- Invokes the Graph to create a new ServicePrincipal representing your MVC app. It does so by generating a new random GUID as identifier, assigning your local IIS express and project address as return URL, and so on
- Reaches out for the WS-Federation metadata document of the tenant you have chosen, and uses it to generate the necessary WIF settings to configure your app for Windows Azure SSO with the tenant of choice
…and that’s what enables you to hit F5 right after the wizard and see the SSO flow unfold in front of your very eyes, without the need of writing any code. Veeery nice.
Now, from the above you might be tempted to think that a ServicePrincipal is the equivalent of a RP role in ACS: an entry which represents an entity meant to be a token recipient. In fact, a ServicePrincipal can represent more roles than a simple RP: for example, an ServicePrincipal can also represent an applicative identity, with its own associated credential, whihc can be used for obtaining a token to be used somewhere else. Remember ACS’ service identities? That’s kind of the same thing.I guess you are starting to figure out what’s the plan here. We want to use the app’s ServicePrincipal credentials (in trusted subsystem fashion) to obtain a token for calling the Graph. That’s a fine plan, but it cannot be implemented without a bit more work. Namely:
- The MVC tool does not do anything the ServicePrincipal’s credentials. We must get to know them, and the only way after creation is to assign new ones. We’ll do that by updating the existing ServicePrincipal via cmdlets
- Calling the Graph is a privilege reserved only to entities belonging to well known roles: Company Administrators for read/write Directory Readers for read-only access. Needless to say, the ServicePrincipal created by the MVC tool belongs to neither. We’ll use the cmdlets here as well to add the app’s ServicePrincipal to the Directory Readers role.
Luckily it’s all pretty straightforward. The first thing we need to do is to retrieve a valid identifier for the ServicePrincipal, so that we can get a hold on it and modify it. That is pretty easy to do. Go to the app’s web.config, in the <system.identityModel> sections, and you’ll find the AppPrincipalId GUID in multiple places: in the identityConfiguration/audienceUris or in the realm property of the system.identityModel.services/federationConfiguration/wsFederation element. Put it in the clipboard (without the “SPN:”!) and open the O365 PowerShell cmdlets prompt. Then, consider the following script. The formatting is all broken, of course: keep an eye on the line numbers for understanding where the actual line breaks are.
1: Connect-MsolService2: Import-Module msonlineextended -Force3: $AppPrincipalId = '62b4b0eb-ef3e-4c28-7777-2c7777776593'4: $servicePrincipal =(Get-MsolServicePrincipal -AppPrincipalId $AppPrincipalId)5: Add-MsolRoleMember -RoleMemberType "ServicePrincipal"-RoleName "Directory Readers"-RoleMemberObjectId $servicePrincipal.ObjectId6:7: $timeNow = Get-Date8: $expiryTime = $timeNow.AddYears(1)9: New-MsolServicePrincipalCredential-AppPrincipalId $AppPrincipalId-Type symmetric-StartDate $timeNow-EndDate $expiryTime-Usage Verify-Value AAAAAAAAAAAAAAAAAAAAAAAAAAAAAAAAAAAAAAA/Q8=Line by line:
Line 1: connect to the tenant. You’ll be prompted for your admin user, make sure you choose the same tenant you have used to configure the MVC app :-)
Line 2: it imports the O365 cmdlets, and specifically the ones about ServicePrincipals. The “force” flag is mandatory on Win8 boxes.
Line 3: I assign the AppPrincipalId from the web.config so I don’t have to paste it every time.
Line 4: retrieve the ServicePrincipal
Line 5: add it to the “Directory Readers” role
Lines 7 and 8: get the current date and the date one year from now, to establish the valitity bopundaries of the credentials we are going to assign to the ServicePrincipal
Line 9: create a new ServicePrincipalCredential of type symmetric key (there are other flavors, like certificate based creds) and assign it to the app’s ServicePrincipal
Simple, right? Well, I have to thank Mugdha Kulkarni from the Graph team for this script. She wrote it for me while I was prepping for the BUILD talk, though in the end I decided I didn’t have enough time to show it on stage. Thank you Mugdha, told you this was going to come in handy! ;-)
Anyway, we’ve done our first task: our app has now the right to invoke the Graph. Let’s get back to the GraphClaimsAuthenticationManager and write some code to exercise that right.
Using AAL to Obtain an Access Token for the Graph API
Get back to VS and paste the following at the beginning of the if block in the Authenticate method:
1: string appPrincipalID = "62b4b0eb-ef3e-4c28-7777-2c7777776593";2: string appKey = "AAAAAAAAAAAAAAAAAAAAAAAAAAAA/Q8=";3:4: string upn = incomingPrincipal.FindFirst("http://schemas.xmlsoap.org/ws/2005/05/identity/claims/upn").Value;5: string tenantID = incomingPrincipal.FindFirst("http://schemas.microsoft.com/ws/2012/10/identity/claims/tenantid").Value;That is pretty scrappy code, I’ll readily admit. The first 2 lines hold the app’s ServicePrincipal id and key, respectively. I could have retrieved it from the config, but if I do everything how are you going to have fun? ;-)
The next 2 lines retrieve the UPN of the incoming user (“username@domain”) and the ID of the directory tenant from where he/she is coming from, both very important values for crafting our query.VERY IMPORTANT especially for you Observers landing on this post from the future (aren’t you sad that Fringe ended? Luckily the finale wasn’t terrible).
The claims used above are the claims from Windows Azure AD available TODAY. Those claims are very likely to change, hence the above will no longer be valid either because the claim types will no longer be there or more appropriate alternatives will emerge.Next, we are going to inject the ServicePrincipal credentials in AAL and obtain a token for calling the Graph. As mentioned, this requires just few lines but the parameters are a bit arcane. Bear with me as I walk you though their function and meaning. Also, don’t forget to add a reference to the AAL NuGet and associated using! You can do that by right-clicking on the GraphClaimsAuthenticaitonManager in solution explorer, choose Manage NuGet Packages, search for AAL and reference the result.
1: // get a token for calling the graph2: AuthenticationContext _authContext =new AuthenticationContext(string.Format(https://accounts.accesscontrol.windows.net/{0},tenantID));3: SymmetricKeyCredential credential =new SymmetricKeyCredential(string.Format("{0}@{1}",appPrincipalID,tenantID),Convert.FromBase64String(appKey));4: AssertionCredential _assertionCredential =_authContext.AcquireToken(string.Format(00000002-0000-0000-c000-000000000000/graph.windows.net@{0},tenantID),credential);5: string authHeader = _assertionCredential.CreateAuthorizationHeader();OK. Ready?
Line 2: we begin by initializing AuthenticationContext to the Windows Azure AD tenant we want to work with. We’ll use the AuthenticationContext for accessing from our code the features that Windows Azure AD offers. In order to do that, we simply pass the path of the Windows Azure AD tenant we want to work with.
Line 3: we create a representation of the app’s ServicePrincipal credentials, as an instance of the class SymmetricCredential. We do that by combining its symmetric key the ServicePrincipal name, obtained by combining the ServicePrincipal GUID (used as ServicePrincipalAppID in the cmdlet earlier) and the ID of the current tenant. The reason for which we need both the AppPrincipalId and the Tenant ID is that we want to make sure we specify we are referring to THIS principal in THIS tenant. If our app would be a multitenant app, designed to work with multiple AAD tenants, the same AppPrinciplaId would be (possibly) used across multiple tenants. we’d need to ensure we are getting a token for the right tenant, hence we qualify the name accordingly: appprincipalid@tenant1, appprincipalid@tenant2 and so on. Here we are working on a single tenant hence there is no ambiguity, but we have to use that format anyway
Line 4: we ask to the AuthenticationContext (hence to the directory tenant) to issue an access token for the Graph.
We need to prove who we are, hence we pass the credentials. Also, we need to specify for which resource we are asking a token for, hence the string.Format clause in the call. You see, the Graph is in itself a resource; and just like your app, it is represented with a ServicePrincipal. The string 00000002-0000-0000-c000-000000000000 happens to be its AppPrincipalId, and graph.windows.net is the hostname; qualify the two with the target tenantID and you' get the Graph ServicePrincipal name.Line 5: with this line we retrieve (from the results of the call to AcquireToken) the string containing the access token we need to call the Graph . The CreateAuthorizationHeader will simply put it in the form “Bearer <token>” for us, less work when we’ll put it in the HTTP header for the call.
Getting the Memberships and Enriching the Claims Collection of the Current Principal
A last effort and we’ll be done with our GraphClaimsAuthenticationManager! I’ll just put all the code there and intertwine the explanation of what’s going on in the description of every line. Paste the code below right after the AAL code just described, still within the if block of the Authenticate method.
1: // query the Graph for the current user's memberships2: string requestUrl =string.Format(https://graph.windows.net/{0}/Users('{1}')/MemberOf,tenantID, upn);3: HttpWebRequest webRequest =WebRequest.Create(requestUrl) as HttpWebRequest;4: webRequest.Method = "GET";5: webRequest.Headers["Authorization"] = authHeader;6: webRequest.Headers["x-ms-dirapi-data-contract-version"] = "0.8";7: string jsonText;8: var httpResponse = (HttpWebResponse)webRequest.GetResponse();9: using (var streamReader =new StreamReader(httpResponse.GetResponseStream()))10: {11: jsonText = streamReader.ReadToEnd();12: }13: JObject jsonResponse = JObject.Parse(jsonText);14: var roles =15: from r in jsonResponse["d"]["results"].Children()16: select (string)r["DisplayName"];17:18: // add a role claim for every membership found19: foreach(string s in roles)20: ((ClaimsIdentity)incomingPrincipal.Identity).AddClaim(new Claim(ClaimTypes.Role, s, ClaimValueTypes.String, "GRAPH"));Line 1: we craft the URL representing the resource we want to obtain. We are using the OData query syntax, which happens to be very intuitive. I’ll break this query down for you. Note that every element builds on its predecessors,
https://graph.windows.net/
This indicates the Windows Azure feature we want to access. In this case, it is the Graph API: if we would have wanted to access a token issuing endpoint, or a metadata document, we would have used a different URL accordingly{tenantID}
This indicates which AAD tenant we want to query. Here I am using tenantID (a GUID) because it is pretty handy, i received it with the incoming claims; howeve I could have used the tenant domain (the cloud-managed ones are of the form ‘tenantname.onmicrosoft.com’) just as well/Users
/Users indicate the entity I want to GET. If I’d stop the query here, I’d get a collection of all the users in the tenant(‘{upn}’)
adding this element filters the users’ list to select a specific entry, the one of the user that matches the corresponding UPN. Once again, the UPN is not the only way of identifying a user. Every entity in the directory has its (GUID) identifier, and if I would have access to it (the web sign on token did not carry it, but I could have gotten it as the result of a former query) I could use it as search key. In fact, that would even be more robust given that the UPN is non-immutable… though it is quite unlikely that a UPN would get reassigned during your session :-).
If we’d stop the query here, we’d get back a representation of the user matching our search key/MemberOf
assuming that the query so far produced a user: /MemberOf returns all the roles and security groups the user belongs to.Lines 3 and 4: standard HttpWebRequest initialization code. I guess I’ll have to start using HttpClient soon, or Daniel will stop greeting me in the hallways ;-)
Line 5: we add the header with the access token we obtained earlier.
Line 6: we add a well-known header, which specifies the version of the API we want to work with. This header is MANDATORY, no version no party.
Line 7 to 12: standard request execution and deserialization of the response stream into a string. We expect this string to be filled with JSON containing the answer to our query.
We didn’t finish the tutorial yet, hence at this point we should not be able to see what we are going to get a s a result, but I am going to cheat a little and give you a peek of a typical result of that query:1: {2: "d": {3: "results": [4: {5: "__metadata": {6: "id": "https://graph.windows.net/929bfe53-8d2d-4d9e-a94d-dd3c121183b4/DirectoryObjects('Group_ce134d80-fa89-425a-8eb6-d64429b0ba58')",7: "uri": "https://graph.windows.net/929bfe53-8d2d-4d9e-a94d-dd3c121183b4/DirectoryObjects('Group_ce134d80-fa89-425a-8eb6-d64429b0ba58')/Microsoft.WindowsAzure.ActiveDirectory.ReferencedObject",8: "type": "Microsoft.WindowsAzure.ActiveDirectory.ReferencedObject"9: },10: "ObjectId": "ce134d80-fa89-425a-8eb6-d64429b0ba58",11: "ObjectReference": "Group_ce134d80-fa89-425a-8eb6-d64429b0ba58",12: "ObjectType": "Group",13: "DisplayName": "Sales",14: "Mail": null15: },16: {17: "__metadata": {18: "id": "https://graph.windows.net/929bfe53-8d2d-4d9e-a94d-dd3c121183b4/DirectoryObjects('Role_fe930be7-5e62-47db-91af-98c3a49a38b1')",19: "uri": "https://graph.windows.net/929bfe53-8d2d-4d9e-a94d-dd3c121183b4/DirectoryObjects('Role_fe930be7-5e62-47db-91af-98c3a49a38b1')/Microsoft.WindowsAzure.ActiveDirectory.ReferencedObject",20: "type": "Microsoft.WindowsAzure.ActiveDirectory.ReferencedObject"21: },22: "ObjectId": "fe930be7-5e62-47db-91af-98c3a49a38b1",23: "ObjectReference": "Role_fe930be7-5e62-47db-91af-98c3a49a38b1",24: "ObjectType": "Role",25: "DisplayName": "User Account Administrator",26: "Mail": null27: }28: ]29: }30: }I didn’t adjust the formatting this time to account for the msdn blog layout clipping: if you are curious to see it in its entirety feel free to select the text, copy it and paste it in notepad, but that’s not required for understanding what I want to point out.
As you can see we are getting a couple of objects in our result set. One is the group “Sales”, the other is the role “User Account Administrator”: our user evidently belongs to both. The latter is one of the built-in roles, which define what the user can do in the context of AAD itself; the former is a custom security group, created by the AAD administrator. Both objects have their own IDs, which identify them unambiguously,Line 13 to 16: this is one of my favorite things as of late. ASP.NET includes a reference to JSON.NET, a great library from Newtonsoft which truly eats JSON for breakfast. Let’s just say that, instead of going crazy to parse from C# the result string, I can just create a JObject and use LINQ to extract the values I need; namely, the DIsplayName for every security group and built-in role in the results. I am using the names (and picking both roles and groups) because that’s what you’d get with the classic isinrole: of course you can decide to restrict to specific types or refer to less ambiguous ObjectIds, provided that they mean something for your application.
Lines 19 and 20: finally, for each entry in the result set we create a corresponding claim of type role and we add it to the incomingPrincipal, which we will eventually return as the principal to be assigned to the current thread and passed to the application. Did you notice that string “GRAPH”? That is going to appear as the issuer of those new claims, to make it clear to the application that they were added a posteriori as opposed to being already present directly in the incoming token. Just using that string is pretty clumsy, using something a bit more informative (the query itself? The graph URL+tenantID URL?) might be more appropriate but for this tutorial I’ll go for conciseness.
Ottimo direi! This is all the code we need to write. Give it a Shift+Ctrl+B just to be sure; if everything builds nicely, we are ready to create a user for our test.
Provisioning Test Users with the Windows Azure AD Management UX
Given that you have an AAD tenant, you already have at least one user: the administrator. But why not taking this opportunity to play with the nice AAD management UX? Head to https://activedirectory.windowsazure.com, sign in as the administrator and prepare for some user & group galore.
The first screen shows you a summary of your services and proposes entry points for the most common tasks. Pick Add new user.
The first screen is pretty straightforward. I am going to fill in the data for a random user ;-) once you have done it, click next:
In this screen you are given the chance to assing to the new user one of the built-in administrative roles. I added User Management administrator, just to see how that will look like. Also, I picked Antarctica: not very useful for the tutorial, but pretty cool :-) hit next again. You’ll be offered to assign O365 licenses, that is also inconsequential for the tutorial. Hit next again.
You’ll be offered to receive the results of the wizard in a mail. Do whatever you want here as well :-) then click Create.
As a result, you are given the temporary password. Put it in a Notepad instance, you’ll need it momentarily; then click Finish.
You’ll end up in the user management section of the portal. Let’s go to the security groups section and see if we can make our new user more interesting.
We already have a security group, Sales. Booring! Let’s create a new group, just to see how it’s done. Hit New.
Add a name, a description, then hit save.
You’ll be transported to the group membership management page. Select the user you want to work with by checking the associated box, then hit add: you will see that the user gets added on the right hand side of the screen. Hit close.
Your group is now listed along all others. We have one last task before we can give our app a spin: you have to change the temporary password of the newly created user. SIgn out of the portal by clicking on your administrator’s user name on the top right corner of the page and choosing Sign Out.
Sign back in right away, but this time using the new user name and temporary password.
Do what you have to do, then hit submit. You’ll be asked to sing in with your new password, and once you do so you’ll be back in the portal. We are done here, close everything and head back to Visual Studio.
Testing the Solution
Excellent! Almost there. Now that we prepared the stage to get roles information, it’s time to take advantage of that in our application.
Open HomeController.cs and modify the About action as follows:
1: [Authorize(Roles="Hippies")]2: public ActionResult About()3: {4: ViewBag.Message = "Your app description page.";5: ClaimsPrincipal cp = ClaimsPrincipal.Current;6: return View();7: }Line 1: this attribute will ensure that only users belonging to the “Hippies” group can access this part of the application. This is standard MVC, good ol’ ASP.NET, nothing claims-specific.
Line 5: this line retries the ClaimsPrincipal from the thread, so that we can take a peek with the debugger without going though static properties magic.
Ready? Hit F5!
You’ll be presented with the usual AAD prompt. For now, access as the AAD administrator. You’ll land on the application’s home page (not depicted below, it’s the usual straight form the project template). Let’s see what happens if you hit the About link, though:
Surprise! Sorry, hippies only here – the admin is clearly not in that category :-) the error experience could be better, of course, and that’s easy to fix, but hopefully this barebone page is already enough to show you that our authorization check worked.
Let’s stop the debugger, restart the app and sign in as the new user instead. Once we get to the usual home page, let’s click on About.
This time, as expected, we can access it! Very nice.
Let’s take a peek inside the incoming ClaimsPrincipal to see the results of our claims enrichment logic. Add a breakpoint inside the About() method, then head to the Locals and expand cp:
The claims from 0 to 7 are the ones we got directly in the original token from AAD. I expanded the Givenname claim to show (light blue box) that the issuer is, in fact, your AAD tenant (did I mention that this is a preview and claim types/formats/etc etc can still change?).
The claims at index 7 and 8 are the ones that were added from our GraphClaimsAuthenticationManager: I expanded the first one, to highlight our goofy but expressive Issuer value. Given that both claims are of the http://schemas.microsoft.com/ws/2008/06/identity/claims/role, and given that they are added before the control is handed over to the app, both can count when used in IsInRole, [Authorize], <authorization> and similar. Ta dah!Summary
Yes, this took a couple of extra nights; and yes, this is definitely not production-ready code (for one, the GraphClaimsAuthenticationManager should cache the token instead of getting a new one at every sign in). However I hope this was useful for getting a more in-depth look to some interesting features such as the Graph API, the management UX, WIF extensibility and the structure of Windows Azure Active Directory itself. Remember, we are still in developer preview: if you have feedback do not hesitate to drop us a line!


Scott Guthrie (@scottgu) explained how to Broadcast push notifications to millions of mobile devices using Windows Azure [Service Bus] Notification Hubs in a 1/23/2013 post:
Today we released a number of great enhancements to Windows Azure.
I blogged earlier today about the general availability (GA) release of Windows Azure Media Services. Windows Azure Media Services provides everything you need to quickly build great, extremely scalable, end-to-end media solutions for streaming on-demand video to consumers on any device.
We also today released a preview of a really cool new Windows Azure capability – Notification Hubs. Notification Hubs provide an extremely scalable, cross-platform, push notification infrastructure that enables you to efficiently route push notification messages to millions of mobile users and devices.
Broadcast Push Notifications with Notification Hubs
Push notifications are a vital component of mobile applications. They are critical not only in consumer apps, where they are used to increase app engagement and usage, but also in enterprise apps where up to date information increases employee responsiveness to business events.
Sending a single push notification message to one mobile user is relatively straight forward (and is already incredibly easy to-do with Windows Azure Mobile Services). Efficiently routing push notification messages to thousands or millions of mobile users simultaneously is much harder – and the amount of code and maintenance necessary to build a highly scalable, multi-platform push infrastructure capable of doing this in a low-latency way can be considerable.
Notification Hubs are a new capability we are adding today to Windows Azure that provides you with an extremely scalable push notification infrastructure that helps you efficiently route push notification messages to users. It can scale automatically to target millions of mobile devices without you needing to re-architect your app or implement your own sharding scheme, and will support a pay-only-for-what-you-use billing model.
Today we are delivering a preview of the Notification Hubs service with the following capabilities:
- Cross-platform Push Notification Support. Notification Hubs provide a common API to send push notifications to multiple device platforms. Your app can send notifications in platform specific formats or in a platform-independent way. As of January 2013, Notification Hubs are able to push notifications to Windows 8 apps and iOS apps. Support for Android and Windows Phone will be added soon.
Efficient Pub/Sub Routing and Tag-based Multicast. Notification Hubs are optimized to enable push notification broadcast to thousands or millions of devices with low latency. Your server back-end can fire one message into a Notification Hub, and thousands/millions of push notifications can automatically be delivered to your users. Devices and apps can specify a number of per-user tags when registering with a Notification Hub. These tags do not need to be pre-provisioned or disposed, and provide a very easy way to send filtered notifications to an infinite number of users/devices with a single API call. Since tags can contain any app-specific string (e.g. user ids, favorite sports teams, stock symbols to track, location details, etc), their use effectively frees the app back-end from the burden of having to store and manage device handles or implement their own per-user notification routing information.
Extreme Scale. Notification Hubs enable you to reach millions of devices without you having to re-architect or shard your application. The pub/sub routing mechanism allows you to broadcast notifications in a super efficient way. This makes it incredibly easy to route and deliver notification messages to millions of users without having to build your own routing infrastructure.
- Usable from any Backend App. Notification Hubs can be easily integrated into any back-end server app. It will work seamlessly with apps built with Windows Azure Mobile Services. It can also be used by server apps hosted within IaaS Virtual Machines (either Windows or Linux), Cloud Services or Web-Sites. This makes it easy for you to take advantage of it immediately without having to change the rest of your backend app architecture.
Try Notification Hubs Today
You can try the new Notification Hub support in Windows Azure by creating a new Notification Hub within the Windows Azure Management Portal – you can create one by selecting the Service Bus Notification Hub item under the “App Services” category in the New dialog:
Creating a new Notification Hub takes less than a minute, and once created you can drill into it to see a dashboard view of activity with it. Among other things it allows you to see how many devices have been registered with it, how many messages have been pushed to it, how many messages have been successfully delivered via it, and how many have failed:
You can then click the “Configure” tab to register your Notification Hub with Microsoft’s Windows Notification System and Apple’s APNS service (we’ll add Android support in a future update):
Once this is setup, its simple to register any client app/device with a Notification Hub (optionally associating “tags” with them so that you can have the Notification Hub automatically filter for you who gets which messages). You can then broadcast messages to your users/mobile apps with only a few lines of code.
For example, below is some code that you could implement within your server back-end app to broadcast a message to all Windows 8 users registered with your Notification Hub:
var hubClient = NotificationHubClient.CreateClientFromConnectionString(connectionString, "scottguhub");
var notificationBody = WindowsNotificationXmlBuilder.CreateToastImageAndText04Xml("myImage.jpg", "text1", "text2", "text3");
hubClient.SendWindowsNativeNotification(notificationBody.InnerXml);
The single Send API call above could be used to send the message to a single user – or broadcast it to millions of them. The Notification Hub will automatically handle the pub/sub scale-out infrastructure necessary to scale your message to any number of registered device listeners in a low-latency way without you having to worry about implementing any of that scale-out logic yourself (nor block on this happening within your own code). This makes it incredibly easy to build even more engaging, real-time mobile applications.
Learn More
Below are some guides and tutorials that will help you quickly get started and try out the new Notification Hubs support:
- Fundamentals: Service Bus Notification Hubs
- Tutorial: Targeting Windows 8 Apps using Service Bus Notification Hubs
- Tutorial: Targeting iOS Apps using Service Bus Notification Hubs
I also highly recommend watching these two videos by Clemens Vasters:
Summary
Notification Hubs provide an extremely scalable, cross-platform, push notification infrastructure that enables you to efficiently route push notification messages to millions of mobile users and devices. It will make enabling your push notification logic significantly simpler and more scalable – and enable you to build even better apps with it.
You can try out the preview of the new Notification Hub support immediately. If you don’t already have a Windows Azure account, you can sign-up for a free trial and start using it today. We are looking forward to seeing what you build with it!


Keith Mayer (@keithmayer) described Step-by-Step: Extending On-Premise Active Directory to the Cloud with Windows Azure - 31 Days of Servers in the Cloud - Part 20 of 31 on 1/20/2013:
Big data is everywhere, and the cloud is no different! Windows Server 2012 can leverage the new Storage Spaces feature and integrated iSCSI Target Server role to provide SAN-like storage capabilities when presenting storage to other servers. When studying these features in Windows Server 2012, we can provide a functional shared storage lab environment using virtual machines in the cloud. This article includes the detailed instructions for configuring this scenario on the Windows Azure cloud platform.
Lab Scenario: Windows Server 2012 Storage Server in the Cloud
In this Step-by-Step guide, you will work through the process of building a Windows Server 2012 virtual machine on the Windows Azure cloud platform that leverages Storage Spaces and the iSCSI Target Server role to present a simple shared storage solution to other virtual machines in a thin-provisioned and disk fault tolerant manner.

Lab Scenario: Adding Windows Server 2012 Storage ServerThis lab scenario will serve also serve as the basis for future Step-by-Step guides, where we will be adding Member Servers to this same Virtual Network in the Windows Azure cloud.
Prerequisites
The following is required to complete this step-by-step guide:
- A Windows Azure subscription with the Virtual Machines Preview enabled.
DO IT: Sign up for a FREE Trial of Windows Azure
NOTE: When activating your FREE Trial for Windows Azure, you will be prompted for credit card information. This information is used only to validate your identity and your credit card will not be charged, unless you explicitly convert your FREE Trial account to a paid subscription at a later point in time.- Completion of the following prior Step-by-Step guides to prepare your cloud-based lab environment:
DO IT: Getting Started with Servers in the Cloud
DO IT: Step-by-Step: Building a Windows Server 2012 Active Directory Forest in the Cloud
DO IT: Step-by-Step: Adding a Windows Server 2012 Replica Domain Controller in the Cloud- This step-by-step guide also assumes that the reader is already somewhat familiar with configuring Windows Server 2012 storage in an on-premise deployment. For a primer on What’s New in Windows Server 2012 Storage, join our Windows Server 2012 “Early Experts” study group and review the following study guide:
DO IT: Complete the “Early Experts” Installer Quest – Configuring Local Storage
Join Us! We already have thousands of IT Pros working together to study the new Cloud OS capabilities of Windows Server 2012. Along the way, you may want to check out the other “Early Experts” Knowledge Quests, too.
- Apprentice Quest – Technical Overview of Windows Server 2012
- Installer Quest – Install, Configure and Manage Active Directory
- Explorer Quest – Group Policy and Server Management
- Networker Quest – IPv4 and IPv6 Core Network Services
- Virtualizer Quest – Install, Configure and Manage Hyper-V Server Virtualization
- Cloud Quest - Build a lab network in the Cloud with Windows Server 2012
Complete each Knowledge Quest at your own pace based on your schedule. You’ll receive your very own “Early Experts” Certificate of Completion, suitable for printing, framing or sharing online with your social network!

Windows Server 2012 “Early Experts” Certificate of CompletionLet’s Get Started
In this Step-by-Step guide, you will complete the following exercises to configure a Windows Server 2012 virtual machine as a shared storage server in the cloud:
- Deploy a New Windows Server 2012 VM in Windows Azure
- Configure Storage Spaces on Windows Server 2012
- Configure iSCSI Target Server Role on Windows Server 2012
- Export / Import Lab Virtual Machines
Estimated Time to Complete: 60 minutes
Exercise 1: Deploy a New Windows Server 2012 VM in Windows Azure
In this exercise, you will provision a new Windows Azure VM to run a Windows Server 2012 on the Windows Azure Virtual Network provisioned in the prior Step-by-Step guides in the “Early Experts” Cloud Quest.
- Sign in at the Windows Azure Management Portal with the logon credentials used when you signed up for your Free 90-Day Windows Azure Trial.
- Select Virtual Machines located on the side navigation panel on the Windows Azure Management Portal page.
- Click the +NEW button located on the bottom navigation bar and select Compute | Virtual Machines | From Gallery.
- In the Virtual Machine Operating System Selection list, select Windows Server 2012, December 2012 and click the
button.
- On the Virtual Machine Configuration page, complete the fields as follows:
- Virtual Machine Name: XXXlabsan01
- New Password and Confirm Password fields: Choose and confirm a new local Administrator password.
- Size: Small (1 core, 1.75GB Memory)
Click thebutton to continue.
Note: It is suggested to use secure passwords for Administrator users and service accounts, as Windows Azure virtual machines could be accessible from the Internet knowing just their DNS. You can also read this document on the Microsoft Security website that will help you select a secure password: http://www.microsoft.com/security/online-privacy/passwords-create.aspx.- On the Virtual Machine Mode page, complete the fields as follows:
- Standalone Virtual Machine: Selected
- DNS Name: XXXlabsan01.cloudapp.net
- Storage Account: Select the Storage Account defined in the Getting Started steps from the Prerequisites section above.
- Region/Affinity Group/Virtual Network: Select XXXlabnet01 – the Virtual Network defined in prior Step-by-Step Guides in the “Early Experts” Cloud Quest.
- Virtual Network Subnets: Select Subnet-1 (10.0.0.0/23)
Click thebutton to continue.
- On the Virtual Machine Options page, click the
button to begin provisioning the new virtual machine.
As the new virtual machine is being provisioned, you will see the Status column on the Virtual Machines page of the Windows Azure Management Portal cycle through several values including Stopped, Stopped (Provisioning), and Running (Provisioning). When provisioning for this new Virtual Machine is completed, the Status column will display a value of Running and you may continue with the next exercise in this guide.- After the new virtual machine has finished provisioning, click on the name ( XXXlabsan01 ) of the new Virtual Machine displayed on the Virtual Machines page of the Windows Azure Management Portal to open the Virtual Machine Details Page for XXXlabsan01.
Exercise 2: Configure Storage Spaces on Windows Server 2012
In this exercise, you will add virtual storage to a Windows Server 2012 virtual machine on the Windows Azure cloud platform and configure this storage as a thin-provisioned mirrored volume using Windows Server 2012 Storage Spaces.
- On the Virtual Machine Details Page for XXXlabsan01, make note of the Internal IP Address displayed on this page. This IP address should be listed as 10.0.0.6.
If a different internal IP address is displayed, the virtual network and/or virtual machine configuration was not completed correctly. In this case, click the DELETE button located on the bottom toolbar of the virtual machine details page for XXXlabsan01, and go back to Exercise 1 to confirm that all steps were completed correctly.- On the virtual machine details page for XXXlabsan01, click the Attach button located on the bottom navigation toolbar and select Attach Empty Disk. Complete the following fields on the Attach an empty disk to the virtual machine form:
- Name: XXXlabsan01-data01
- Size: 50 GB
- Host Cache Preference: None
Click thebutton to create and attach a new virtual hard disk to virtual machine XXXlabsan01.
- Complete the task in listed above in Step 2 a second time to attach a second empty disk named XXXlabsan01-data02 to virtual machine XXXlabsan01. With the exception of a different name for this second disk, use the same values for all other fields.
After completing Steps 2 & 3, your virtual machine should now be attached to two empty data disks, each of which are 50GB in size.- On the virtual machine details page for XXXlabsan01, click the Connect button located on the bottom navigation toolbar and click the Open button to launch a Remote Desktop Connection to the console of this virtual machine.
Logon at the console of your virtual machine with the local Administrator credentials defined in Exercise 1 above.
Wait for the Server Manager tool to launch before continuing with the next step.- Using the Server Manager tool, create a new Storage Pool using the empty disks attached in Steps 2 & 3 above.
- Select File and Storage Services | Storage Pools from the left navigation panes.
- On the Storage Pools page, click on the Tasks drop-down menu and select New Storage Pool… to launch the New Storage Pool wizard.
- In the New Storage Pool Wizard dialog box, click the Next button to continue.
- On the Specify a storage pool name and subsystem wizard page, enter DataPool01 in the Name: field and click the Next button.
- On the Select physical disks for the storage pool wizard page, select all physical disks and click the Next button.
- On the Confirm selections wizard page, click the Create button.
- On the View Results wizard page, click the Close button.
- Using the Server Manager tool, create a new thin-provisioned mirrored Virtual Disk from the Storage Pool created in Step 5.
- On the Storage Pools page, right-click on DataPool01 and select New Virtual Disk… to launch the New Virtual Disk wizard.
- In the New Virtual Disk Wizard dialog box, click the Next button to continue.
- On the Select the storage pool wizard page, select DataPool01 and click the Next button.
- On the Specify the virtual disk name wizard page, enter DataVDisk01 in the Name: field and click the Next button.
- On the Select the storage layout wizard page, select Mirror in the Layout: list field and click the Next button.
- On the Specify the provisioning type wizard page, select the Thin radio button option to select Thin Provisioning as the provisioning type. Click the Next button to continue.
- On the Specify the size of the virtual disk wizard page, enter 500 GB in the Virtual Disk Size: field and click the Next button.
Note that because we are using Thin Provisioning in this exercise, we can specify a larger Virtual Disk Size than we have physical disk space available in the Storage Pool.- On the Confirm selections wizard page, click the Create button.
- On the View results wizard page, uncheck the option to Create a volume when this wizard closes and click the Close button.
- Using the Server Manager tool, create and format a new Volume from the Virtual Disk created in Step 6.
- On the Storage Pools page, right-click on DataVDisk01 and select New Volume… to launch the New Volume wizard.
- In the New Volume Wizard dialog box, click the Next button to continue.
- On the Select the server and disk wizard page, select server XXXlabsan01 and virtual disk DataVDisk01. Click the Next button to continue.
- On the Specify the size of the volume wizard page, accept the default value for Volume size ( 500 GB ) and click the Next button.
- On the Assign a drive letter or folder wizard page, accept the default value for Drive letter ( F: ) and click the Next button.
- On the Select file system settings wizard page, enter DataVol01 in the Volume label: field and click the Next button.
- On the Confirm selections wizard page, click the Create button.
In this exercise, you completed the tasks involved in creating a new Storage Pool, thin-provisioned mirrored Virtual Disk, and Volume using the Server Manager tool.
If you’d like to see how these same tasks can be accomplished in just a single line of PowerShell script code, be sure to check out the following article:Exercise 3: Configure iSCSI Target Server Role on Windows Server 2012
In this exercise, you will configure the iSCSI Target Server Role on Windows Server 2012 to be able to share block-level storage with other virtual machines in your cloud-based lab.
Begin this exercise after establishing a Remote Desktop Connection to virtual machine XXXlabsan01 and logging in as the local Administrator user account.
- Using the Server Manager tool, install the iSCSI Target Server Role.
- In the Server Manager window, click the Manage drop-down menu in the top navigation bar and select Add Roles and Features.
- In the Add Roles and Features Wizard dialog box, click the Next button three times to advance to the Select server roles page.
- On the Select server roles wizard page, scroll-down the Roles list and expand the File and Storage Services role category by clicking the triangle to the left. Then, expand the File and iSCSI Services role category.
- Scroll-down the Roles list and select the checkbox for the iSCSI Target Server role. Click the Next button to continue. When prompted, click the Add Features button.
- Click the Next button two times to advance to the Confirm installation selections wizard page. Click the Install button to install the iSCSI Target Server role.
- When the role installation has completed, click the Close button.
- Using the Server Manager tool, create a new iSCSI Virtual Disk and iSCSI Target that can be assigned as shared storage to other virtual machines.
- In the Server Manager window, select File and Storage Services | iSCSI from the left navigation panes.
- Click on the Tasks drop-down menu and select New iSCSI Virtual Disk… to launch the New iSCSI Virtual Disk Wizard.
- On the Select iSCSI virtual disk location wizard page, select XXXlabsan01 as the server and F: as the volume on which to create a new iSCSI virtual disk. Click the Next button to continue.
- On the Specify iSCSI virtual disk name wizard page, enter iSCSIVdisk01 in the Name: field and click the Next button to continue.
- On the Specify iSCSI virtual disk size wizard page, enter 50 GB in the Size: field and click the Next button to continue.
- On the Assign iSCSI target wizard page, select New iSCSI Target and click the Next button to continue.
- On the Specify target name wizard page, enter iSCSITarget01 in the Name: field and click the Next button to continue.
- On the Specify access servers wizard page, click the Add button and add the following two servers to the Initiators list:
- IP Address: 10.0.0.7
- IP Address: 10.0.0.8
When finished adding both servers to the Initiators list, click the Next button to continue.
NOTE: In a real-world production environment, it is recommended to add iSCSI initiators to this list via DNS name or IQN. In this Step-by-Step guide, we are entering IP Address values for each iSCSI initiator because the virtual machines for 10.0.0.7 and 10.0.0.8 have not yet been provisioned in the lab environment.- On the Enable authentication wizard page, accept the default values and click the Next button.
- On the Confirm selections wizard page, click the Create button.
- Using the Server Manager tool, create a second new iSCSI Virtual Disk that will be assigned to the same iSCSI Target as defined above in Step 2.
- In the Server Manager window, select File and Storage Services | iSCSI from the left navigation panes.
- Click on the Tasks drop-down menu and select New iSCSI Virtual Disk… to launch the New iSCSI Virtual Disk Wizard.
- On the Select iSCSI virtual disk location wizard page, select XXXlabsan01 as the server and F: as the volume on which to create a new iSCSI virtual disk. Click the Next button to continue.
- On the Specify iSCSI virtual disk name wizard page, enter iSCSIVdisk02 in the Name: field and click the Next button to continue.
- On the Specify iSCSI virtual disk size wizard page, enter 50 GB in the Size: field and click the Next button to continue.
- On the Assign iSCSI target wizard page, select XXXiSCSITarget01 as an Existing iSCSI Target and click the Next button to continue.
- On the Confirm selections wizard page, click the Create button.
In this exercise, you have installed the iSCSI Target Server role on Windows Server 2012 and configured two iSCSI virtual disks that can presented as shared storage to other virtual machines via a common iSCSI Target definition.
The above tasks can also be performed via PowerShell by leveraging the iSCSI PowerShell module cmdlets as follows:
# Define New iSCSI Target and assign it to two iSCSI initiators
New-IscsiServerTarget –TargetName “iSCSITarget01” –InitiatorID “IPAddress:10.0.0.7,IPAddress:10.0.0.8”
# Create Two New iSCSI Virtual Disks
New-IscsiVirtualDisk –Path “F:\iSCSIVirtualDisks\iSCSIVdisk01.vhd” –Size 50GB
New-IscsiVirtualDisk –Path “F:\iSCSIVirtualDisks\iSCSIVdisk02.vhd” –Size 50GB
# Associate the iSCSI Virtual Disks with the iSCSI Target
Add-IscsiVirtualDiskTargetMapping –TargetName “iSCSITarget01” –DevicePath “F:\iSCSIVirtualDisks\iSCSIVdisk01.vhd” –Size 50GB
Add-IscsiVirtualDiskTargetMapping –TargetName “iSCSITarget01” –DevicePath “F:\iSCSIVirtualDisks\iSCSIVdisk02.vhd” –Size 50GB
Exercise 4: Export / Import Lab Virtual Machines
Our Windows Server 2012 cloud-based lab is now functional, but if you’re like me, you may not be using this lab VM 24x7 around-the-clock. As long as a virtual machine is provisioned, it will continue to accumulate compute hours against your Free 90-Day Windows Azure Trial account regardless of virtual machine state – even in a shutdown state!
To save our compute hours for productive study time, we can leverage the Windows Azure PowerShell module to automate export and import tasks to de-provision our virtual machines when not in use and re-provision our virtual machines when needed again.
In this exercise, we’ll step through using Windows PowerShell to automate:
- De-provisioning lab virtual machines when not in use
- Re-provisioning lab virtual machines when needed again.
Once you’ve configured the PowerShell snippets below, you’ll be able to spin up your cloud-based lab environment when needed in just a few minutes!
Note: Prior to beginning this exercise, please ensure that you’ve downloaded, installed and configured the Windows Azure PowerShell module as outlined in the Getting Started article listed in the Prerequisite section of this step-by-step guide. For a step-by-step walkthrough of configuring PowerShell support for Azure, see Setting Up Management by Brian Lewis, one of my peer IT Pro Technical Evangelists.
- De-provision the lab. Use the Stop-AzureVM and Export-AzureVM cmdlets in the PowerShell snippet below to shutdown and export lab VMs when they are not being used.
NOTE: Prior to running this snippet, be sure to edit the first line to reflect the name of your VM and confirm that the $ExportPath folder location exists.
$myVM = “XXXlabsan01”
$myCloudSvc = "XXXlabsan01"
Stop-AzureVM -ServiceName $myCloudSvc -Name $myVM
$ExportPath = "C:\ExportVMs\ExportAzureVM-$myVM.xml"
Export-AzureVM -ServiceName $myVM -name $myVM -Path $ExportPath
After you've verified that all Export files were created in the folder location specified by $ExportPath, you can then de-provision your VM with the following PowerShell snippet:
Remove-AzureVM -ServiceName $myCloudSvc -name $myVM- Re-provision the lab. Use the Import-AzureVM and Start-AzureVM cmdlets in the PowerShell snippet below to import and start lab VMs when needed again.
$myVNet = "XXXlabnet01"
$myVM = "XXXlabsan01"
$myCloudSvc = "XXXlabsan01"
$ExportPath = "C:\ExportVMs\ExportAzureVM-$myVM.xml"
Import-AzureVM -Path $ExportPath | New-AzureVM -ServiceName $myCloudSvc -VNetName $myVNet
Start-AzureVM -ServiceName $myCloudSvc -name $myVMCompleted! What’s Next?
The installation and configuration of a new Windows Server 2012 Storage Server running on Windows Azure is now complete. To continue your learning about Windows Server 2012, explore these other great resources:
- Join the Windows Server 2012 “Early Experts” Challenge study group to learn more about Windows Server 2012! and prepare for MCSA Certification!
- Learn more about Windows Azure Virtual Machines and Virtual Networks with this FREE Online Training!
- Complete the other Hands-On Labs in the "Early Experts" Cloud Quest to request your certificate of completion ... Become our next "Early Expert"!


<Return to section navigation list>
Windows Azure Virtual Machines, Virtual Networks, Web Sites, Connect, RDP and CDN
• Panagiotis Kefalidis (@pkefal) reported VMDepot is now integrated into the Windows Azure Portal in a 1/25/2013 post:
A nice change I noticed today is that VMDepot images are now visible in the Windows Azure Portal.
If you [go] to Virtual Machines:
You’ll see an option that says “Browse VMDepot”:
If you click it, you get the list of the image already in the VM Depot:
You can select one and create a virtual machine based on that image, just like that!
The coolest of all is that you can create your own images, publish them to VM Depot and if they get accepted, they get visible in the portal as well.
Small addition but a lot of value comes out of it!


Jim O’Neil (@jimoneil) described a series Practical Azure #9: Windows Azure Web Sites Webcasts in a 1/24/2013 post:
One of the awesome things about Windows Azure is choice. When you deploy an application to the Microsoft cloud you can leverage one of three models, Virtual Machines (Infrastructure-as-a-Service), Cloud Services (Platform-as-a-Service) and Web Sites. For the next several episodes of Practical Azure on MSDN DevRadio, I’ll be looking at these three options in turn.
First up is Windows Azure Web Sites, the fastest way to get your ASP.NET, Node.js, PHP, or even open source CRMs (like WordPress and Drupal) up and running in the Windows Azure cloud. And with a free tier offering it's a no-brainer way to set up a small business site or mobile service back-end, so you can concentrate on the site and let Windows Azure worry about the upkeep, failover, scaling, and other infrastructure management. Check this episode out below!
Download:
MP3
MP4 (iPod, Zune HD)
High Quality MP4 (iPad, PC)
Mid Quality MP4 (WP7, HTML5)
High Quality WMV (PC, Xbox, MCE)And here are the Handy Links for this episode:


<Return to section navigation list>
Live Windows Azure Apps, APIs, Tools and Test Harnesses
• Maarten Balliauw (@maartenballiauw) explained Hosting a YouTrack instance on Windows Azure in a 1/25/2013 post:
Note: this is a cross-post from the JetBrains YouTrack blog. Since it is centered around Windows Azure, I thought it is appropriate to post a copy on my own blog as well.
YouTrack, JetBrains’ agile issue tracker, can be installed on different platforms. There is a stand-alone version which can be downloaded and installed on your own server. If you prefer a cloud-hosted solution there’s YouTrack InCloud available for you. There is always a third way as well: why not host YouTrack stand-alone on a virtual machine hosted in Windows Azure?
In this post we’ll walk you through getting a Windows Azure subscription, creating a virtual machine, installing YouTrack and configuring firewalls so we can use our cloud-hosted YouTrack instance from any browser on any location.
Getting a Windows Azure subscription
In order to be able to work with Windows Azure, we’ll need a subscription. Microsoft has several options there but as a first-time user, there is a 90-day free trial which comes with a limited amount of free resources, enough for hosting YouTrack. If you are an MSDN subscriber or BizSpark member, there are some additional benefits that are worth exploring.
On www.windowsazure.com, click the Try it free button to start the subscription wizard. You will be asked for a Windows Live ID and for credit card details, depending on the country you live in. No worries: you will not be charged in this trial unless you explicitly remove the spending cap.
The 90-day trial comes with 750 small compute hours monthly, which means we can host a single core machine with 1.5 GB of memory without being charged. There is 35 GB of storage included, enough to host the standard virtual machines available in the platform. Inbound traffic is free, 25 GB of outbound traffic is included as well. Seems reasonable to give YouTrack on Windows Azure a spin!
Enabling Windows Azure preview features
Before continuing, it is important to know that some features of the Windows Azure platform are still in preview, such as the “infrastructure-as-a-service” virtual machines (VM) we’re going to use in this blog post. After creating a Windows Azure account, make sure to enable these preview features from the administration page.
Once that’s done, we can direct our browser to http://manage.windowsazure.com and start our YouTrack deployment.
Creating a virtual machine
The Windows Azure Management Portal gives us access to all services activated in our subscription. Under Virtual Machines we can manage existing virtual machines or create our own.
When clicking the + New button, we can create a new virtual machine, either by using the Quick create option or by using the From gallery option. We’ll choose the latter as it provides us with some preinstalled virtual machines running a variety of operating systems, both Windows and Linux.
Depending on your preferences, feel free to go with one of the templates available. YouTrack is supported on both Windows and Linux. Let’s go with the latest version of Windows Server 2012 for this blog post.
Following the wizard, we can name our virtual machine and provide the administrator password. The name we’re giving in this screen is the actual hostname, not the DNS name we will be using to access the machine remotely. Note the machine size can also be selected. If you are using the free trial, make sure to use the Small machine size or charges will incur. There is also an Extra Small instance but this has few resources available.
In the next step of the wizard, we have to provide the DNS name for our machine. Pick anything you would like to use, do note it will always end in .cloudapp.net. No worries if you would like to link a custom domain name later since that is supported as well.
We can also select the region where our virtual machine will be located. Microsoft has 8 Windows Azure datacenters globally: 4 in the US, 2 in Europe and 2 in Asia. Pick one that’s close to you since that will reduce network latency.
The last step of the wizard provides us with the option of creating an availability set. Since we’ll be starting off with just one virtual machine this doesn’t really matter. However when hosting multiple virtual machines make sure to add them to the same availability set. Microsoft uses these to plan maintenance and make sure only part of your virtual machines is subject to maintenance at any given time.
After clicking the Complete button, we can relax a bit. Depending on the virtual machine size selected it may take up to 15 minutes before our machine is started. Status of the machine can be inspected through the management portal, as well as some performance indicators like CPU and memory usage.
Every machine has only one open firewall port by default: remote desktop for Windows VM’s (on TCP port 3389) or SSH for Linux VM’s (on TCP port 22). Which is enough to start our YouTrack installation. Using the Connect button or by opening a remote desktop or SSH session to the URL we created in the VM creation wizard, we can connect to our fresh machine as an administrator.
Installing YouTrack
After logging in to the virtual machine using remote desktop, we have a complete server available. There is a browser available on the Windows Server 2012 start screen which can be accessed by moving our mouse to the lower left-hand corner.
From our browser we can navigate to the JetBrains website and download the YouTrack installer. Note that by default, Internet Explorer on Windows Server is being paranoid about any website and will display a security warning. Use the Add button to allow it to access the JetBrains website. If you want to disable this entirely it’s also possible to disable Internet Explorer Enhanced Security.
We can now download the YouTrack installer directly from the JetBrains website. Internet Explorer will probably give us another security warning but we know the drill.
If you wish to save the installer to disk, you may notice that there is both a C:\ and D:\ drive available in a Windows Azure VM. It’s important to know that only the C:\ drive is persistent. The D:\ drive holds the Windows pagefile and can be used as temporary storage. It may get swiped during automated maintenance in the datacenter.
We can install YouTrack like we would do it on any other server: complete the wizard and make sure YouTrack gets installed to the C:\ drive.
The final step of the YouTrack installation wizard requires us to provide the port number on which YouTrack will be available. This can be any port number you want but since we’re only going to use this server to host YouTrack let’s go with the default HTTP port 80.
Once the wizard completes, a browser Window is opened and the initial YouTrack configuration page is loaded. Note that the first start may take a couple of minutes. An important setting to specify, next to the root password, is the system base URL. By default, this will read http://localhost. Since we want to be able to use this YouTrack instance through any browser and have correctly generated URLs in e-mail being sent out, we have to specify the full DNS name to our Windows Azure VM.
Once saved we can start creating a project, add issues, configure the agile board, do time tracking and so on.
Let’s see if we can make our YouTrack instance accessible from the outside world.
Configuring the firewall
By default, every VM can only be accessed remotely through either remote desktop or SSH. To open up access to HTTP port 80 on which YouTrack is running, we have to explicitly open some firewall ports.
Before diving in, it’s important to know that every virtual machine on Windows Azure is sitting behind a load balancer in the datacenter’s network topology. This means we will have to configure the load balancer to send traffic on HTTP port 80 to our virtual machine. Next to that, our virtual machine may have a firewall enabled as well, depending on the selected operating system. Windows Server 2012 blocks all traffic on HTTP port 80 by default which means we have to configure both our machine and the load balancer.
Allowing HTTP traffic on the VM
If you are a command-line person, open up a command console in the remote desktop session and issue the following command:
netsh advfirewall firewall add rule name="YouTrack" dir=in action=allow protocol=TCP localport=80
If not, here’s a crash-course in configuring Windows Firewall. From the remote desktop session to our machine we can bring up Windows Firewall configuration by using the Server Manager (starts with Windows) and clicking Configure this local server and then Windows Firewall.
Next, open Advanced settings.
Next, add a new inbound rule by right-clicking the Inbound Rules node and using the New Rule… menu item. In the wizard that opens, add a Port rule, specify TCP port 80, allow the connection and apply it to all firewall modes. Finally, we can give the rule a descriptive name like “Allow YouTrack”.
Once that’s done, we can configure the Windows Azure load balancer.
Configuring the Windows Azure load balancer
From the Windows Azure management portal, we can navigate to our newly created VM and open the Endpoints tab. Next, click Add Endpoint and open up public TCP port 80 and forward it to private port 80 (or another one if you’ve configured YouTrack differently).
After clicking Complete, the load balancer rules will be updated. This operation typically takes a couple of seconds. Progress will be reported on the Endpoints tab.
Once completed we can use any browser on any Internet-connected machine to use our YouTrack instance. Using the login created earlier, we can create projects and invite users to register with our cloud-hosted YouTrack instance.
Enjoy!


• Aditi Cloud Services (@smarx, @WadeWegner) described Getting Started with Scheduler in the Windows Azure Store in a 1/24/2013 post:
Today you can purchase Scheduler directly within Windows Azure by following the steps below.
Log into the Windows Azure Management Portal.
- Purchasing: Step 1 of 3
- Click NEW in the lower-left hand corner and click STORE.
- Click APP SERVICES and scroll down until you see Scheduler. Click the Scheduler service.
- Click the right arrow to continue to the next step.
- Purchasing: Step 2 of 3
- Choose the appropriate plan from the list.
- Choose a NAME unique to your subscription. By default the name is Scheduler.
NOTE: currently the Windows Azure portal includes a REGION selection. This selected region has no bearing on the Scheduler as it is a managed service and not bound to any particular Windows Azure data center. In the future the Windows Azure store will remove this selection so as not to cause confusion.- Click the right arrow to continue to the next step.
- Purchasing: Step 3 of 3
- Review the terms of use and privacy statement.
- When you have reviewed your choices and are satisfied, click PURCHASE.
- Getting Your Connection Info
- Upon purchase you will return to the Windows Azure Add-Ons list and you will see the Scheduler with a Creating status.
- In less than a minute the status will switch to Started.
- Select Scheduler by clicking the Scheduler resource you just created.
- From here you can click CONNECTION INFO link to get information you need for interacting with your schedule tasks.
- Grab the SECRETKEY and TENANTID values to use when signing the request header when making calls to the Scheduler API.
And that's it! You have now successfully provision the Scheduler resource. To learn how to interact with the Scheduler API, see the Using the Aditi.Scheduler NuGet for Scheduler tutorial.


• Aditi Cloud Services (@smarx, @WadeWegner) explained Using the Aditi.Scheduler NuGet Package for Scheduler in a 1/24/2013 post:
The Scheduler is available through a fully documented Web API. This allows you to use any programming language or framework of your choice to GET, POST, DELETE, or PUT against the API. That said, if you choose to use .NET, you can use the Aditi.Scheduler NuGet package to get started quickly.
Note: The Aditi.Scheduler is provided for convenience only and doesn't necessarily reflect best practices. To review or modify the implementation please visit the Aditi.Scheduler GitHub repository and fork the respository.
Prior to starting this tutorial, be sure you have your SECRETKEY and TENANTID available. You can review the Getting Started with Scheduler in the Windows Azure Store tutorial to learn where to find this connection info.
- Create a new project in Visual Studio 2012. For this tutorial we will use a Console Application using the .NET Framework 4.5. Choose the name AditiScheduler and click OK.
- Install the Aditi.Scheduler NuGet package. In the NuGet Package Manager Console type: Install-Package Aditi.Scheduler. You should see the Aditi.SignatureAuth and Aditi.Scheduler NuGet packages install successfully.
NOTE: The Aditi.Scheduler NuGet package has a dependency on the package Aditi.SignatureAuth. Aditi.Signature is used for creating the Authorization header that is used when making requests. These package are separate so that we can ship updates or fixes independently.- Now that the NuGet package is installed, you can start developing against the Aditi.Scheduler assemblies. Add the following references to Program.cs:
using Aditi.Scheduler; using Aditi.Scheduler.Models;- Create two class level variables for your SECRETKEY and TENANTID.
private static string tenantId = "YourTenantId"; private static string secretKey = "YourSecretKey";- Create a new scheduled task. Started by creating a new SchedulTasks using the tenantId and secretKey class variables. Next, create a new TaskModel with a Name, JobType, CronExpression, and a Params value set to a url. Finally, call CreateTask and pass in your TaskModel.
NOTE: Cron expressions are typical in the UNIX world but less common elsewhere. If you need assistance creating a CRON expression, take a look at http://cronmaker.com/.var scheduledTasks = new ScheduledTasks(tenantId, secretKey); // create a task var task = new TaskModel { Name = "My first Scheduler job", JobType = JobType.Webhook, CronExpression = "0 0/5 * 1/1 * ? *", Params = new Dictionary<string, object> { {"url", "http://www.microsoft.com"} } }; var newTask = scheduledTasks.CreateTask(task);- Build and run your program. You have now created a schedule task that will run every five minutes and perform a web hook against http://www.microsoft.com.
- Now that you have a scheduled task, you can use the NuGet package to 1) get all tasks, 2) get a single task, 3) update a task, and 4) delete a task. Add the following code after the above CreateTask operation.
    // get all tasks
    var tasks = scheduledTasks.GetTasks();

    // get a single task
    var getTask = scheduledTasks.GetTask(newTask.Id);

    // update a task
    newTask.Name = "new name";

    var updTask = scheduledTasks.UpdateTask(newTask);

    // delete a task
    var delTask = scheduledTasks.DeleteTask(newTask.Id);
And that's it! You now know how to create, get, update, and delete tasks against the Scheduler.


• Craig Kitterman (@craigkitterman) posted a Cross-Post: Building the Bing apps for Windows 8 to the Windows Azure blog on 1/21/2013:
Editor’s Note: This is a cross post from the Windows 8 App Developer Blog.
Approximately one year ago, members of the Bing team began to build applications for News, Weather, Finance, Sports, Travel and Maps for Windows 8. The team uses services in Windows Azure to scale and support rich apps that are powered by lots of data and content with hundreds of millions of users. Several of these, like the Finance app, rely heavily on data and services from Windows Azure. If you want to create apps that take advantage of the Bing web index or industry leading publisher data, check out the Windows Azure Marketplace.
Read more about leveraging Windows Azure to develop apps for Windows 8 here.

Scott Guthrie (@scottgu) described Windows Azure Store: New add-ons and expanded availability in a 1/23/2012 post:
During the BUILD 2012 conference we announced a new capability of Windows Azure: the Windows Azure Store. The Windows Azure Store makes it incredibly easy for you to discover, purchase, and provision premium add-on services, provided by our partners, for your cloud based applications. For example, you can use the Windows Azure Store to easily setup a MongoDB database in seconds, or quickly setup an analytics service like NewRelic that gives you deep insight into your application’s performance.
There is a growing list of app and data services now available through the Windows Azure Store, and the list is constantly expanding. Many services offered through the store include a free tier, which makes it incredibly easy for you to try them out with no obligation required. Services you decide to ultimately buy are automatically added to your standard Windows Azure bill – enabling you to add new capabilities to your applications without having to enter a credit card again nor setup a separate payment mechanism.
The Windows Azure Store is currently available to customers in 11 markets: US, UK, Canada, Denmark, France, Germany, Ireland, Italy, Japan, Spain, and South Korea. Over the next few weeks we’ll be expanding the store to be available in even more countries and territories around the world.
Signing up for an Add-On from the Windows Azure Store
It is incredibly easy to start using a partner add-on from the Windows Azure store:
1) Sign-into the Windows Azure Management Portal
2) Click the New button (in the bottom-left corner) and then select the “Store” item within it:
3) This will bring up UI that allows you to browse all of the partner add-ons available within the Store:
You will see two categories of add-ons available: app services and data. Explore each to get an idea of the types of services available, and don’t forget to check back often, as the list is growing quickly! …


Scott continues with an illustrated tutorial for trying out the free SendGrid service.
Gaurav Mantri (@gmantri) described Building a Simple Task Scheduler in Windows Azure in a 1/23/2013 post:
Often times we need to execute certain tasks repeatedly. In this blog post, we will talk about building a simple task scheduler in Windows Azure. We’ll actually develop a simple task scheduler which will run in a Windows Azure Worker Role. We’ll also discuss some other alternatives available to us within Windows Azure.
The Project
For the purpose of demonstration, we’ll try and build a simple service which pings some public websites (e.g. www.microsoft.com etc.) and stores the result in Windows Azure Table Storage. This is very similar to service offered by Pingdom. For the sake of argument, let’s call this service as “Poor Man’s Pingdom”
.
We’ll store the sites which we need to ping in a table in Windows Azure Table Storage and every minute we’ll fetch this list from there, ping them and then store the result back in Windows Azure Table Storage (in another table of course). We’ll run this service in 2 X-Small instances of worker role just to show how we can handle concurrency issues so that each instance processing unique set of websites. We’ll assume that in all we’re pinging 10 websites and each worker role instance will ping 5 websites every minute so that the load is evenly distributed across multiple instances.
Implementing the Scheduler
At the core of the task scheduler is implementing the scheduling engine. There’re so many options available to you. You could use .Net Framework’s built in Timer objects or you could use 3rd part libraries available. In my opinion, one should not try and build this on their own and use what’s available out there. For the purpose of this project, we’re going to use Quartz Scheduler Engine (http://quartznet.sourceforge.net/). It’s extremely robust, used by very many people and lastly it’s open source. In my experience, I found it extremely flexible and easy to use.
Design Considerations
In a multi-instance environment, there’re a few things we would need to consider:
Only one Instance Fetches Master Data
We want to ensure that only one instance fetches the master data i.e. the data required by scheduler to process. For this we would rely on blob leasing functionality. A lease is an exclusive lock on a blob to prevent that blob from modification. In our application, each instance will try and acquire lease on the blob and only one instance will be successful. The instance which will be able to acquire the lease on the blob (let’s call it “Master Instance”) will fetch the master data. All other instances (let’s call them “Slave Instances”) will just wait till the time master instance is done with that data. Please note that the master instance will not actually execute the task just yet i.e. in our case ping the sites. It will just read the data from the source and push it some place from where both master and slave instances will pick the data and process that data (i.e. in our case ping the sites).
Division of Labor
It’s important that we make full use of all the instances in which our application is running (in our case 2). So what will happen is that the master instance will fetch the data from the source and puts that in a queue which is polled by all instances. For the sake of simplicity, the message will simply the URL that we need to ping. Since we know that that there’re two instances and we need to process ten websites, each instance will “GET” 5 messages. Each instance will then read the message contents (which is a URL) and then ping those URLs and record the result.
Trigger Mechanism
In normal worker role implementations, the worker role is in an endless loop mostly sleeping. It wakes up from the sleep, does some processing and goes back to sleep. Since we’re relying on Quartz for scheduling, we’ll only rely on Quartz for triggering the tasks instead of worker role. That would give us the flexibility of introducing more kinds of scheduled tasks without worrying about implementing them in our worker role. To explain, let’s assume that we’ve to process 2 scheduled tasks – one executed every minute and other executed every hour. If we were to implement it in the worker role sleep logic, it would become somewhat complicated. When you start adding more and more scheduled tasks, the level of complexity increases considerably. With Quartz, it’s really simple.
Keeping Things Simple
For the purpose of this blog post, to keep things simple, we will not worry about handling various error conditions. We’ll just assume that everything’s hunky-dory and we’ll not have to worry about transient errors from storage. In an actual application, one would need to take those things into consideration as well.
High Level Architecture
With these design considerations, this is how the application architecture and flow would look like:
So every minute, Quartz will trigger the task. Once the task is triggered, this is what will happen:
- Each instance will try and acquire the lease on a specific blob.
- As we know, only one instance will succeed. We’ll assume that the master instance would need about 15 seconds to read the data from the source and put that in queue. The slave instances will wait for 15 seconds while master instance does this bit.
- Master instance will fetch the data from master data source (Windows Azure Table Storage in our case). Slave instances are still waiting.
- Master instance will push the data in a queue. Slave instances are still waiting.
- All instances will now “GET” messages from the queue. By implementing “GET” semantics (instead of “PEEK”), we’re making sure that a message is fetched only by a single instance. Once the message is fetched, it will be immediately deleted.
- Each worker role instance will get the URI to be pinged from the message content and launches a process of pinging the data. Pinging will be done by creating a “Get” web request for that URI and reading the response.
- Once the ping result is returned, we’ll store the results in table storage and then wait for the next time Quartz will trigger the task.
The Code
Enough talking! Let’s look at some code
Entities
Since we’re storing the master data as well as results in Windows Azure Table Storage, let’s create two classes which will hold that data. Both of these will be derived from TableEntity class.
PingItem.cs
This entity will represent the items to be pinged. We’ll keep things simple and have only one property which contains the URL to be pinged. This is how the code looks like:
using System;
using System.Collections.Generic;
using System.Linq;
using System.Text;
using System.Threading.Tasks;
using Microsoft.WindowsAzure.Storage;
using Microsoft.WindowsAzure.Storage.Table;

namespace PoorMansPingdomWorkerRole
{
    public class PingItem : TableEntity
    {
        public PingItem()
        {
            PartitionKey = "PingItem";
            RowKey = Guid.NewGuid().ToString();
        }

        /// <summary>
        /// Gets or sets the URL to be pinged.
        /// </summary>
        public string Url
        {
            get;
            set;
        }

        public override string ToString()
        {
            return this.RowKey + "|" + Url;
        }

        public static PingItem ParseFromString(string s)
        {
            string[] splitter = {"|"};
            string[] rowKeyAndUrl = s.Split(splitter, StringSplitOptions.RemoveEmptyEntries);
            return new PingItem()
            {
                PartitionKey = "PingItem",
                RowKey = rowKeyAndUrl[0],
                Url = rowKeyAndUrl[1],
            };
        }
    }
}
PingResult.cs
This entity will store the result of the ping.
using System;
using System.Collections.Generic;
using System.Linq;
using System.Text;
using System.Threading.Tasks;
using Microsoft.WindowsAzure.Storage;
using Microsoft.WindowsAzure.Storage.Table;

namespace PoorMansPingdomWorkerRole
{
    public class PingResult : TableEntity
    {
        /// <summary>
        /// Gets or sets the URL pinged.
        /// </summary>
        public string Url
        {
            get;
            set;
        }

        /// <summary>
        /// Gets or sets the HTTP Status code.
        /// </summary>
        public string StatusCode
        {
            get;
            set;
        }

        /// <summary>
        /// Gets or sets the time taken to process the ping in milliseconds.
        /// </summary>
        public double TimeTaken
        {
            get;
            set;
        }

        public long ContentLength
        {
            get;
            set;
        }
    }
}
Application Code
Worker Role Initialization – Master Settings
Since our implementation depends on certain assumptions, we’ll ensure that those assumptions are in place by implementing them in the worker role’s initialization phase. The things we would do are:
- Ensuring that the table in which will store the results is already present.
- Ensuring that the blob on which we’ll acquire the lease is already present.
To keep things flexible, we’ll define a number of settings in the configuration file. This is how our configuration file would look like for these things:
<?xml version="1.0" encoding="utf-8"?>
<ServiceConfiguration serviceName="PoorMansPingdom" xmlns="http://schemas.microsoft.com/ServiceHosting/2008/10/ServiceConfiguration" osFamily="3" osVersion="*" schemaVersion="2012-10.1.8">
  <Role name="PoorMansPingdomWorkerRole">
    <Instances count="2" />
    <ConfigurationSettings>
      <Setting name="Microsoft.WindowsAzure.Plugins.Diagnostics.ConnectionString" value="UseDevelopmentStorage=true" />
      <!-- Storage account where our data will be stored. -->
      <Setting name="StorageAccount" value="UseDevelopmentStorage=true" />
      <!-- Name of the table where master data will be stored. -->
      <Setting name="PingItemsTableName" value="PingItems"/>
      <!-- Name of the table where we'll store the results. -->
      <Setting name="PingResultsTableName" value="PingResults" />
      <!-- Blob container name where we'll store the blob which will be leased. -->
      <Setting name="BlobContainer" value="lease-blob-container" />
      <!-- Name of the blob on which each instance will try and acquire the lease. -->
      <Setting name="BlobToBeLeased" value="lease-blob.txt" />
      <!-- Name of the queue from which messages will be read. -->
      <Setting name="ProcessQueueName" value="ping-items-queue"/>
    </ConfigurationSettings>
  </Role>
</ServiceConfiguration>
We’ll write a function which will be called during the initialization process for setting master settings:
        private void Init()
        {
            // Get the cloud storage account.
            CloudStorageAccount storageAccount = CloudStorageAccount.Parse(RoleEnvironment.GetConfigurationSettingValue("StorageAccount"));
            // Get the name of the blob container
            string blobContainerName = RoleEnvironment.GetConfigurationSettingValue("BlobContainer");
            CloudBlobContainer blobContainer = storageAccount.CreateCloudBlobClient().GetContainerReference(blobContainerName);
            // Create the blob container.
            blobContainer.CreateIfNotExists();
            // Get the blob name
            string blobName = RoleEnvironment.GetConfigurationSettingValue("BlobToBeLeased");
            CloudBlockBlob blob = blobContainer.GetBlockBlobReference(blobName);
            // Write some dummy data in the blob.
            string blobContent = "This is dummy data";
            // Upload blob
            using (MemoryStream ms = new MemoryStream(Encoding.UTF8.GetBytes(blobContent)))
            {
                blob.UploadFromStream(ms);
            }
            // Get the table name for storing results.
            string tableName = RoleEnvironment.GetConfigurationSettingValue("PingResultsTableName");
            // Create the table.
            CloudTable table = storageAccount.CreateCloudTableClient().GetTableReference(tableName);
            table.CreateIfNotExists();
            // Get the queue name where ping items will be stored.
            string queueName = RoleEnvironment.GetConfigurationSettingValue("ProcessQueueName");
            // Create the queue.
            CloudQueue queue = storageAccount.CreateCloudQueueClient().GetQueueReference(queueName);
            queue.CreateIfNotExists();
        }
And this is how we’ll call it:
        public override void Run()
        {
            // This is a sample worker implementation. Replace with your logic.
            Trace.WriteLine("PoorMansPingdomWorkerRole entry point called", "Information");
            // Call the initialization routine.
            Init();
            while (true)
            {
                Thread.Sleep(10000);
                Trace.WriteLine("Working", "Information");
            }
        }
Now if we run this thing, we will see the following in our storage account.
Creating a Scheduled Job and Scheduling the Task
Now let’s create a job and schedule it. To start with, the job won’t be doing any work. We’ll just create a class called PingJob and have it implement IInterruptableJob interface in Quartz library.
using System;
using System.Collections.Generic;
using System.Diagnostics;
using System.IO;
using System.Linq;
using System.Net;
using System.Text;
using System.Threading;
using Microsoft.WindowsAzure.Diagnostics;
using Microsoft.WindowsAzure.ServiceRuntime;
using Microsoft.WindowsAzure.Storage;
using Microsoft.WindowsAzure.Storage.Blob;
using Microsoft.WindowsAzure.Storage.Table;
using Microsoft.WindowsAzure.Storage.Queue;
using Quartz;

namespace PoorMansPingdomWorkerRole
{
    public class PingJob : IInterruptableJob
    {
        public void Execute(IJobExecutionContext context)
        {
            Trace.WriteLine(string.Format("[{0}] - Executing ping job", DateTime.UtcNow.ToString("yyyy-MM-dd HH:mm:ss")));
        }

        public void Interrupt()
        {
            throw new NotImplementedException();
        }
    }
}
Now let’s schedule this job. To do so we would need to define the CRON job schedule which we will do in our application configuration file so that we can change it on the fly if need be:
      <!-- Ping Job Cron Schedule. Executes every minute -->
      <Setting name="PingJobCronSchedule" value="0 0/1 * * * ?"/>
And then in our WorkerRole.cs we will schedule this job:
        private void ScheduleJob()
        {
            DateTimeOffset runTime = DateBuilder.EvenMinuteDate(DateTime.Now);

            // construct a scheduler factory
            ISchedulerFactory schedFact = new StdSchedulerFactory();

            // get a scheduler
            IScheduler sched = schedFact.GetScheduler();
            sched.Start();

            JobDataMap jobDataMap = new JobDataMap();

            IJobDetail websitePingJobDetail = JobBuilder.Create<PingJob>()
                    .WithIdentity("WebsitePingJob", "group1")
                    .WithDescription("Website Ping Job")
                    .UsingJobData(jobDataMap)
                    .Build();

            ITrigger websitePingJobTrigger = TriggerBuilder.Create()
                .WithIdentity("WebsitePingJob", "group1")
                .StartAt(runTime)
                .WithCronSchedule(RoleEnvironment.GetConfigurationSettingValue("PingJobCronSchedule"))
                .StartNow()
                .Build();

            sched.ScheduleJob(websitePingJobDetail, websitePingJobTrigger);
        }
We’ll just call this function in our role’s Run() method as shown below and our job is now scheduled. It will fire off every minute. It’s that simple!
        public override void Run()
        {
            // This is a sample worker implementation. Replace with your logic.
            Trace.WriteLine("PoorMansPingdomWorkerRole entry point called", "Information");
            // Call the initialization routine.
            Init();
            // Call the job scheduling routine.
            ScheduleJob();
            while (true)
            {
                Thread.Sleep(10000);
                Trace.WriteLine("Working", "Information");
            }
        }
Just to ensure the job is executing properly, here’s the output in the compute emulator for both role instances:
Now all we’re left to do is implement the job functionality. So let’s do that.
Acquiring Lease
As mentioned above, first thing we want to do is try an acquire lease on the blob.
        private bool AcquireLease()
        {
            try
            {
                blob.AcquireLease(TimeSpan.FromSeconds(15), null);
                return true;
            }
            catch (Exception exception)
            {
                return false;
            }
        }
We’ll keep things simple and if there’s any exception we would just assume that another instance acquired lease on the blob. In real world scenario, you would need to take proper exceptions into consideration.
            // Try and acquire the lease.
            if (AcquireLease())
            {
                Trace.WriteLine(string.Format("[{0}] - Lease acquired. Role instance: {1}.", DateTime.UtcNow.ToString("yyyy-MM-dd HH:mm:ss"), RoleEnvironment.CurrentRoleInstance.Id));
                // If successful then read the data.
            }
            else
            {
                Trace.WriteLine(string.Format("[{0}] - Failed to acquire lease. Role instance: {1}.", DateTime.UtcNow.ToString("yyyy-MM-dd HH:mm:ss"), RoleEnvironment.CurrentRoleInstance.Id));
                // Else just sleep for 15 seconds.
                Thread.Sleep(15 * 1000);
            }
Reading Master Data
Next step would be reading master data. Again keeping things simple, we’ll not worry about the exceptions. We’ll just ensure that the data is there in our “PingItems” table. For this blog post, I just entered the data in this table manually.
        private List<PingItem> ReadMasterData()
        {
            string pingItemTableName = RoleEnvironment.GetConfigurationSettingValue("PingItemsTableName");
            CloudTable table = storageAccount.CreateCloudTableClient().GetTableReference(pingItemTableName);
            TableQuery<PingItem> query = new TableQuery<PingItem>();
            var queryResult = table.ExecuteQuery<PingItem>(query);
            return queryResult.ToList();
        }
Saving Data in Process Queue
Now we’ll save the data in process queue.
        private void SaveMessages(List<PingItem> pingItems)
        {
            string queueName = RoleEnvironment.GetConfigurationSettingValue("ProcessQueueName");
            CloudQueue queue = storageAccount.CreateCloudQueueClient().GetQueueReference(queueName);
            foreach (var pingItem in pingItems)
            {
                CloudQueueMessage msg = new CloudQueueMessage(pingItem.ToString());
                queue.AddMessage(msg, TimeSpan.FromSeconds(45));
            }
        }
Fetch Data from Process Queue
Next we’ll fetch data from process queue and process those records. Each instance will fetch 5 messages from the queue. Again for the sake of simplicity, once a message is fetched we’ll delete it immediately. In real world scenario, one would need to hold on to this message till the time the message is processed properly.
        private List<PingItem> FetchMessages(int maximumMessagesToFetch)
        {
            string queueName = RoleEnvironment.GetConfigurationSettingValue("ProcessQueueName");
            CloudQueue queue = storageAccount.CreateCloudQueueClient().GetQueueReference(queueName);
            var messages = queue.GetMessages(maximumMessagesToFetch);
            List<PingItem> itemsToBeProcessed = new List<PingItem>();
            foreach (var message in messages)
            {
                itemsToBeProcessed.Add(PingItem.ParseFromString(message.AsString));
                queue.DeleteMessage(message);
            }
            return itemsToBeProcessed;
        }
Process Items
This is the final stage of our task. We’ll write a function which will fetch the URL and returns a PingResult object which we’ll persist in table storage.
        private PingResult FetchUrl(PingItem item)
        {
            DateTime startDateTime = DateTime.UtcNow;
            TimeSpan elapsedTime = TimeSpan.FromSeconds(0);
            string statusCode = "";
            long contentLength = 0;
            try
            {
                HttpWebRequest req = (HttpWebRequest)WebRequest.Create(item.Url);
                req.Timeout = 30 * 1000;//Let's timeout the request in 30 seconds.
                req.Method = "GET";
                using (HttpWebResponse resp = (HttpWebResponse)req.GetResponse())
                {
                    DateTime endDateTime = DateTime.UtcNow;
                    elapsedTime = new TimeSpan(endDateTime.Ticks - startDateTime.Ticks);
                    statusCode = resp.StatusCode.ToString();
                    contentLength = resp.ContentLength;
                }
            }
            catch (WebException webEx)
            {
                DateTime endDateTime = DateTime.UtcNow;
                elapsedTime = new TimeSpan(endDateTime.Ticks - startDateTime.Ticks);
                statusCode = webEx.Status.ToString();
            }
            return new PingResult()
            {
                PartitionKey = DateTime.UtcNow.Ticks.ToString("d19"),
                RowKey = item.RowKey,
                Url = item.Url,
                StatusCode = statusCode,
                ContentLength = contentLength,
                TimeTaken = elapsedTime.TotalMilliseconds,
            };
        }
private void SaveResult(PingResult result) { string tableName = RoleEnvironment.GetConfigurationSettingValue("PingResultsTableName"); CloudTable table = storageAccount.CreateCloudTableClient().GetTableReference(tableName); TableOperation addOperation = TableOperation.Insert(result); table.Execute(addOperation); }public void Execute(IJobExecutionContext context) { // Introduce a random delay between 100 and 200 ms to to avoid race condition. Thread.Sleep((new Random()).Next(100, 200)); Trace.WriteLine(string.Format("[{0}] - Executing ping job. Role instance: {1}.", DateTime.UtcNow.ToString("yyyy-MM-dd HH:mm:ss"), RoleEnvironment.CurrentRoleInstance.Id)); Init(); // Try and acquire the lease. if (AcquireLease()) { Trace.WriteLine(string.Format("[{0}] - Lease acquired. Role instance: {1}.", DateTime.UtcNow.ToString("yyyy-MM-dd HH:mm:ss"), RoleEnvironment.CurrentRoleInstance.Id)); // If successful then read the data. var itemsToBeProcessed = ReadMasterData(); //Now save this data as messages in process queue. SaveMessages(itemsToBeProcessed); } else { Trace.WriteLine(string.Format("[{0}] - Failed to acquire lease. Role instance: {1}.", DateTime.UtcNow.ToString("yyyy-MM-dd HH:mm:ss"), RoleEnvironment.CurrentRoleInstance.Id)); // Else just sleep for 15 seconds. Thread.Sleep(15 * 1000); } // Now we'll fetch 5 messages from top of queue var itemsToBeProcessedByThisInstance = FetchMessages(5); if (itemsToBeProcessedByThisInstance.Count > 0) { int numTasks = itemsToBeProcessedByThisInstance.Count; List<Task> tasks = new List<Task>(); for (int i = 0; i < numTasks; i++) { var pingItem = itemsToBeProcessedByThisInstance[i]; var task = Task.Factory.StartNew(() => { var pingResult = FetchUrl(pingItem); SaveResult(pingResult); }); tasks.Add(task); } Task.WaitAll(tasks.ToArray()); } }
Pretty simple huh!!!
Finished Code
Here’s the complete code for pinging job in one place
Configuration File
<?xml version="1.0" encoding="utf-8"?>
<ServiceConfiguration serviceName="PoorMansPingdom" xmlns="http://schemas.microsoft.com/ServiceHosting/2008/10/ServiceConfiguration" osFamily="3" osVersion="*" schemaVersion="2012-10.1.8">
  <Role name="PoorMansPingdomWorkerRole">
    <Instances count="2" />
    <ConfigurationSettings>
      <Setting name="Microsoft.WindowsAzure.Plugins.Diagnostics.ConnectionString" value="UseDevelopmentStorage=true" />
      <!-- Storage account where our data will be stored. -->
      <Setting name="StorageAccount" value="UseDevelopmentStorage=true" />
      <!-- Name of the table where master data will be stored. -->
      <Setting name="PingItemsTableName" value="PingItems" />
      <!-- Name of the table where we'll store the results. -->
      <Setting name="PingResultsTableName" value="PingResults" />
      <!-- Blob container name where we'll store the blob which will be leased. -->
      <Setting name="BlobContainer" value="lease-blob-container" />
      <!-- Name of the blob on which each instance will try and acquire the lease. -->
      <Setting name="BlobToBeLeased" value="lease-blob.txt" />
      <!-- Name of the queue from which messages will be read. -->
      <Setting name="ProcessQueueName" value="ping-items-queue" />
      <!-- Ping Job Cron Schedule -->
      <Setting name="PingJobCronSchedule" value="0 0/1 * * * ?" />
    </ConfigurationSettings>
  </Role>
</ServiceConfiguration>
WorkerRole.cs
using System;
using System.Collections.Generic;
using System.Diagnostics;
using System.IO;
using System.Linq;
using System.Net;
using System.Text;
using System.Threading;
using Microsoft.WindowsAzure.Diagnostics;
using Microsoft.WindowsAzure.ServiceRuntime;
using Microsoft.WindowsAzure.Storage;
using Microsoft.WindowsAzure.Storage.Blob;
using Microsoft.WindowsAzure.Storage.Table;
using Microsoft.WindowsAzure.Storage.Queue;
using Quartz;
using Quartz.Impl;

namespace PoorMansPingdomWorkerRole
{
    public class WorkerRole : RoleEntryPoint
    {
        public override void Run()
        {
            // This is a sample worker implementation. Replace with your logic.
            Trace.WriteLine("PoorMansPingdomWorkerRole entry point called", "Information");
            // Call the initialization routine.
            Init();
            // Call the job scheduling routine.
            ScheduleJob();
            while (true)
            {
                Thread.Sleep(10000);
                //Trace.WriteLine("Working", "Information");
            }
        }

        public override bool OnStart()
        {
            // Set the maximum number of concurrent connections
            ServicePointManager.DefaultConnectionLimit = 12;

            // For information on handling configuration changes
            // see the MSDN topic at http://go.microsoft.com/fwlink/?LinkId=166357.

            return base.OnStart();
        }

        private void Init()
        {
            // Get the cloud storage account.
            CloudStorageAccount storageAccount = CloudStorageAccount.Parse(RoleEnvironment.GetConfigurationSettingValue("StorageAccount"));
            // Get the name of the blob container
            string blobContainerName = RoleEnvironment.GetConfigurationSettingValue("BlobContainer");
            CloudBlobContainer blobContainer = storageAccount.CreateCloudBlobClient().GetContainerReference(blobContainerName);
            // Create the blob container.
            blobContainer.CreateIfNotExists();
            // Get the blob name
            string blobName = RoleEnvironment.GetConfigurationSettingValue("BlobToBeLeased");
            CloudBlockBlob blob = blobContainer.GetBlockBlobReference(blobName);
            // Write some dummy data in the blob.
            string blobContent = "This is dummy data";
            // Upload blob
            using (MemoryStream ms = new MemoryStream(Encoding.UTF8.GetBytes(blobContent)))
            {
                blob.UploadFromStream(ms);
            }
            // Get the table name for storing results.
            string tableName = RoleEnvironment.GetConfigurationSettingValue("PingResultsTableName");
            // Create the table.
            CloudTable table = storageAccount.CreateCloudTableClient().GetTableReference(tableName);
            table.CreateIfNotExists();
            // Get the queue name where ping items will be stored.
            string queueName = RoleEnvironment.GetConfigurationSettingValue("ProcessQueueName");
            // Create the queue.
            CloudQueue queue = storageAccount.CreateCloudQueueClient().GetQueueReference(queueName);
            queue.CreateIfNotExists();
        }

        private void ScheduleJob()
        {
            DateTimeOffset runTime = DateBuilder.EvenMinuteDate(DateTime.Now);

            // construct a scheduler factory
            ISchedulerFactory schedFact = new StdSchedulerFactory();

            // get a scheduler
            IScheduler sched = schedFact.GetScheduler();
            sched.Start();

            JobDataMap jobDataMap = new JobDataMap();

            IJobDetail websitePingJobDetail = JobBuilder.Create<PingJob>()
                    .WithIdentity("WebsitePingJob", "group1")
                    .WithDescription("Website Ping Job")
                    .UsingJobData(jobDataMap)
                    .Build();

            ITrigger websitePingJobTrigger = TriggerBuilder.Create()
                .WithIdentity("WebsitePingJob", "group1")
                .StartAt(runTime)
                .WithCronSchedule(RoleEnvironment.GetConfigurationSettingValue("PingJobCronSchedule"))
                .StartNow()
                .Build();

            sched.ScheduleJob(websitePingJobDetail, websitePingJobTrigger);
        }
    }
}
PingJob.cs
using System;
using System.Collections.Generic;
using System.Diagnostics;
using System.IO;
using System.Linq;
using System.Net;
using System.Text;
using System.Threading;
using Microsoft.WindowsAzure.Diagnostics;
using Microsoft.WindowsAzure.ServiceRuntime;
using Microsoft.WindowsAzure.Storage;
using Microsoft.WindowsAzure.Storage.Blob;
using Microsoft.WindowsAzure.Storage.Table;
using Microsoft.WindowsAzure.Storage.Queue;
using Quartz;
using System.Threading.Tasks;

namespace PoorMansPingdomWorkerRole
{
    public class PingJob : IInterruptableJob
    {
        CloudStorageAccount storageAccount;
        CloudBlobContainer blobContainer;
        CloudBlockBlob blob;

        public void Execute(IJobExecutionContext context)
        {
            // Introduce a random delay between 100 and 200 ms to to avoid race condition.
            Thread.Sleep((new Random()).Next(100, 200));
            Trace.WriteLine(string.Format("[{0}] - Executing ping job. Role instance: {1}.", DateTime.UtcNow.ToString("yyyy-MM-dd HH:mm:ss"), RoleEnvironment.CurrentRoleInstance.Id));
            Init();
            // Try and acquire the lease.
            if (AcquireLease())
            {
                Trace.WriteLine(string.Format("[{0}] - Lease acquired. Role instance: {1}.", DateTime.UtcNow.ToString("yyyy-MM-dd HH:mm:ss"), RoleEnvironment.CurrentRoleInstance.Id));
                // If successful then read the data.
                var itemsToBeProcessed = ReadMasterData();
                //Now save this data as messages in process queue.
                SaveMessages(itemsToBeProcessed);
            }
            else
            {
                Trace.WriteLine(string.Format("[{0}] - Failed to acquire lease. Role instance: {1}.", DateTime.UtcNow.ToString("yyyy-MM-dd HH:mm:ss"), RoleEnvironment.CurrentRoleInstance.Id));
                // Else just sleep for 15 seconds.
                Thread.Sleep(15 * 1000);
            }
            // Now we'll fetch 5 messages from top of queue
            var itemsToBeProcessedByThisInstance = FetchMessages(5);
            if (itemsToBeProcessedByThisInstance.Count > 0)
            {
                int numTasks = itemsToBeProcessedByThisInstance.Count;
                List<Task> tasks = new List<Task>();
                for (int i = 0; i < numTasks; i++)
                {
                    var pingItem = itemsToBeProcessedByThisInstance[i];
                    var task = Task.Factory.StartNew(() =>
                        {
                            var pingResult = FetchUrl(pingItem);
                            SaveResult(pingResult);
                        });
                    tasks.Add(task);
                }
                Task.WaitAll(tasks.ToArray());
            }
        }

        public void Interrupt()
        {
            throw new NotImplementedException();
        }

        private void Init()
        {
            storageAccount = CloudStorageAccount.Parse(RoleEnvironment.GetConfigurationSettingValue("StorageAccount"));
            string blobContainerName = RoleEnvironment.GetConfigurationSettingValue("BlobContainer");
            blobContainer = storageAccount.CreateCloudBlobClient().GetContainerReference(blobContainerName);
            string blobName = RoleEnvironment.GetConfigurationSettingValue("BlobToBeLeased");
            blob = blobContainer.GetBlockBlobReference(blobName);
        }

        private bool AcquireLease()
        {
            try
            {
                blob.AcquireLease(TimeSpan.FromSeconds(45), null);
                return true;
            }
            catch (Exception exception)
            {
                return false;
            }
        }

        private List<PingItem> ReadMasterData()
        {
            string pingItemTableName = RoleEnvironment.GetConfigurationSettingValue("PingItemsTableName");
            CloudTable table = storageAccount.CreateCloudTableClient().GetTableReference(pingItemTableName);
            TableQuery<PingItem> query = new TableQuery<PingItem>();
            var queryResult = table.ExecuteQuery<PingItem>(query);
            return queryResult.ToList();
        }

        private void SaveMessages(List<PingItem> pingItems)
        {
            string queueName = RoleEnvironment.GetConfigurationSettingValue("ProcessQueueName");
            CloudQueue queue = storageAccount.CreateCloudQueueClient().GetQueueReference(queueName);
            foreach (var pingItem in pingItems)
            {
                CloudQueueMessage msg = new CloudQueueMessage(pingItem.ToString());
                queue.AddMessage(msg, TimeSpan.FromSeconds(45));
            }
        }

        private List<PingItem> FetchMessages(int maximumMessagesToFetch)
        {
            string queueName = RoleEnvironment.GetConfigurationSettingValue("ProcessQueueName");
            CloudQueue queue = storageAccount.CreateCloudQueueClient().GetQueueReference(queueName);
            var messages = queue.GetMessages(maximumMessagesToFetch);
            List<PingItem> itemsToBeProcessed = new List<PingItem>();
            foreach (var message in messages)
            {
                itemsToBeProcessed.Add(PingItem.ParseFromString(message.AsString));
                queue.DeleteMessage(message);
            }
            return itemsToBeProcessed;
        }

        private PingResult FetchUrl(PingItem item)
        {
            DateTime startDateTime = DateTime.UtcNow;
            TimeSpan elapsedTime = TimeSpan.FromSeconds(0);
            string statusCode = "";
            long contentLength = 0;
            try
            {
                HttpWebRequest req = (HttpWebRequest)WebRequest.Create(item.Url);
                req.Timeout = 30 * 1000;//Let's timeout the request in 30 seconds.
                req.Method = "GET";
                using (HttpWebResponse resp = (HttpWebResponse)req.GetResponse())
                {
                    DateTime endDateTime = DateTime.UtcNow;
                    elapsedTime = new TimeSpan(endDateTime.Ticks - startDateTime.Ticks);
                    statusCode = resp.StatusCode.ToString();
                    contentLength = resp.ContentLength;
                }
            }
            catch (WebException webEx)
            {
                DateTime endDateTime = DateTime.UtcNow;
                elapsedTime = new TimeSpan(endDateTime.Ticks - startDateTime.Ticks);
                statusCode = webEx.Status.ToString();
            }
            return new PingResult()
            {
                PartitionKey = DateTime.UtcNow.Ticks.ToString("d19"),
                RowKey = item.RowKey,
                Url = item.Url,
                StatusCode = statusCode,
                ContentLength = contentLength,
                TimeTaken = elapsedTime.TotalMilliseconds,
            };
        }

        private void SaveResult(PingResult result)
        {
            string tableName = RoleEnvironment.GetConfigurationSettingValue("PingResultsTableName");
            CloudTable table = storageAccount.CreateCloudTableClient().GetTableReference(tableName);
            TableOperation addOperation = TableOperation.Insert(result);
            table.Execute(addOperation);
        }
    }
}
Complete Source Code on Github.com!
I’ve been putting this exercise on back burner for a long-long time. Not anymore:) I’ve taken the plunge and started using Github. The complete solution is now available on Github.com for you to take a look at: https://github.com/gmantri/windowsazure-task-scheduler-example.
Other Alternatives
You don’t really have to go all out and build this thing on your own. Luckily there’re some things which are available to you even today which will help you achieve the same thing. Some of the options are outside of Windows Azure while some are inside Windows Azure. We’ll only talk about options available to you today in Windows Azure:
Windows Azure Mobile Service Task Scheduler
Recently Windows Azure announced the availability of a job scheduler functionality in Windows Azure Mobile Service. You can write code using node.js for job functionality and mobile service takes care of job execution. For more information, please visit: http://www.windowsazure.com/en-us/develop/mobile/tutorials/schedule-backend-tasks/.
Aditi Cloud Services
Aditi (www.aditi.com), a big Microsoft partner recently announced the availability of “Scheduler” service which allows you execute any CRON job in the cloud. This service is also available through Windows Azure Marketplace and can be added as a add-on feature to your subscription. For more information, please visit: http://www.aditicloud.com/.
Summary
As demonstrated above, it is quite simple to build a task scheduler in Windows Azure. Obviously I took a rather simple example and made certain assumptions. When you would build a service like this for production use, you would need to address a number of concerns so that you build a robust service. I hope you’ve found this blog post useful. Do share your thoughts by providing comments. If you find any issues, please let me know and I’ll fix them ASAP.


<Return to section navigation list>
Visual Studio LightSwitch and Entity Framework 4.1+
TechTarget’s SearchCloudComputing blog published my (@rogerjenn) Build mobile device-agnostic cloud apps with Visual Studio LightSwitch article on 1/23/2013. It begins:
The increasing market share of users adopting a BYOD workplace means IT departments must develop line-of-business applications that run under iOS, Android and Windows RT operating systems, as well as on conventional laptop and desktop PCs. Additionally, constraints on IT spending are leading to increased adoption of pay-as-you go public cloud computing and data storage services. The loss ofWintel's historical ubiquity threatens Microsoft's bottom line and has the potential to bust IT app development budgets.
The solution is a single set of tools and languages that enables developers to use existing skills to create Web-based, data-driven, multi-tenant apps that run without significant modification on the most popular mobile and desktop devices. These apps also need simple user authentication and authorization, preferably by open-source identity frameworks, such as OAuth 2.
In 2012, Microsoft Vice President Scott Guthrie announced the first step on the company's road to bring your own device (BYOD) nirvana -- native Windows Azure support through Office 365's cloud-based SharePoint Online. Microsoft Office 365's auto-hosted SharePoint Online applications natively support Windows Azure Web Sites generated by the recently released Visual Studio LightSwitch's HTML Client Preview 2. The preview supports multi-tenant applications for Windows RT phones and tablets, as well as Apple iOS mobile devices and Android smartphones. Microsoft promises Android tablet compatibility in the near future.
Guthrie explains the move in his Windows Azure and Office 365 blog post:
[The] Beta release of Microsoft Office 365 and SharePoint introduced several great enhancements, including a bunch of developer improvements. Developers can now extend SharePoint by creating web apps using ASP.NET(both ASP.NET Web Forms and now ASP.NET MVC), as well as extend SharePoint by authoring custom workflows using the new Workflow Framework in .NET 4.5.
Even better, the web and workflow apps that developers create to extend SharePoint can now be hosted on Windows Azure. We are delivering end-to-end support across Office 365 and Windows Azure that makes it super easy to securely package up and deploy these solutions.
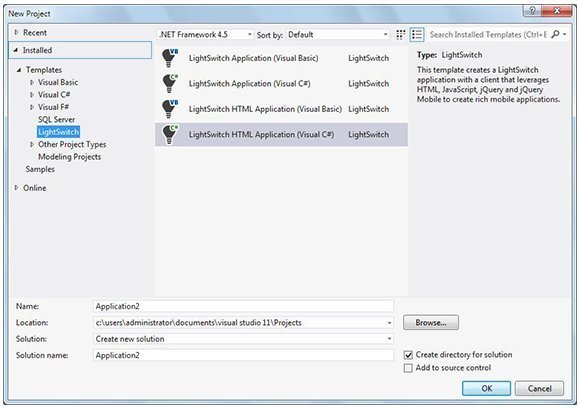
Figure 1. The Visual Studio LightSwitch HTML Client Preview 2 tools add LightSwitch HTML application items for C# and VB projects to the LightSwitch Templates list.
HTML 5 and cascading style sheets (CSS) are currently the best approach for designing UIs that are compatible with Windows 8 PCs and laptops, Windows RT, iOS and Android-powered smartphones and tablets. And the Visual Studio LightSwitch team dropped the other shoe in November 2012 when it announced the release of Visual Studio LightSwitch HTML Client Preview 2 for Visual Studio 2012 Standard Edition or higher. HTML Client Preview 2 bits are included in the Microsoft Office Developer Tools for Visual Studio 2012 Preview 2 package (OfficeToolsForVS2012GA.exe). Installing the tools adds LightSwitch HTML Application (Visual Basic) and (Visual C#) templates to the LightSwitch group (Figure 1).
Windows Azure hosting models for LightSwitch apps
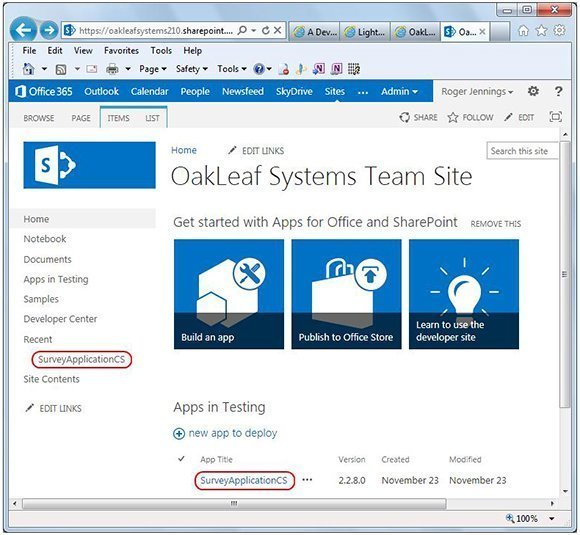
Figure 2. Developers publish LightSwitch HTML Client front ends to a SharePoint Online site where they appear in a list on Office 365 SharePoint 2013 feature's Apps in Testing page.
Developers can use LightSwitch HTML Client Preview 2 to build SharePoint 2013 apps and install them to an Office 365 Developer Preview site. Deployment to SharePoint Online, offers "simplified deployment, central management of user identity, app installation and updates, and the ability for your app to consume SharePoint services and data in a more integrated fashion," according to the LightSwitch team in a blog post. "For users of your app, this means a central place for them to sign in once and launch modern, web-based applications on any device for their everyday tasks," the post added (Figure 2).
Developers can choose between two SharePoint Online app hosting models: auto-hosted and provider-hosted. Steve Fox of Microsoft described the two models as:
The [auto-hosted] app model natively leverages Windows Azure when you deploy the app to SharePoint, and the [provider-hosted] app enables you to use Windows Azure or other Web technologies (such as PhP). …
[T]he [auto-hosted] and [provider-hosted] models are different in a number of ways:
- The [auto-hosted] app model leverages Windows Azure natively, so when you create the app and deploy it to Office 365 the Web app components and database are using the Windows Azure Web role and Windows Azure SQL Database under the covers. This is good because it's automatic and managed for you—although you do need to ensure you programmatically manage the cross-domain OAuth when hooking up events or data queries/calls into SharePoint.
So, top-level points of differentiation are: the [auto-hosted] app model uses the Web Sites and SQL Database services of Windows Azure and it is deployed to Windows Azure (and, of course, to the SharePoint site that is hosting the app). If you're building departmental apps or light data-driven apps, the [auto-hosted] option is good. And there are patterns to use if you want to replace the default ASP.NET Web project with, say, an ASP.NET MVC4 Web project to take advantage of the MVVM application programming.- The [provider-hosted] app model supports programming against a much broader set of Windows Azure features -- mainly because you are managing the hosting of this type of app so you can tap into, say, Cloud Services, Web Sites, Media Services, BLOB Storage, and so on. (And if these concepts are new to you, then check out the Windows Azure home page here.)
Also, while the [auto-hosted] app model tightly couples Windows Azure and SharePoint within a project and an APP that is built from it, the [provider-hosted] app provides for a much more loosely-coupled experience. And as I mentioned earlier, this broader experience of self-hosting means that you can also use other Web technologies within the [provider-hosted] app.
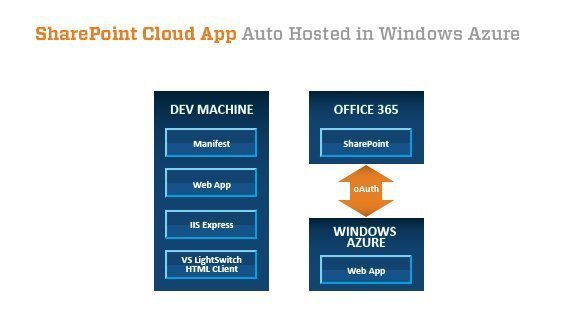
Figure 3. Developing an auto-hosted SharePoint Online Web app with Visual Studio 2012 and the LightSwitch HTML Client Preview follows the same pattern as creating a Windows Azure ASP.NET project with a conventional Web role.
LightSwitch HTML Client Preview 2 lets developers write simple auto-hosted front ends for data stored in SharePoint lists with minimal added .NET and JavaScript code (Figure 3). …


Read more.
Beth Massi (@bethmassi) described Enabling .NET Framework 4.5 on LightSwitch Server Projects in a 1/23/2012 post:
With LightSwitch in Visual Studio 2012 (a.k.a LightSwitch V2) your server projects target the .NET Framework 4.0. This was a conscious decision on the team’s part in order to allow V2 applications to be deployed to the same servers running V1 applications with no fuss. Additionally the LightSwitch runtime takes no dependency on .NET 4.5, just 4.0.
That said, you may want to take advantage of some enhancements in .NET 4.5 on the server side so here’s how you can do that. Keep in mind that this not “officially” supported. The team has not fully tested this scenario so your mileage may vary. In order to change the target framework in LightSwitch, you need to modify the server project file.
Here are the steps:
- Close Visual Studio if you have your LightSwitch solution open
- Navigate to your solution’s \Server folder
- Edit the Server.vbproj (or csproj) file in a text editor like Notepad
- Make the following change to the <TargetFrameworkVersion>: <TargetFrameworkVersion>v4.5</TargetFrameworkVersion>
- Save the file & reopen Visual Studio
- Compile & verify no errors
Now you will be able to take advantage of the new features in .NET 4.5. For more info see: What's New in the .NET Framework 4.5. Keep in mind you will need to deploy to a server that supports .NET 4.5. See the “Supported Server Operating Systems” section of .NET Framework System Requirements.


Return to section navigation list>
Windows Azure Infrastructure and DevOps
•• David Linthicum (@DavidLinthicum) asserted “Faster development is just one advantage for a technology that should be front and center in your cloud strategy” in explaining Why application development is better in the cloud in a 1/25/2013 article for InfoWorld’s Cloud Computing blog:
InfoWorld's own Paul Krill has the skinny around a recent Evans Data survey that found developers are split on the benefits of building in the cloud.
This is an important data point: One of the true "killer" use cases for cloud computing is app dev and test. The payback from using public cloud-based assets to build, test, and deploy applications is already compelling, but it will become immense in the near future.
The results of the Evans Data Cloud Development Survey, conducted in December and released this month, found that cloud platforms reduce overall development time by an average of 11.6 percent. This is largely due to the cloud platform's ability to streamline the development process, including the ability to quickly get the development assets online. Moreover, cloud platforms provide the ability to collaborate on development efforts, which is also a benefit.
However, about 10 percent of developers cited no time savings in using cloud-based development environments. An equal amount said they had experienced more than 30 percent in time savings, and 38 percent cited savings in the 11 to 20 percent range.
Cloud-based development platforms in PaaS and IaaS public clouds -- such as Google, Amazon Web Services, Microsoft, and Salesforce.com -- are really in their awkward teenage years. But they show cost savings and better efficiencies. Most developers are surprised when they review the metrics.
Right now, there are two "killer" use cases for cloud computing: big data and app dev and test. If you don't have a program in place to at least explore the value of this technology, you should get one going right now. Here are the benefits:
- The ability to self-provision development and testing environments (aka devops), so you can get moving on application builds without having to wait for hardware and software to show up in the data center
- The ability to quickly get applications into production and to scale those applications as required
- The ability to collaborate with other developers, architects, and designers on the development of the application
The value is very apparent, the technology is solid, and the opportunity is clear. Are you in?

•• Josh Holmes (@joshholmes) recommended that you Scale out, not up… Cloud Architecture 101 in a 1/21/2013 post:
A common question that I get is how to cut down on one’s Azure bill. People will come to me because they are finding a way to control their spend in Azure while not hurting their service levels. Most of these folks are big proponents of the cloud because of how agile they can be and the fact that it’s got geo-replicated content and traffic and so on.
The first time that I saw this question, I was thinking that this could be tough to tackle as Azure’s pricing is fairly aggressive until I saw their architecture. And it turns out that in most cases, it’s the same issue.
A very common architecture is two large web role instances or so in front of a small worker role instance with some storage plus a SQL Azure database. The basic problem here is that the two large instances means that their unit of scale is a large instance which is an 4 core box with 7 gig of memory that costs about $345 a month to run. This is not leveraging cloud computing. There are definitely times where you need a big iron box but for 99% (made up statistic) of web apps, it’s overkill. Actually, overkill is the wrong term, it’s scaling vertically by throwing bigger hardware at a problem rather than what the cloud is really good at which is scaling horizontally.
The fundamental difference between architecting for cloud verses architecting for old school on premise or fixed contract hosting is that in the old world you had to architect and build for the maximum and hope you never hit it. In the new world of cloud computing, you architect for scaling out horizontally and build for the minimum. This means building small stateless servers that can be added or thrown away on an hour by hour basis.
The fix to these customer’s cost issues is simple, move from 2 larges into how ever many smalls you need and then scale up or down as needed.
The reason that they were running 2 larges rather than 2 smalls is that they are concerned about traffic spikes and the site going down. I completely get that and there are a number of great solutions to this issue. We don’t “auto-scale” automatically in Azure. The reason for this is simple, we charge your for instances that are spun up so it’d be in our interest to aggressively spin up new instances and charge you for them. To avoid even the appearance of impropriety, we don’t auto-scale. However, we give you all of the tools to write your own auto-scaling or manage it remotely.
How do you know how many instances you should be running? Go to the Windows Azure portal and look at your current usage. There’s a ton of diagnostics available through the portal. You should go spelunking there and see what all they have. Some folks are running as low as 1-2% utilization whereas we are pushing for folks to try and run on average between 70 and 80% utilization. In a traditional data centre, we’d never never want for that to be our “normal” for fear of spikes but in Azure, your spikes can be soaked up by the rest of the infrastructure.
Once you figure out where your normal should be, build that out and then use some of the tools to scale up or down as needed.
Mobile tools:
http://udm4.com/iPhone/CloudTools_for_Windo-701342. That’ll give you health stats on your instances and then you can turn them on and off from the phone.
http://mobilepcmonitor.com/ – will let you know when your site has any issues at all. X amount of memory being used, X number of users, server goes down and the like. Clients on iphone, windows phone, windows 8, windows 7 and so on.
Autoscale with your own code:
http://archive.msdn.microsoft.com/azurescale – auto-scaling yourself sample all.
http://channel9.msdn.com/posts/Autoscaling-Windows-Azure-applications – Windows Azure Application Block that does auto-scaling for you.
http://channel9.msdn.com/Events/WindowsAzure/AzureConf2012/B04 – more great content on how to do this yourself.
Third parties to manage your scale:
http://www.paraleap.com/AzureWatch offers monitoring and auto-scaling.
http://www.azure-manager.com/ – does what it says on the tin. Manages azure for you.
http://www.italliancegroup.com/ – does a managed service/partnership where they manage your infrastructure in Azure.
In short, if you are looking at cloud computing, make sure that you architect for the right kind of scaling…

David Hardin described Building and Packaging Virtual Applications within Azure Projects in a 1/21/2013 post:
Azure SDK 1.8 introduced a change in how CSPack locates virtual applications given the physicalDirectory attribute in the ServiceDefinition.csdef file while packaging an Azure project. This blog shows how to support build and packaging of virtual applications within both Visual Studio and TFS Build using Azure SDK 1.8.
Prior to SDK 1.8 my team used the build and packaging technique given on the kellyhpdx blog. After the SDK upgrade our build started throwing:
Cannot find the physical directory 'C:\...WebApplication1' for virtual path ... (in) ServiceDefinition.csdef
Tweaking the "..\" portion of the physicalDirectory attribute as suggested in other blog articles only worked for local Visual Studio builds but failed on our build server. I'll first cut to the case and show you what is needed then explain what is going on. Refer to the kellyhpdx blog article for background and details of what worked prior to SDK 1.8.
Usage
To add a virtual application to an Azure project:
- Add the virtual application's web project to your Visual Studio solution.
- Edit the web project's csproj file by right clicking the project and select "Unload Project" then right click the project again and select Edit.
- Locate the following import element:
<Import Project="$(MSBuildExtensionsPath32)\Microsoft\VisualStudio\v10.0\WebApplications\Microsoft.WebApplication.targets" Condition="false" />- After this import element add this target:
<!-- Performs publishing prior to the Azure project packaging --> <Target Name="PublishToFileSystem" DependsOnTargets="PipelinePreDeployCopyAllFilesToOneFolder"> <Error Condition="'$(PublishDestination)'==''" Text="The PublishDestination property is not set." /> <MakeDir Condition="!Exists($(PublishDestination))" Directories="$(PublishDestination)" /> <ItemGroup> <PublishFiles Include="$(_PackageTempDir)\**\*.*" /> </ItemGroup> <Copy SourceFiles="@(PublishFiles)" DestinationFiles="@(PublishFiles->'$(PublishDestination)\%(RecursiveDir)%(Filename)%(Extension)')" SkipUnchangedFiles="True" /> </Target>- Now edit the Azure project's ServiceDefinition.csdef file and add the <VirtualApplication> element with the physicalDirectory attribute's value set to "_PublishedSites\YourWebProjectName". Replace YourWebProjectName with the name of your web project's csproj file.
- Edit the Azure ccproj file by right clicking the project and select "Unload Project" then right click the project again and select Edit.
- At the end of the Azure ccproj file, right before the </Project> element closing tag, add the following:
<!-- Virtual applications to publish --> <ItemGroup> <!-- Manually add PublishToFileSystem target to each virtual application .csproj file --> <!-- For each virtual application add a VirtualApp item to this ItemGroup: <VirtualApp Include="Relative path to csproj file"> <PhysicalDirectory>Must match value in ServiceDefinition.csdef</PhysicalDirectory> </VirtualApp> --> <VirtualApp Include="..\WebApplication1\WebApplication1.csproj"> <PhysicalDirectory>_PublishedWebsites\WebApplication1</PhysicalDirectory> </VirtualApp> </ItemGroup> <!-- Executes before CSPack so that virtual applications are found --> <Target Name="PublishVirtualApplicationsBeforeCSPack" BeforeTargets="CorePublish;CsPackForDevFabric" Condition="'$(PackageForComputeEmulator)' == 'true' Or '$(IsExecutingPublishTarget)' == 'true' "> <Message Text="Start - PublishVirtualApplicationsBeforeCSPack" /> <PropertyGroup Condition=" '$(PublishDestinationPath)'=='' and '$(BuildingInsideVisualStudio)'=='true' "> <!-- When Visual Studio build --> <PublishDestinationPath>$(ProjectDir)$(OutDir)</PublishDestinationPath> </PropertyGroup> <PropertyGroup Condition=" '$(PublishDestinationPath)'=='' "> <!-- When TFS build --> <PublishDestinationPath>$(OutDir)</PublishDestinationPath> </PropertyGroup> <Message Text="Publishing '%(VirtualApp.Identity)' to '$(PublishDestinationPath)%(VirtualApp.PhysicalDirectory)'" /> <MSBuild Projects="%(VirtualApp.Identity)" ContinueOnError="false" Targets="PublishToFileSystem" Properties="Configuration=$(Configuration);PublishDestination=$(PublishDestinationPath)%(VirtualApp.PhysicalDirectory);AutoParameterizationWebConfigConnectionStrings=False" /> <!-- Delete files excluded from packaging; take care not to delete xml files unless there is a matching dll --> <CreateItem Include="$(PublishDestinationPath)%(VirtualApp.PhysicalDirectory)\**\*.dll"> <Output ItemName="DllFiles" TaskParameter="Include" /> </CreateItem> <ItemGroup> <FilesToDelete Include="@(DllFiles -> '%(RootDir)%(Directory)%(Filename).pdb')" /> <FilesToDelete Include="@(DllFiles -> '%(RootDir)%(Directory)%(Filename).xml')" /> </ItemGroup> <Message Text="Files excluded from packaging '@(FilesToDelete)'" /> <Delete Files="@(FilesToDelete)" /> <Message Text="End - PublishVirtualApplicationsBeforeCSPack" /> </Target>- In the code you just added, locate this element:
<VirtualApp Include="..\WebApplication1\WebApplication1.csproj"> <PhysicalDirectory>_PublishedWebsites\WebApplication1</PhysicalDirectory> </VirtualApp>- Change the three occurrences of WebApplication1 to the name of your web project's csproj file. See the comment above that element for a definition of what its values contain.
Your Azure solution should now build and package successfully in Visual Studio and on your TFS build server. I verified that this technique works in Visual Studio 2012 with the online Team Foundation Service. It was easy to create a TFS instance at http://tfs.visualstudio.com and perform continuous integration deployments to Azure.
The zip file attached below contains a sample project demonstrating this technique. Download and try it for yourself.
Explanation of Technique
Within your Azure ccproj file you define an ItemGroup of VirtualApp's that you want published and packaged inside the resulting .cspkg file. Define as many VirtualApp items as you need. The sample defines two.
The remainder of the MSBuild code in the ccproj file executes before targets that call CSPack. For each of the VirtualApp's the code launches another instance of MSBuild that executes the PublishToFileSystem target in each respective web project. The code then creates a list of dll filenames which were published and looks for .pdb and .xml files for each of those dll filenames. It then deletes the .pdb and .xml files found.
The code is written so that you can include other .xml files in your web project and just the .xml files corresponding to the dll's get deleted. Other .xml files are published and end up in the .cspkg file as expected.
The PublishToFileSystem target added to the virtual application's csproj file performs a simple recursive copy of the project's build output to the destination specified. Using the _PublishedSites directory isn't a strict requirement but follows the convention used by TFS Build so that the files get copied to the drop folder.
Explanation of Azure SDK 1.8 Changes
During packaging the physicalDirectory attribute in csdef is with respect to the location of the csdef file being used by CSPack, specifically the file identified by the ResolveServiceDefinition target as the Target Service Definition in the build output. See the definition of the ResolveServiceDefinition target, typically in "C:\Program Files (x86)\MSBuild\Microsoft\VisualStudio\v11.0\Windows Azure Tools\1.8\ Microsoft.WindowsAzure.targets".
Prior to SDK 1.8 the csdef being used was located in a subfolder within the csx folder under the Azure project and was named ServiceDefinition.build.csdef. The folder name matched the configuration being built, normally either Debug or Release. It is important to note that this caused the physicalDirectory attribute in csdef to be with respect to a folder in the source tree while building locally in Visual Studio and also on the TFS build server. Additionally, the csdef file was not copied to the build output folder.
Azure SDK 1.8 on the other hand copies the csdef file to the build output folder and changed the ResolveServiceDefinition target so that it looks for the file there. While doing a local Visual Studio build the output folder is a subfolder within the bin folder under the Azure project matching the configuration being built, typically Debug or Release. The important point for a local Visual Studio build is that this folder is an equal number of folders down in the source tree when compared to the previous csx subfolder so the SDK 1.8 change should be transparent to most developers.
Unfortunately the build output folder on a TFS build server is very different. A step in the TFS build process needs to copy the build output to a drop folder for archival purposes. To facilitate this the TFS build templates uses two folder, one for the source and another for the build output. The obj and csx folders continue to get created within the source folders but instead of the build output going to the bin folder as is done by Visual Studio, TFS uses a build output folder named Binaries that is at the same, sibling folder level as the Source. The build output folder contents is also slightly different in that there is a _PublishedWebsites folder.
Package Contents
If you want to verify what is packaged, inside the .cspkg file there is a sitesroot folder which contains a folder for each application; 0 is the root site and 1 is the virtual application. You can view the contents by renaming the .cspkg file to .zip then exporting it and renaming the .cssx file to .zip. The sitesroot folder is within the renamed .cssx file. The MSBuild code above results in the virtual application containing the files for the published site except that the pdb and xml files associated with dll's are deleted.

David Linthicum (@DavidLinthicum) asserted “We've heard that line before, but if CIOs are serious, here's how they can get started” in a deck for his CIOs say cloud computing is really, truly a priority this time article of 1/21/2013 for InfoWorld’s Cloud Computing blog:
In a recent survey of 2,000 CIOs, a Gartner report revealed that the execs' top tech priorities for 2013 include cloud computing in general, as well as its specific types: software as a service (SaaS), infrastructure as a service (IaaS), and platform as a service (PaaS). No surprise there.
Of course, every year since 2008 has been deemed the "year of the cloud." Yes, small cloud projects exist and Amazon Web Services did not get to be a billion-dollar company due to a lack of interest. However, the adoption has been slow if steady. It isn't exploding, as everyone has predicted for each year.
At least CIOs finally get it: Either figure out a way to leverage cloud technology, or get into real estate. Although this technology is still emerging, the value of at least putting together a plan and a few projects has been there for years. The business cases have always existed.
Despite those obvious needs, many CIOs have been secretly pushing back on cloud computing. Indeed, I suspect some CIOs did not respond to the Gartner survey honestly and will continue to kick plans to develop a cloud computing strategy further down the road.
You have to feel for some of the CIOs. Many of them have businesses to run, with massive amounts of system deployments and upgrades. Cloud computing becomes another task on the whiteboards to be addressed with their already strained resources. In many organizations, the cloud would add both risk and cost they're not prepared to deal with.
The right way to do this is to create a plan and do a few pilot projects. This means taking a deep dive into the details of existing systems and fixing those systemic issues that have been around for years. This should occur before you move to any platform, including those based in the cloud. Yes, it's more hard work for the CIO.
But if CIOs were honest in telling Gartner that the cloud is really a priority this time, they need to push forward with a sound cloud computing strategy and a few initial projects. We'll see this time if they really get to work on it. I look forward to following their progress.

<Return to section navigation list>
Windows Azure Platform Appliance (WAPA), Hyper-V, System Center and Private/Hybrid Clouds
• Travis Wright (@radtravis) reported System Center 2012 SP1 is Generally Available! on 1/15/2013 (missed when published):
This morning we announced the general availability of System Center 2012 SP1! While the RTM bits have been available for a few weeks already to TechNet/MSDN subscribers and volume licensing customers, today marks the broad availability of System Center 2012 SP1 to all customers.
The System Center 2012 SP1 release is chock full of new features to light up the new functionality found in Windows Server 2012. The combination of System Center 2012 SP1 with Windows Server 2012 provides the foundation of what we call the ‘Cloud OS’. You can read more about the Cloud OS and how System Center fits into the solution in these other articles:
- What is the Cloud OS?
- Transform Your Datacenter with System Center 2012 SP1
- Official System Center 2012 SP1 Release Announcement
- Cloud OS Vision
You can read more about System Center 2012 SP1 and download a trial from the System Center home page:
http://www.microsoft.com/en-us/server-cloud/system-center/default.aspx

<Return to section navigation list>
Cloud Security, Compliance and Governance

<Return to section navigation list>
Cloud Computing Events
No significant articles today
<Return to section navigation list>
Other Cloud Computing Platforms and Services
•• James Staten (@staten7) asked Are You Like Oracle When It Comes to the Cloud? in a 1/25/2013 post to his Forrester Research blog:
Oracle makes itself an easy target for the ire of the cloud community when it makes dumb, cloudwashed announcements like last week's supposed IaaS offering. But then again, Oracle is just doing what it thinks it takes to be in the cloud discussion and is frankly reflecting what a lot of its I&O customers are defining as cloud efforts.
Forrester Forrsights surveys continue to show that enterprise IT infrastructure and operations (I&O) professionals are more apt to call their static virtualized server environments clouds than to recognize that true cloud computing environments are dynamic, cost optimized and automated environments. These same enterprise buyers are also more likely to say that the use of public cloud services lie in the future rather than already taking place today. Which fallacy is more dangerous?
The latter is definitely more harmful because while the first one is simply cloudwashing of your own efforts, the other is turning a blind eye to activities that are growing steadily, and increasingly without your involvement or control. Both clearly place I&O outside the innovation wave at their companies and reinforce the belief that IT manages the past and is not the engine for the future. But having your head in the sand about your company's use of public cloud services such as SaaS and cloud platforms could put you more at risk.
We've said for a while now that business leaders and developers are the ones driving the adoption of cloud computing in the enterprise, and this is borne out in our surveys. But Forrsights surveys also show that these constituents are also far less knowledgeable about the companies' legal and security requirements than I&O professionals, which means the extent to which they are exposing your company to unknown risks is...frankly, unknown.
So now that the cloud genie is out of its bottle in your company (don't deny it), what should you do about it? Well, you can't force it back in — too late. You can't keep pretending it isn't happening. And sorry, "not approved" or "too risky" will simply paint I&O leaders as conservative and behind the times. Instead, it's time to acknowledge what is going on and get ahead of it. Finding the right approach for your company is key.
On February 12 and 13, I'll be traveling to BMC events in Washington, D.C. and New York City specifically to help you tackle this issue. Whether you are in highly regulated industries such as financial services or pharmaceuticals or work for organizations facing stiffening rules and regulations such as the US Federal Government that is staring down FedRamp, you must be proactive about cloud engagement with the business. As our Forrester Cloud Developer Survey showed, the use of sensitive data in the cloud will happen in 2013. The question is whether you will know about it, be ready for it, and be engaged.
I encourage you to join me in these discussions so you can be best prepared and move from laggard to leader in cloud adoption within your company. After all, you can cloudwash all you want, but you won't lead until you get real about the cloud.


My (@rogerjenn) First Look at the CozySwan UG007 Android 4.1 MiniPC Device review updated 1/24/2013 covers the following topics:
Introduction and Background
- UG007 Specifications and Accessories
- Comparing the UG-007 MiniPC with Dell Computer’s Cloud-Based Project Ophelia
- Estimating the Cost of a MiniPC Workstation
- Startup Issues
- Selected Screen Captures
- Testing XBMC App Compatibility
- Potential Personal Video Recorder (PVR) Add-ins with HDTV Tuners
- Using Pinnacle/Hauppauge Video Tuner/Decoders
- Using the Pinnacle PCTV USB Mini Stick 80e with a NextPVR Windows Back End
- Connecting to the NextPVR with XBMC’s Live TV Add-in
- Using the nDroid Android Client with a NextPVR Back End
- Using the SiliconDust HDHomeRun DUAL HDTV Tuner with a MythTV Back End
Introduction and Background
I received a CozySwan UG007 Android 4.1 MiniPC device from Amazon (US$69.50) on 1/14/2013. I ordered the MiniPC based on James Threw’s The RK3066 Android 4.1 mini PC is the MK802's younger, smarter, cheaper brother, we go hands on Engaget review of 1/12/2013, which begins as follows:
When the MK802 Android mini PC landed in our laps, it caused more than a ripple of interest. Since then, a swathe of "pendroids" have found their way to market, and the initial waves have died down. While we were at CES, however, we bumped into the man behind the MK802, and he happened to have a new, updated iteration of the Android mini PC. Best of all, he was kind enough to give us one to spend some time with. The specifications speak for themselves, and this time around we're looking at a dual-core 1.6GHz Cortex A9, 1GB of RAM, 4GB of built-in flash (and a microSD slot), WiFi in b/g/n flavors, DLNA support and Bluetooth, all running on Android 4.1 Jelly Bean. There's also a micro-USB, full-size USB, female HDMI port and 3.5mm audio out. [Emphasis added, see note below.]
For anyone who has used one of these types of devices, the two standout features mentioned above should be the audio jack, and the addition of Bluetooth. Why? Because this expands the potential functionality of the device manyfold. Beforehand, the lack of Bluetooth made adding peripherals -- such as a mouse of keyboard -- either difficult, or impractical. However, with Bluetooth, setting up this device to be somewhat useful just got a lot easier. Likewise, with the dedicated audio out, now you can work with sound when the display you are connecting it to (a monitor for example) doesn't have speakers. Read on after the break to hear more of our impressions. …
I wasn’t able to find a 3.5-mm audio output connector on the device I received.
UG007 Specifications and Accessories
According to Amazon, the specs for the CozySwan unit (edited for clarity) are as follows:
Operating System: Google Android 4.1.1 Jelly Bean with Bluetooth
- CPU: RK3066 1.6GHZ Dual ARM Cortex-A9 processor
- GPU: Mali 400MP4 quad-core; supports 1080P video (1920 by 1080 pixels)
- RAM: 1GB DDR3
- Internal Memory: 8 GB Nand Flash
- External Memory: Supports Micro-SD card, up to 32GB
- Networking: WiFi 802.11b/g/n with internal antenna
- Ports: 1 USB 2.0 host and 1 Micro USB
host* and 1 Micro-SD card slot (see photo at right); 1 HDMI male under a removable cover (see photo above)- Power: 90-230V, 50/60Hz, 30 W input to wall-wart [with UK (round pin) power plug*]; output: 5V/2A
- Video Decoding:MPEG 2 and 4.H.264; VC-1; Divx; Xvid; RM8/9/10; VP6
- Video Formats: MKV, TS, TP, M2TS, RM/RMVB, BD-ISO, AVI, MPG, VOB, DAT, ASF, TRP, FLV
- Audio Decoding: DTS, AC3, LPCM, FLAC, HE-AAC
- Images: JPEG, PNG, BMP, GIF
* The instruction sheet says the Micro USB connector is for power; see Startup Issues below.
The package I received contained the following items:
- The UG007 Mini PC device
A 5V/2A power supply with Euro-style round power pins, not US standard blades.
- A USB 2.0 male to Micro USB type A male power cable
- A six-inch female HDMI to male HDMI cable to connect to an HDTV HDMI input
- An 8-1/2 x 11 inch instruction leaflet printed on both sides and written in Chingrish.
Note: There are many similar first-generation devices, such as the MK802, which use the RK3066 CPU, run Android 4.0 and don’t support v4.1 or Bluetooth. Make sure you purchase a second-generation device. …


The article continues for several feet.
Nick Heath (@NickJHeath) reported “Google has released code samples for cloud services such as App Engine and BigQuery on GitHub in an attempt to encourage developers to use Google Cloud Platform” in a deck for his Google woos developers by releasing cloud platform code to GitHub article of 1/23/2013 for ZD Net’s Cloud blog:
Google is trying to encourage more developers to use its Cloud Platform services by releasing code samples on the popular online repository GitHub.
Code for 36 sample projects and tools relating to App Engine, BigQuery, Compute Engine, CloudSQL, and Cloud Storage is available to download.
Much of the sample code is designed to help developers who want to start building apps around these cloud services. Google has made available a series of "starter projects," programs that demonstrate simple tasks such as how to connect to these services' APIs, and which are available in a variety of languages such as Java, Python, and Ruby.
"We will continue to add repositories that illustrate solutions, such as the classic guest-book app on Google App Engine. For good measure, you will also see some tools that will make your life easier, such as an OAuth 2.0 helper," Julia Ferraioli, developer advocate for the Google Compute Engine, said in a blog post on Wednesday.
James Governor, co-founder of analyst firm RedMonk, said Google is releasing this code in an attempt to attract developers to its cloud platforms.
"Increasingly today, developers are not going to use your stuff if it isn't open source and they don't have access to the code," he said. "Google hasn't been the most aggressively open source by any means. I think they're feeling 'It's a service in the cloud and anyone can use so we don't need to open source the code.' This may be a bit of an acceptance that they need to be more open."
However, he said this initial release falls short of the openness that other web giants like Facebook and Twitter have shown when attempting to attract developers to their platforms.
"It's about trying to get people to collaborate around the frameworks running on top of these [platforms] rather than the code itself," he said. "If it was Facebook or Twitter, they would probably be contributing the source code."
Google, in choosing to release this code on GitHub when it has its own online project-hosting environment Google Code, is acknowledging the strength of GitHub's community, said Governor.
"GitHub is where software development is done and developers go about their daily lives.
"Development today starts with a search, but it turns out that it starts with a social search and that is why Google is supporting GitHub rather than the other way around."


Jeff Barr (@jeffbarr) described EC2 for In-Memory Computing - The High Memory Cluster Eight Extra Large Instance in a 1/22/2013 post:
Our new High Memory Cluster Eight Extra Large (cr1.8xlarge) instance type is designed to host applications that have a voracious need for compute power, memory, and network bandwidth such as in-memory databases, graph databases, and memory intensive HPC.
Here are the specs:
- Two Intel E5-2670 processors running at 2.6 GHz with Intel Turbo Boost and NUMA support.
- 244 GiB of RAM.
- Two 120 GB SSD for instance storage.
- 10 Gigabit networking with support for Cluster Placement Groups.
- HVM virtualization only.
- Support for EBS-backed AMIs only.
This is a real workhorse instance, with a total of 88 ECU (EC2 Compute Units). You can use it to run applications that are hungry for lots of memory and that can take advantage of 32 Hyperthreaded cores (16 per processor). We expect this instance type to be a great fit for in-memory analytics systems like SAP HANA and memory-hungry scientific problems such as genome assembly.
The Turbo Boost feature is very interesting. When the operating system requests the maximum possible processing power, the CPU increases the clock frequency while monitoring the number of active cores, the total power consumption and the processor temperature. The processor runs as fast as possible while staying within its documented temperature envelope.
NUMA (Non-Uniform Memory Access) speeds access to main memory by optimizing for workloads where the majority of requests for a particular block of memory come from one of the two processors. By enabling processor affinity (asking the scheduler to tie a particular thread to one of the processors) and taking care to manage memory allocation according to prescribed rules, substantial performance gains are possible. See this Intel article for more information on the use of NUMA.
Pricing starts at $3.50 per hour for Linux instances and $3.831 for Windows instances, both in US East (Northern Virginia). One year and three year Reserved Instances and Spot Instances are also available.
These instances are available in the US East (Northern Virginia) Region. We plan to make them available in other AWS Regions in the future.


<Return to section navigation list>


